Customising Modules
Customising Modules
- Standard Modules
- Custom Modules or User-Generated Modules
Standard Modules
The CRM lets you work with more than 10 standard modules for Sales, Marketing, Customer Support and Inventory management. These predefined modules come with a set of default fields and layout. You can edit most aspects of a standard module to suit your requirements. For example, if there is a field called Twitter in the Leads module and you think none of your leads use Twitter, you can remove this field from the Leads layout. Similarly there are many other customisation options provided to Standard modules. The customisation options and their exceptions vary depending on the module you wish to modify.
Standard, predefined modules are available to all the CRM users, regardless of the Edition they have subscribed to.
Custom Modules or User-Generated Modules
Sometimes, the standard, predefined modules present in the CRM do not always meet your requirements. In such a case, the CRM lets you create a new module depending on your business needs. For instance, Leads, Contacts, and Deals will not be ideal for an educational institution. Students, Teachers and Parents would be more appropriate modules for them and they can create these modules. A hospital can create new modules called Doctors, Patients, and Nurses.
To address these unique business requirements, you can create your own modules. With the Custom Modules functionality in the CRM, you can develop new modules using built-in tools that need no programming skills. These custom modules can seamlessly integrate with core CRM modules and need not be stand-alone modules. What's more, you can:
- Add fields and modify the page layout as per your needs.
- Use roles and profiles to define access controls for the custom modules and its fields.
- Import data to the custom modules with ease.
- Take a backup of your data, anytime.
- Send mass emails to the records in the custom module.
- Create mass email schedulers.
- Use macros to execute a set of actions.
- Create workflow rules to automate your business process.
- Build module relationship by linking custom module records with standard module records.
- Use auto-responders to send automated replies and follow-up emails.
With the CRM's simple WYSIWYG Module Editor (What-You-See-Is-What-You-Get Editor), you can create new modules as well as edit existing modules easily.
Difference Between Custom Modules and Custom Apps Features
Custom Modules and Custom Apps are two different functionalities in the CRM that helps you extend your CRM to suit the requirements that are unique to your business.
- Custom Modules - Create custom tabs, just like other standard modules, and build module relationship by linking custom module records with standard module records. Like other standard modules, you can customise, import and export data, configure workflow rules and generate reports for the custom module.
- Custom Apps - Create custom applications, forms and views (powered by Creator) and use them to build custom tabs inside the CRM.
Module Customisation - In a Nutshell
Using the What-You-See-Is-What-You-Get (WYSIWYG) Module Editor you can easily create/edit modules in the CRM. Take a quick glance at how to use this editor to customise your module.
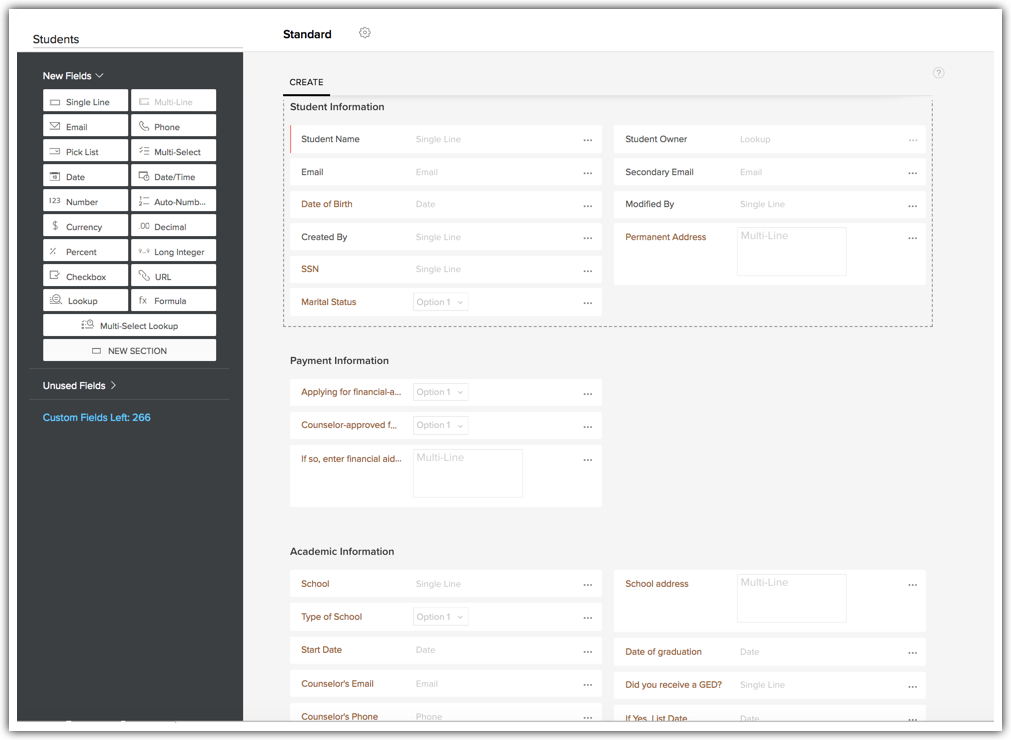
- Name/Rename the module.
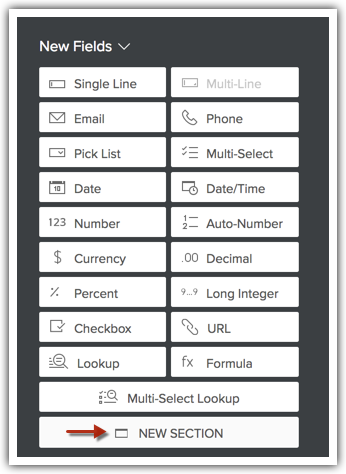
- Drag and drop one or more fields to the layout from the New Fields tray and click Save Layout.
- Edit the Field Properties and Set Permissions for the fields from the Settings icon. Remove fields from the Layout using the Trash icon.
- Drag and drop new sections to the layout from the New Fields tray.
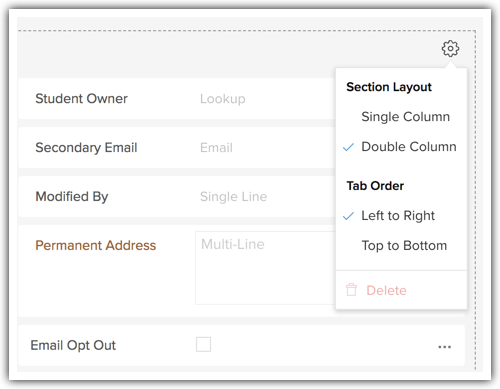
- Switch between single-column layout and two-column layout for a section. Move the sections around to rearrange them. Use the Delete icon to delete a section.
- View the removed fields in the Unused Fields section.
- Set Module permission for different user profiles.
- Preview the module layout as a particular profile. This is useful if you have given different Field Permissions for different user profiles.
- Save the Layout, once you are satisfied with it.
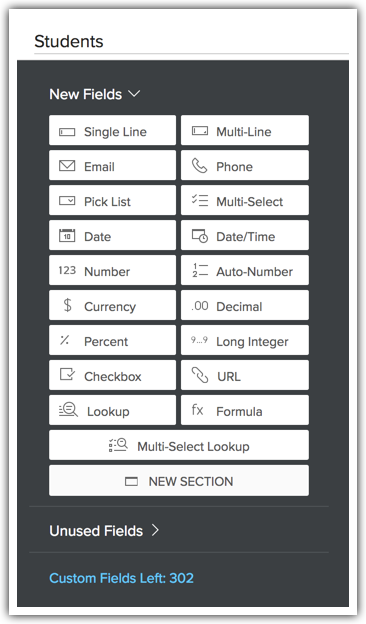
As you add new fields and remove existing fields, Custom Fields Left automatically tells you how many more fields you are allowed to create based on the field limits applicable for your Edition.
As you can see, you can create fields, edit layout, set permissions, preview your module, all from a single place. Instructions on customising your module are given below in detail.
Create a Module
- Log in to the CRM with Administrator privileges.
- Go to Setup > Customisation > Modules and Fields.
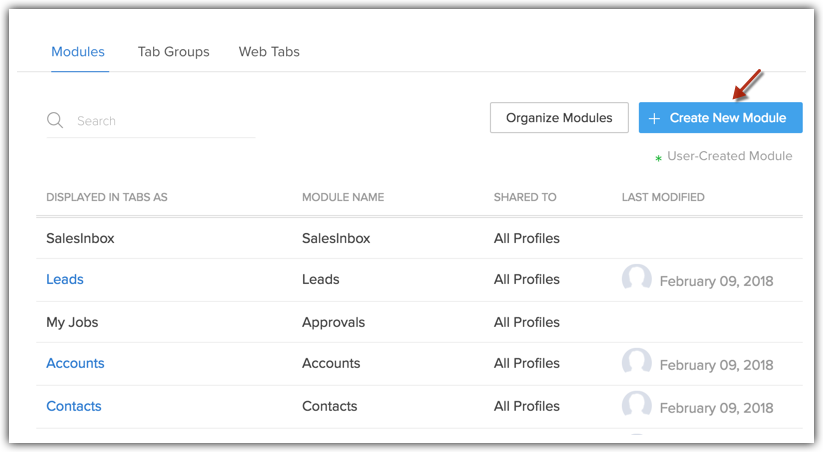
- Under the Modules tab, click Create New Module.
- Enter a name for the module - both the singular and plural forms.
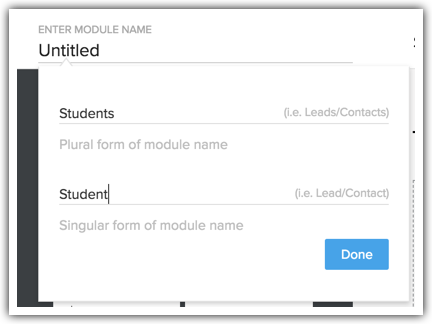
- Click Save.
Add New Fields
To add a new field
- From the New Fields Tray on the left, drag and drop the fields you require in the section.
Set Module Permissions
To set module-level permission for your module

- The options Module Permission and Set Permission will not be available in a single-user account. They are available only for accounts with more than one user.
Design Module Layout
You can rearrange fields and sections by a simple drag and drop action. You can also change the column-layout of sections.
Preview Module
A preview of the module is available that helps you get a quick idea of what the module will look like to users in each profile. All you have to do is select the user profile to check out the preview. Based on the preview, you can modify permissions and layout, if required.
To preview the custom module
- The Field Properties of default fields of custom modules as well as standard modules are not editable. For all other custom fields which you create from the New Fields Tray, the Field Properties are editable.
- The Default Field Name label of the custom module is editable.
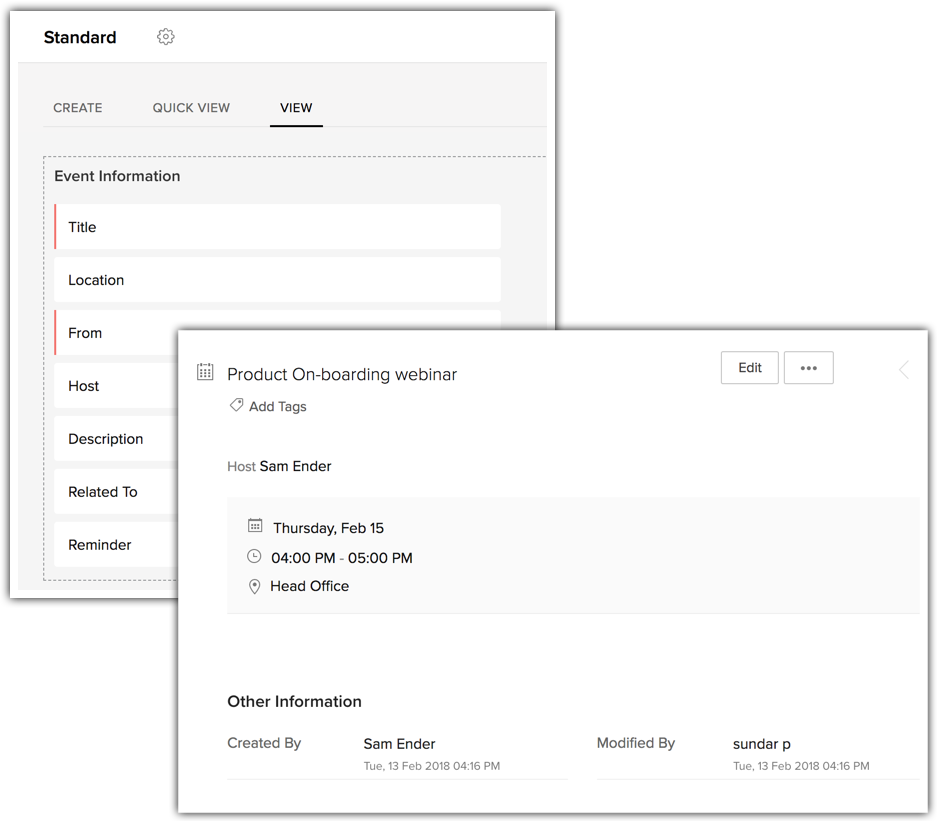
Customise the Events Module
The Events page layout is different from the other modules' page layout but you can still add or remove fields, rearrange the fields and mark them as mandatory.
Edit Modules
To edit a module (standard module or a user generated module)
Quick-Edit Options for Modules
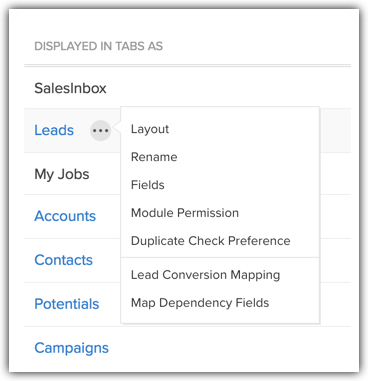
The CRM lets you edit a few items of a module directly from the Modules List View. You do not have to go to the Module Editor to edit these items. Follow the instructions below to access the quick-edit options.
Delete Modules
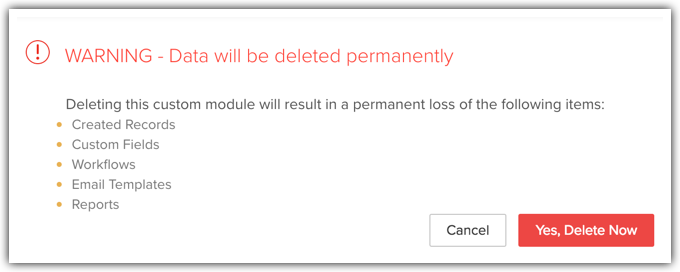
In the CRM, the standard modules cannot be deleted but when there is a need to delete a custom module make sure that it is not linked to another module. Once you delete the custom module, you can't restore data from it. Alternatively, you can hide the custom module for all the users in the organisation's CRM account or only to specific profiles.
To delete a module
- There is a limit to the total number of fields that you can create in your account and also a limit to the type of fields that you create.
- You can add fields specific to particular layouts in Quick Create and Detail View. Learn more on adding fields Add Sections
From the Module Builder Tray on the left, drag and drop +Add New Section to include more sections for the module.
You can add/delete as many sections as you require.
Click the Edit icon in the section header and edit the name of the section, if required.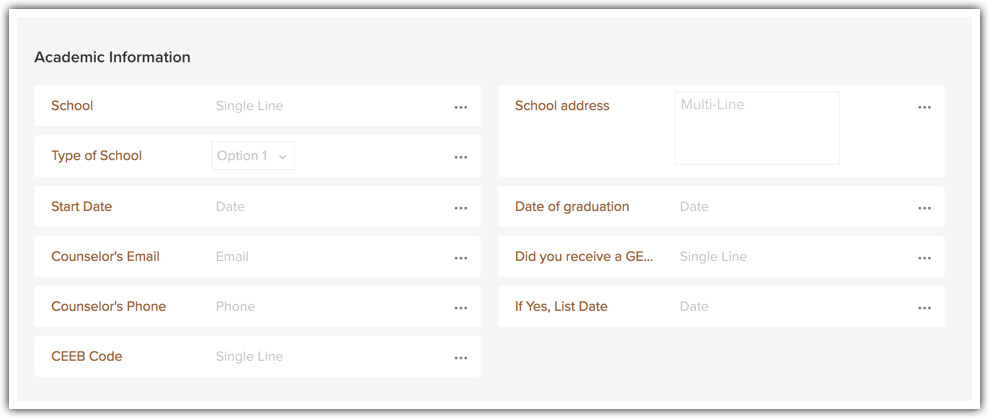
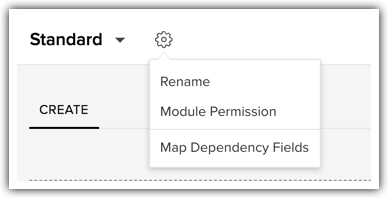
- Click the Module Settings icon and select Module Permission from the drop-down menu.
- In the Module Permissions-[Module] pop-up, select the profiles that should have access to the new module.
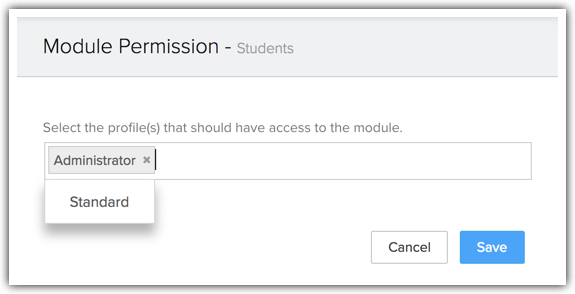
- Click Save.
You can also edit the Module Permissions at a later point in time.
- Click the Section Settings icon and select between single column or double column layouts for the section as required.
- To rearrange fields, simply click on a field and drag and drop in the required place. To rearrange section drag and drop the section to its new place.
- In the layout builder page, click the Preview link.
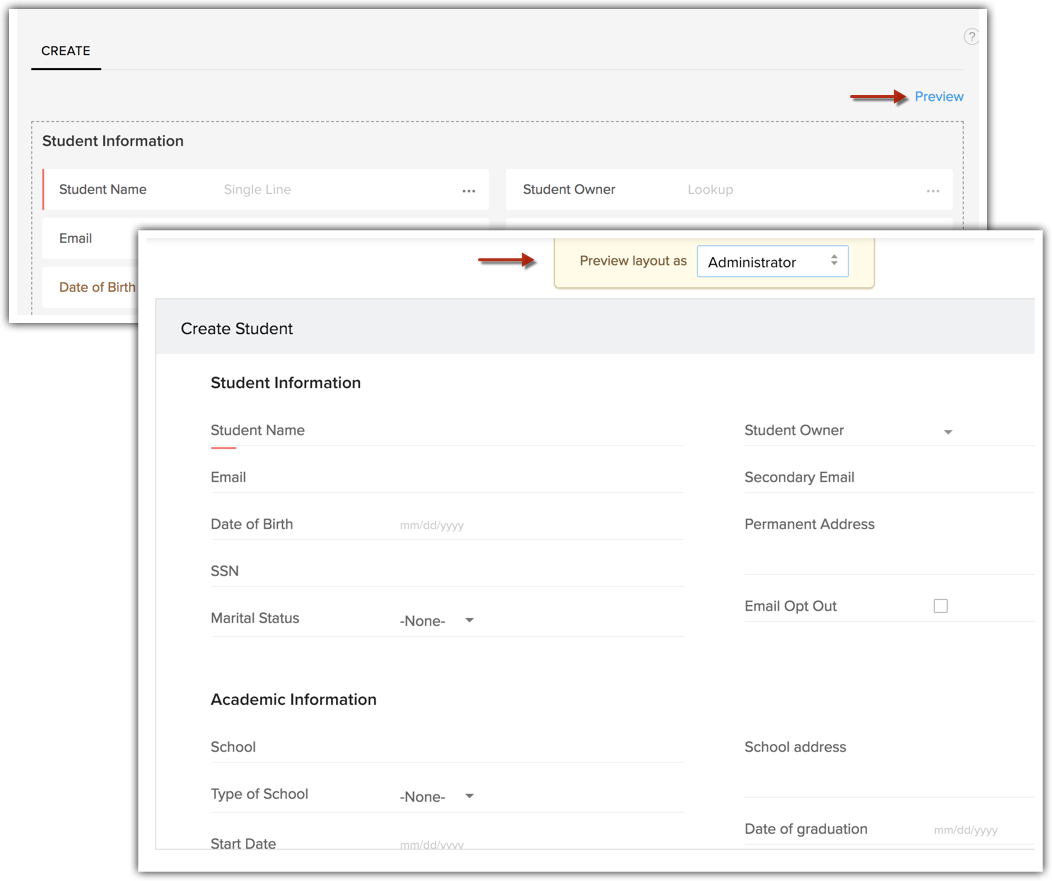
- In the pop-up that appears, select the desired profile from the Preview Layout As drop-down.
You will be able to look at what the module will look like for users in the profile that you have selected.
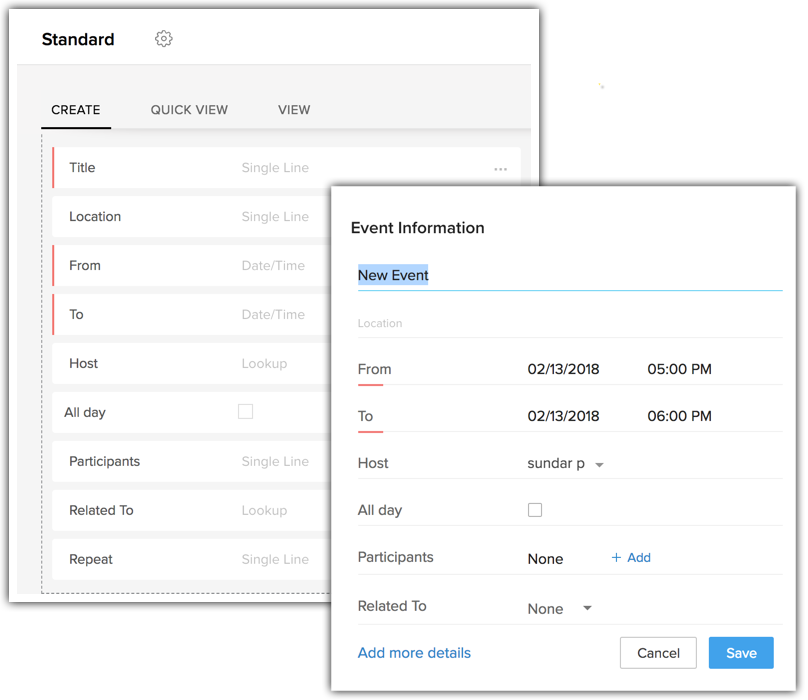
- Create - Adding an event requires you to fill up a form. The form lists some fields that can be customised. You can change the order of the fields, remove fields that are not required and also mark them as mandatory.
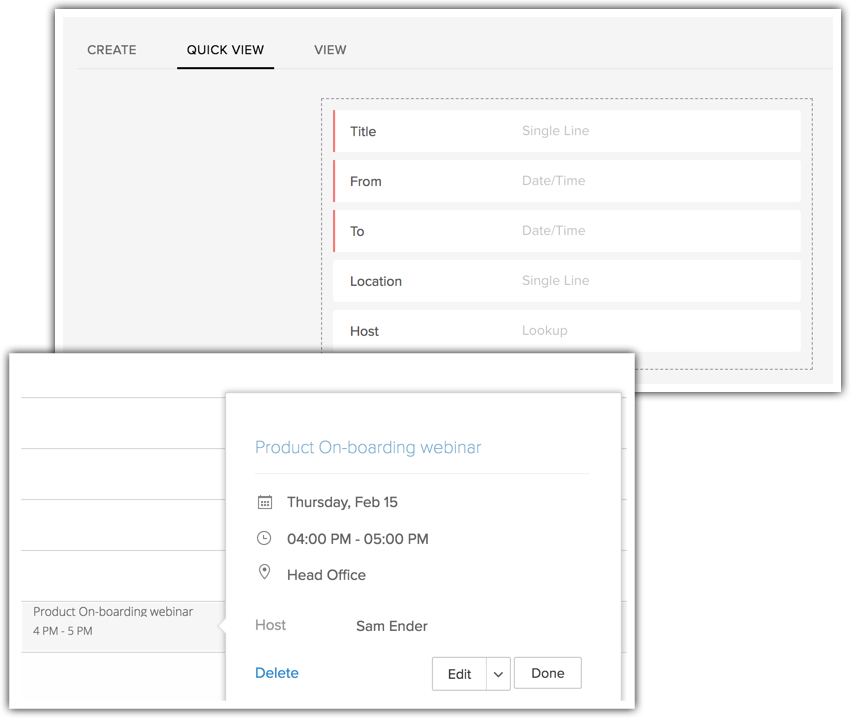
- Quick View - While viewing an event in your calendar, you can choose to have a quick glance at only the most important information about the event. That can be defined here in the Quick View.
- View - While viewing an event in the Activities tab, you can rearrange the fields and add sections. You can also check out the fields used for the business card view.
- Go to Setup > Customisation > Modules and Fields.
- From the list of modules under the Modules tab, click the desired module.
You will be taken to the Module Editor page where you can edit the module elements such as fields and sections, layout, and permissions.
- Go to Setup > Customisation > Modules and Fields.
- Under the Modules tab, point your mouse to the required module.
- Click the More icon and select a desired option from the drop-down list.
- Execute the appropriate action as required and Save the action.
- You have taken a backup of your data using the Export feature.
- The module is not linked with any other custom or standard modules.
- Workflow rules that are configured for the custom module are deleted.
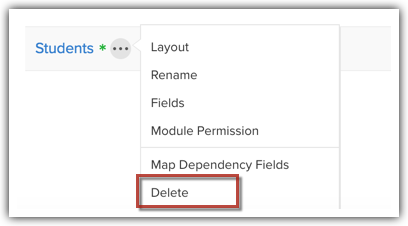
- Go to Setup > Customisation > Modules and Fields.
- Under the Modules tab, point your mouse to the required module.
- Click the More icon and select Delete from the drop-down list.
- Read the warning message on the pop-up. If you wish to go ahead, click Yes, Delete now to confirm the action.
- Click the Module Settings icon and select Module Permission from the drop-down menu.
Related Articles
Customising Record's Detail Page
Customising Record's Detail Page Organize Page Details Customize Related Lists Customize Search Layout Page-level customisation refers to customising a record's details page and the layouts related to it. This includes organising related items on a ...Customising the Home Tab
Customising the Home Tab Classic View User's Home Page Customized Home Page Switch between the Classic View, User's Home Page and Customized Home Page Create Customized Home Page Add Components in User's Home Page View Recent Items Check Reminders ...Types of CRM Modules
Types of CRM Modules The CRM is designed to automate your business process and build better relationships with your customers. It helps you to get an insight into the behavior of the customers and modify the business operations to ensure that ...Standard Modules & Fields
Standard Modules & Fields Leads Accounts Contacts Deals Campaigns Forecasts Cases Solutions Products Price Books Quotes Sales Orders Invoices Vendors Purchase Order Tasks Events Calls The standard modules in the CRM: Leads Accounts Contacts Deals ...Customising Setup Page
Customising Setup Page Customize the Setup Page Add Submenu in System Defined Groups Hide Features From the Setup Page The CRM provides enhanced user experience by enabling its users to customise the CRM setup page. In the section below we have ...