Working with Portal
Working with Portal
Sending Invite to Users
To send an invitation
- Choose a module.
- Select a User.
- In the User detail page, click the More icon > Send Portals Invitation.
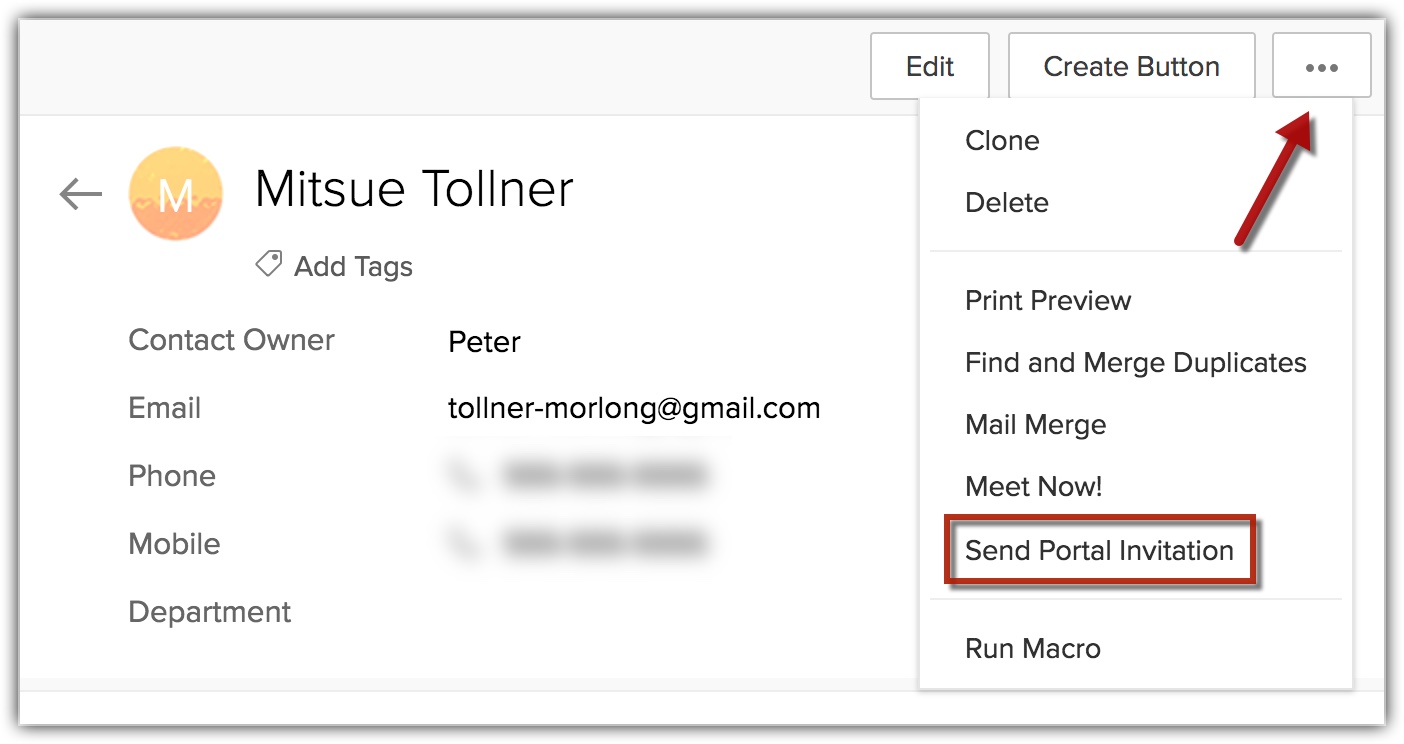
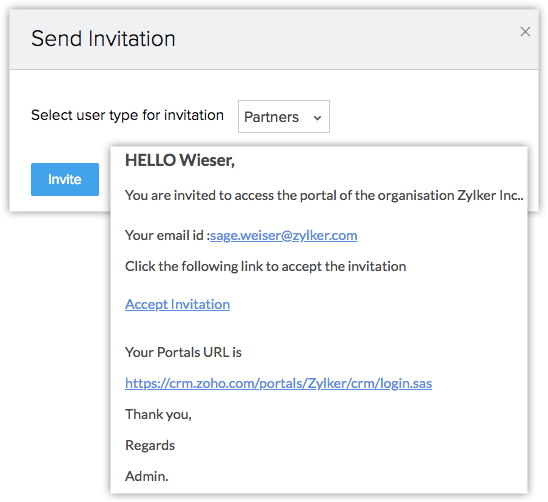

- You can send an email invitation to the customers from the User detail page in the CRM. The send invite option is only available if the user's email address has been added.
- You can not send mass email invitation to your customers.
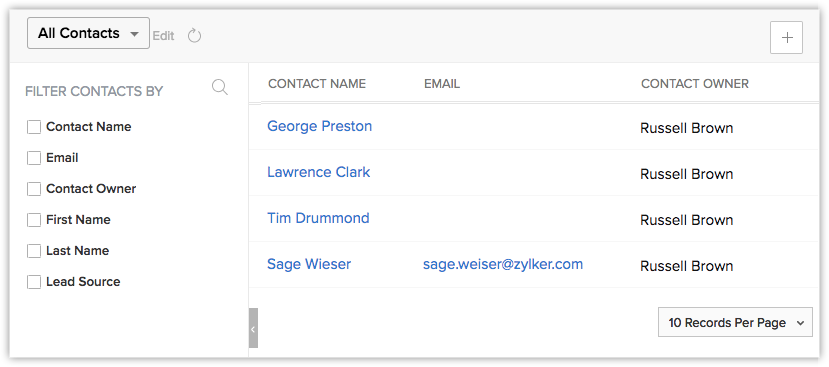
- For example: Russell is a CRM user who invites Sage to access the portal with the permissions to create contacts and deals. In this case, when Sage creates a contact through the portal, it will be added to the CRM database and Russell will be the owner of the new contact.
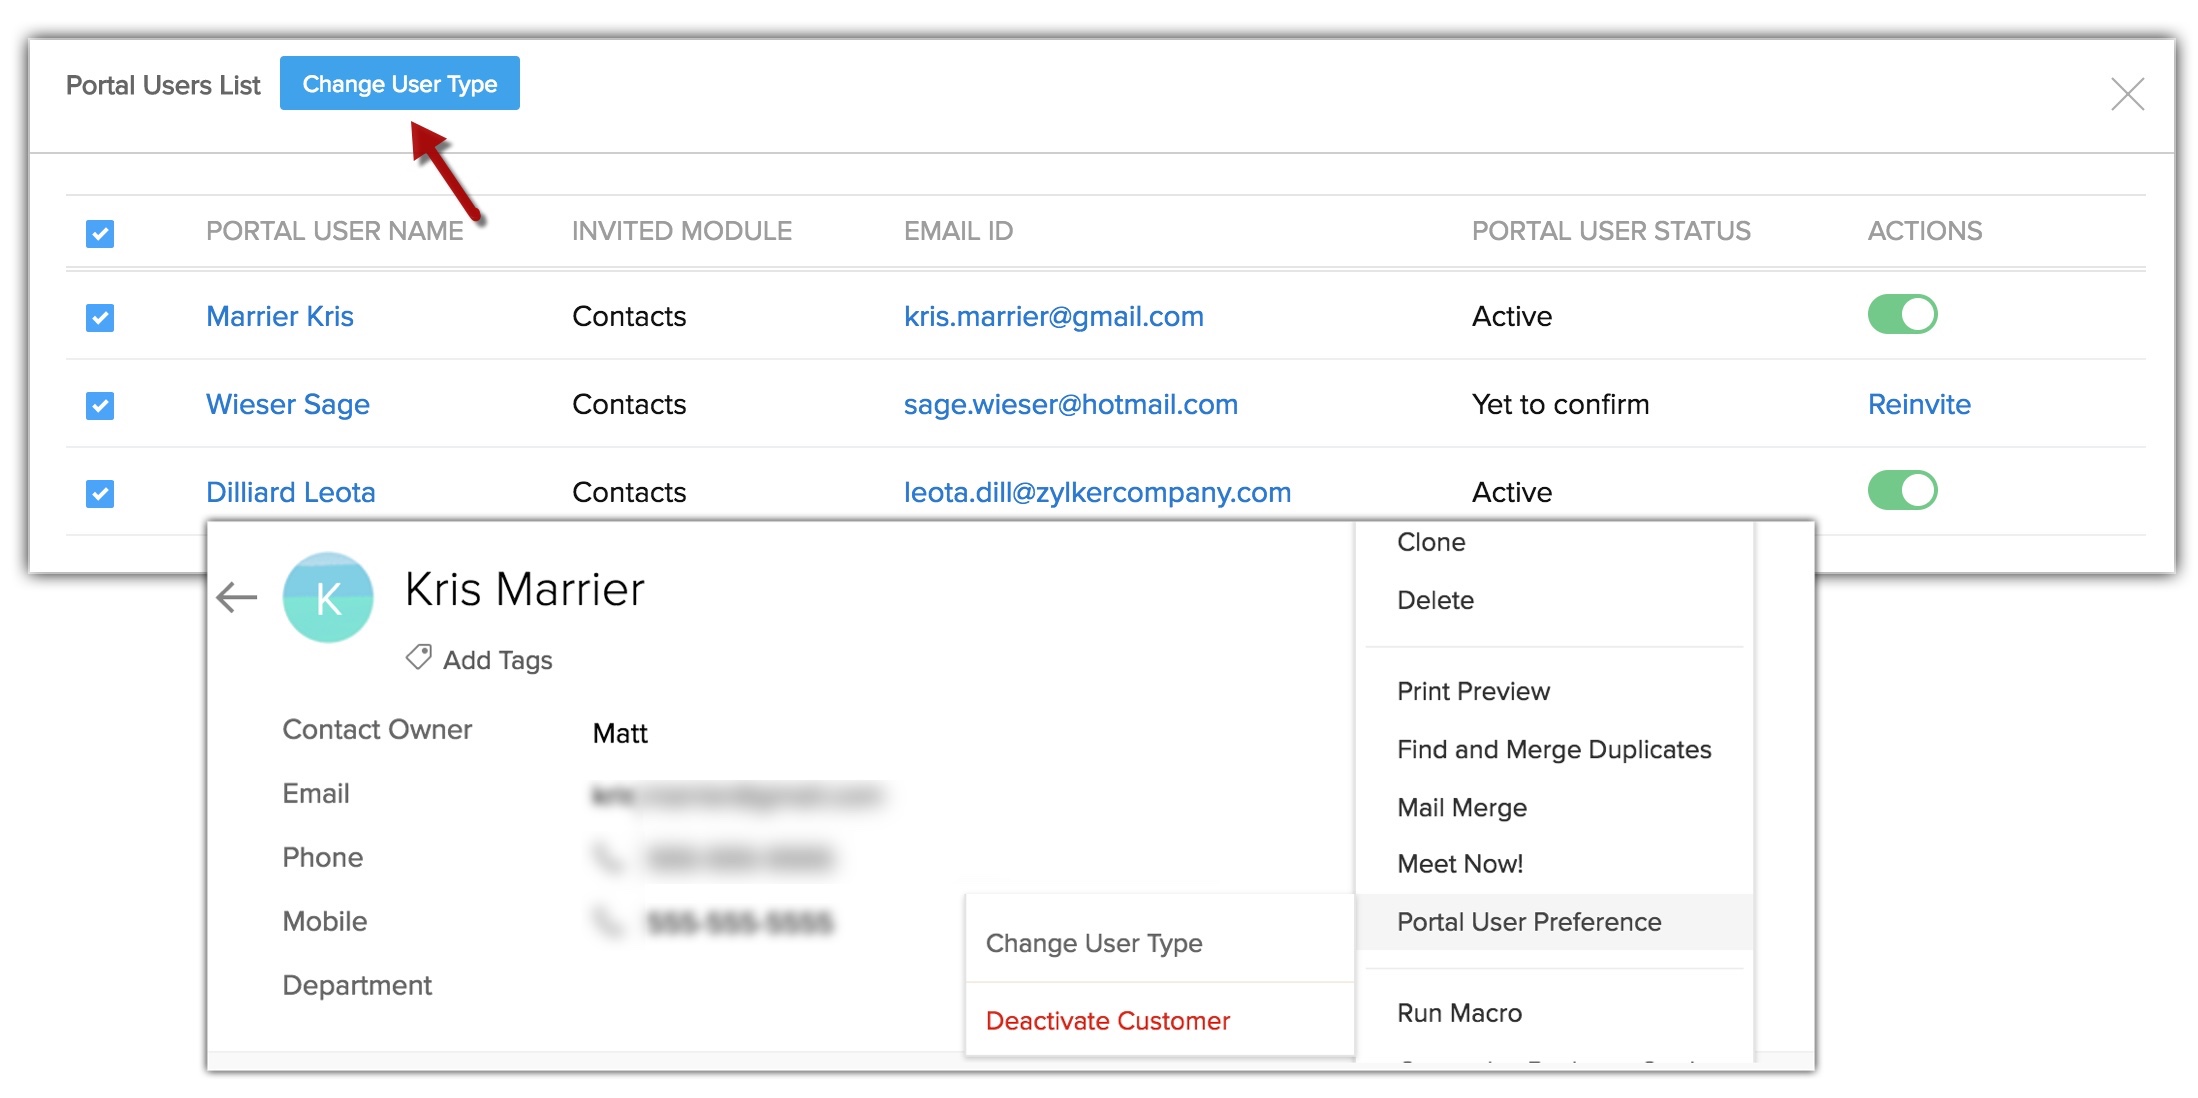
Changing Portal User Type
There may be occasions when you have to move a user from one portal user type to another. For example, you have created two different portals for customers interested in Product A and Product B. If the customer is no longer interested in buying Product A and wants to buy Product B instead, you can easily move them to the Product B portal user type. You can transfer users from one portal user type to another from any of the following places:
- Record Detail Page - You can change the portal user type from the record's detail page.
- Portal Users List - If you want to change multiple portal users to another portal user type at once, you can do so from the Portal Users List popup in the Portal Configuration page.
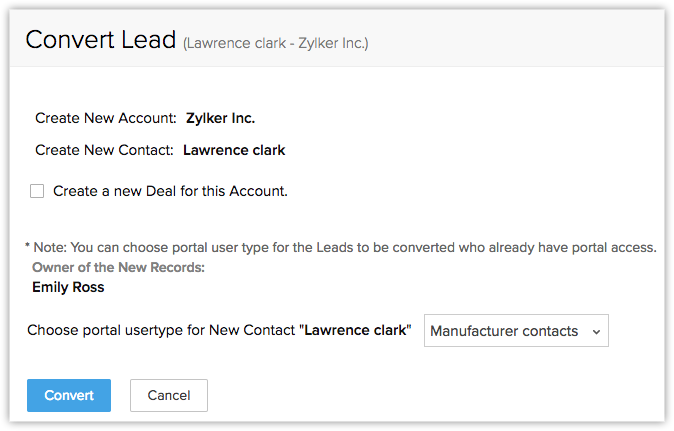
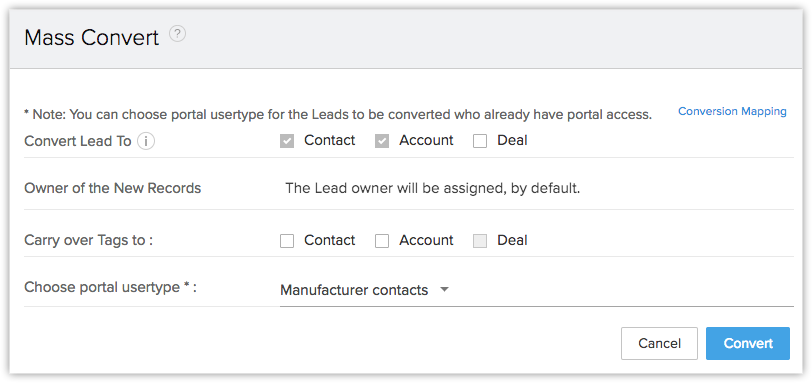
Converting a Lead to Contact
In the CRM, you can convert qualified leads to contacts either manually or automatically using the workflow rules. If you have created one portal user type for leads and two types for contacts and added your CRM leads and contacts to the appropriate portals, you will be prompted to choose one of the portal user types under Contacts when you convert the leads to contacts in your CRM. For example, you have four leads A, B, C, and D in the Leads portal user type; and Contacts 1 and Contacts 2 as two portal user types in the Contacts modules. When you convert leads A, B, C, and D into contacts in CRM, you will be prompted to choose the Contacts portal user type (Contacts 1 or Contacts 2) to transfer the leads to.

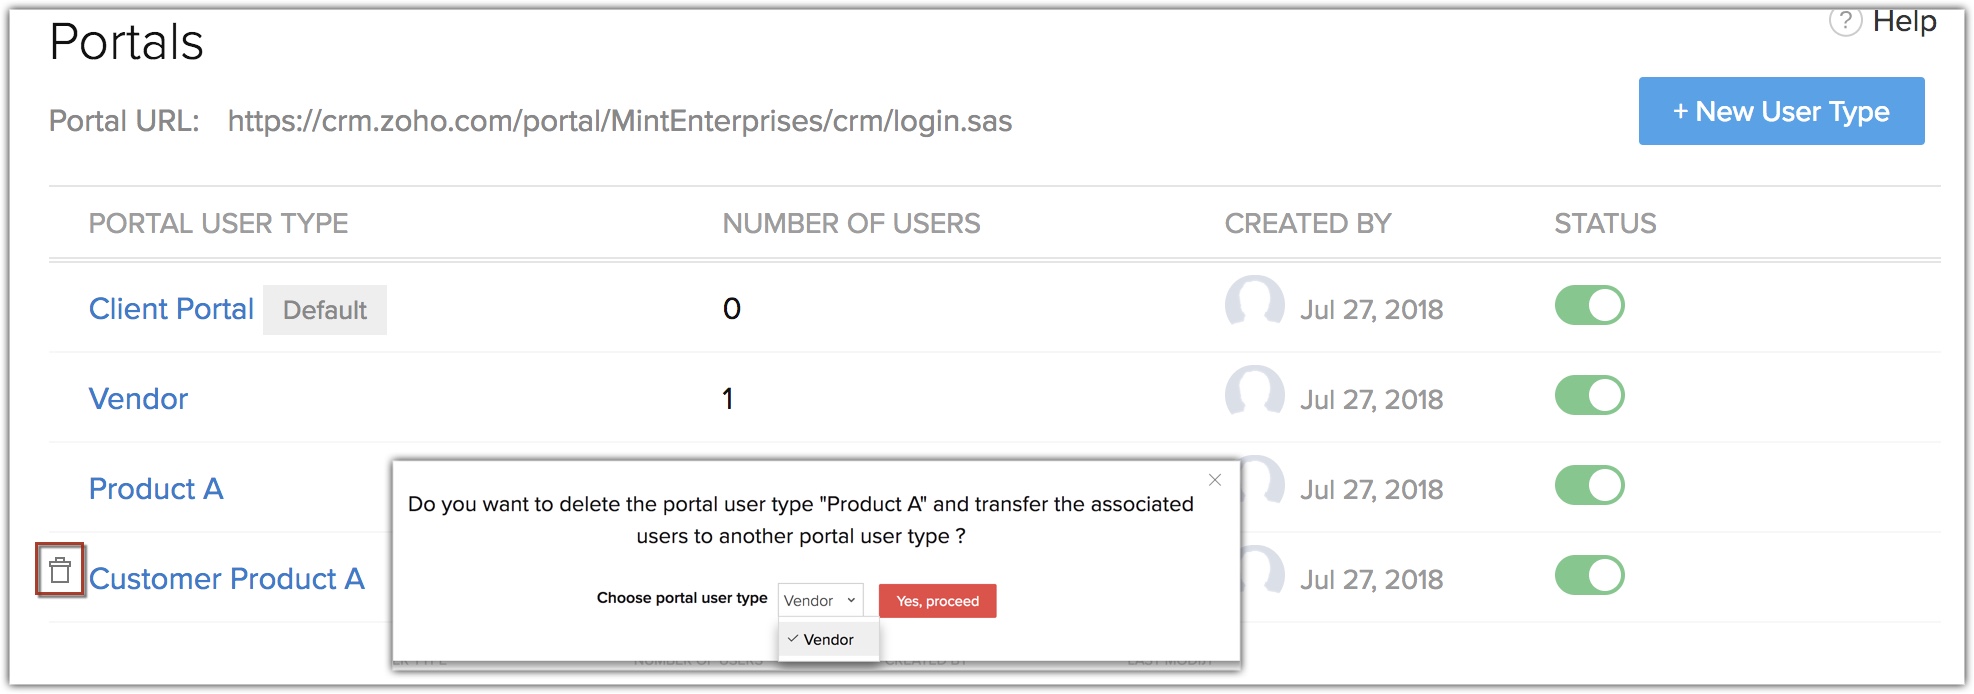
Deleting a Portal User Type
There may be instances when you want to remove a particular portal user type. In that case, you will first have to transfer the users to another portal user type and then delete the portal user type. You can only transfer the users to another portal user type if you want to delete their original portal user type.
If you have not associated any user to a portal user type, you can delete it as it is.
To delete the portal and transfer portal user type
- Go to Setup > Channels > Portals.
- Select a portal and hover over it and then click Delete.
- In the pop-up, click Transfer and Delete.
- Choose a Portal User Type to transfer the user to from the drop-down list.
- Click Yes Proceed.
- If you want to rename a portal user type, click the Edit option in the Portal Configuration page.
- You can delete user(s) from a portal, if you don't want them to be a part of it anymore. You can add another user instead, as deleted user won't count towards your user license.
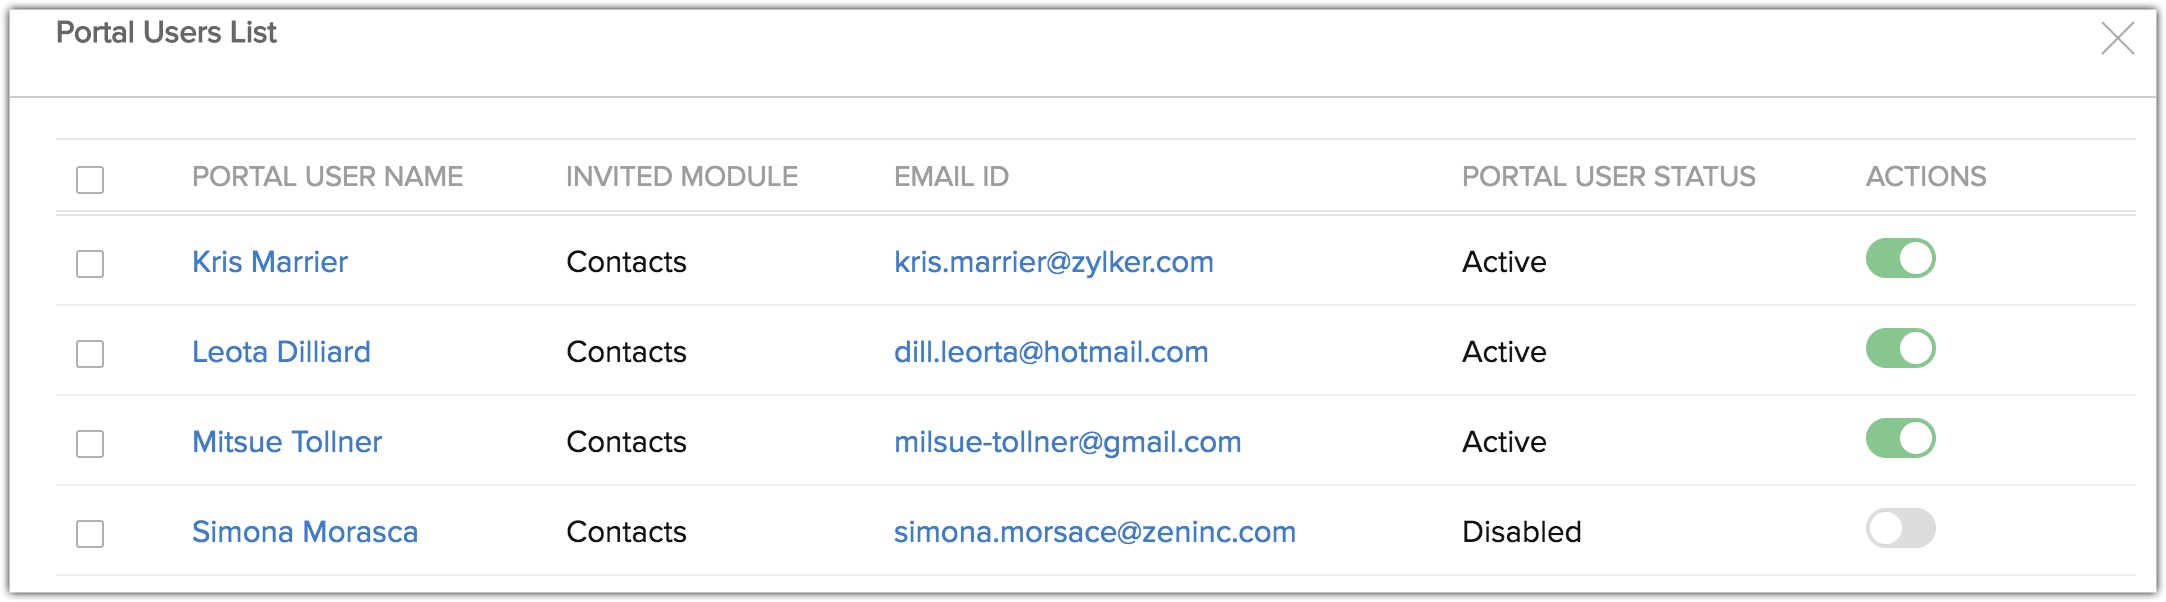
Deactivating a Portal User
You can deactivate a portal user whenever you need to.
To deactivate a portal user
- Select a Portal User Type and click Portal Users.
- In the Portal User List popup, toggle off the status bar of the user.
Related Articles
Creating a Portal
Creating a Portal Create a portal To create a portal Go to Setup > Channels > Portals. In the Portals page, click Get Started Now. Your company's name will appear as the default portal name. Edit the Portal name, if required. Click Configure Now. The ...Data Privacy for Portal Users
Data Privacy for Portal Users Data Processing Basis As a Data Controller, to be GDPR compliant you need to process data based on one of the lawful bases. Based on your business requirement and discretion you can choose a processing basis from the ...Creating and Setting up Portal
Creating and Setting up Portal Setting up portals involves the following four steps: Creating portal Defining portal user type Configuring portal type Specifying field permissions Creating portal By default, the company's name will be the portal name ...Working with Invoices
Working with Invoices Once the sales stage reaches its final phase you may start working on the payment procedure. In this regard an Invoice plays a vital role, which is important for both Sales and Accounting purposes. An invoice is a bill issued by ...Working with Purchase Orders
Working with Purchase Orders A Purchase Order is an order placed for procuring products or services from your vendors. It is a legal binding document that protects interests of both the vendor and buyers. In general, a Purchase Order (PO) contains ...