Using the CRM Mobile App for iOS
Using the CRM Mobile App for iOS
Organise CRM Home Screen
The CRM for iOS welcomes you with an attractive Home screen that displays the Activities for the week. You can prioritise your work for the day based on the activities displayed. You can also check off completed activities and add new activities from the Home screen.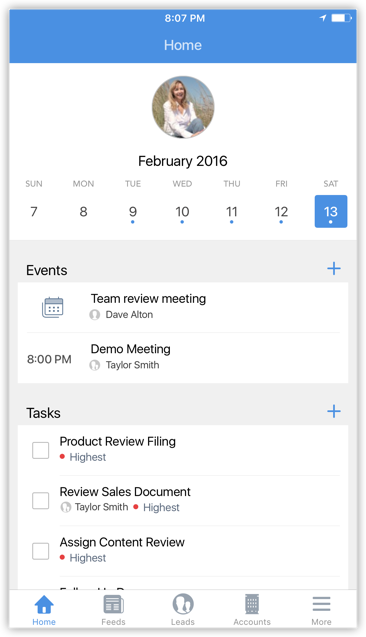
Toggle between the days of the week to view the tasks, events and calls for the selected day. Click the Add (+) icon against the Event, Task or Call to add a new activity, respectively.
Sort the activities into pending and completed lists by grouping the completed events, tasks and calls. Selecting an event, call or task would mark it as complete.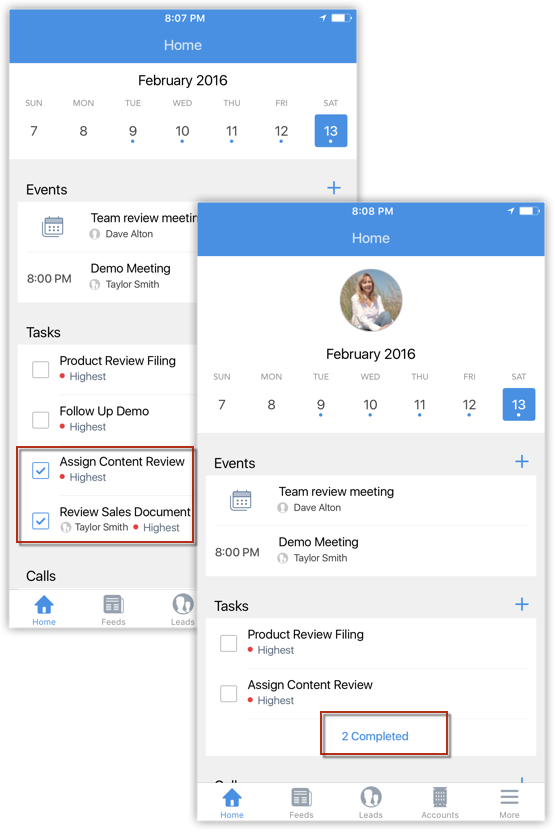
Collaborate using Feeds
Feeds on the CRM for iOS lets you collaborate with your peers and keep a track of your organisation's activities - be it your own or that of your colleagues. It lets you post and view status updates, add comments, attach files and filter Feeds updates by modules.
To create/view Feeds updates
- In your CRM app for iOS, tap the Feeds icon (
).
All the Feeds updates are displayed. - Tap the Add icon and compose your status update.
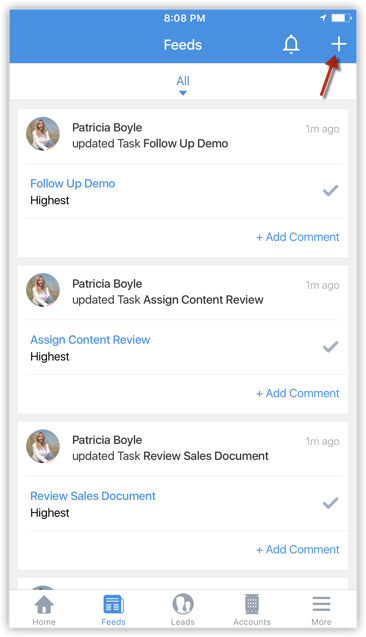
- Comment on other record updates by your peers.
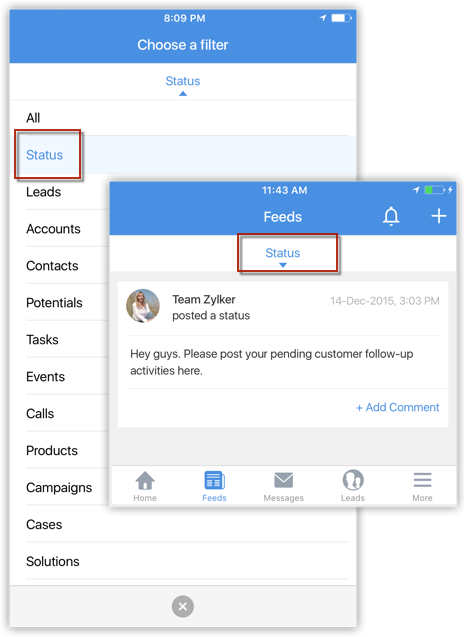
- To filter updates from a particular module tap the All drop-down and select the desired module.
The updates related to the selected module are filtered and displayed for you.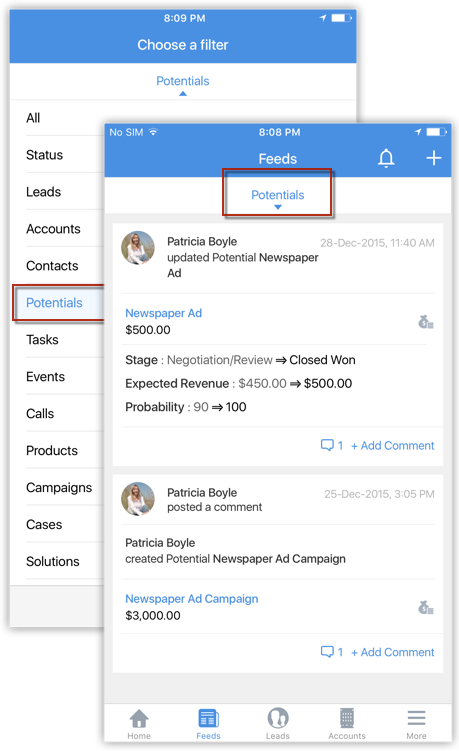
- To filter out only status updates by members of your organisation, tap Status.
Create Records
You can create records for all supported CRM modules from your iPhone.
To create a record
- Go to the desired module on your iPhone.
The records of the module are displayed. - Tap the Add Record icon.
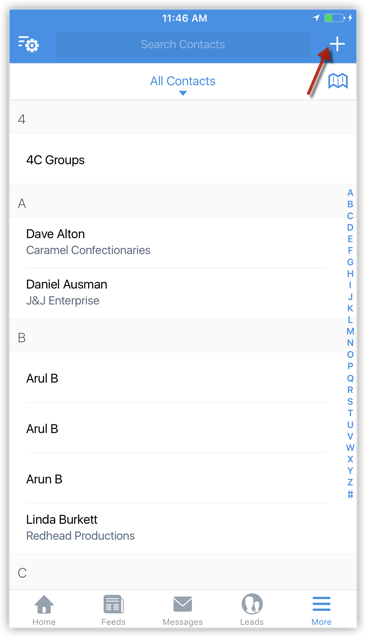
- Tap Add [Record]
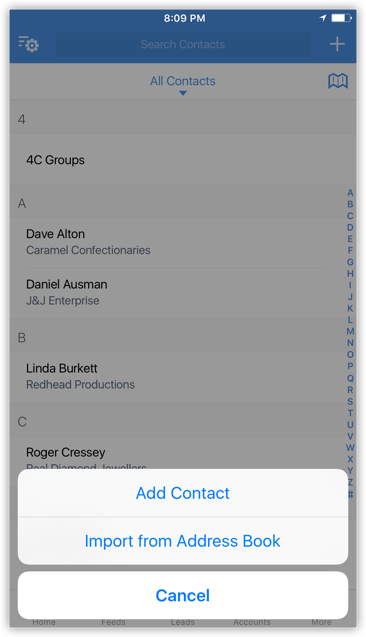
In the case of Leads and Contacts, you can add new records or Import from Address Book.
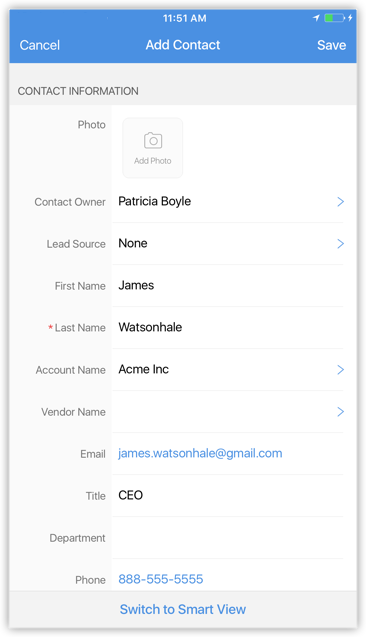
In the case of other modules, you can directly add a new record. - In the Add [Record] screen, specify the details and tap Save.
Convert Leads
Once the lead status has reached a certain stage, (i.e. when there is a chance of further negotiations), it can be qualified as a potential. You can then convert the lead into an account, contact, and potential.
To convert a lead
- Tap the Leads module.
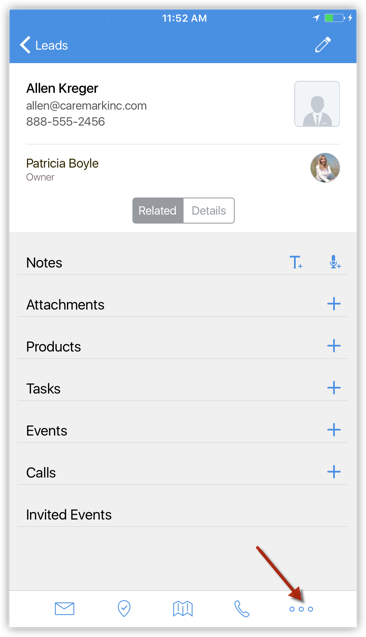
All the leads in the selected list view will be listed. - Tap the record that you want to convert.
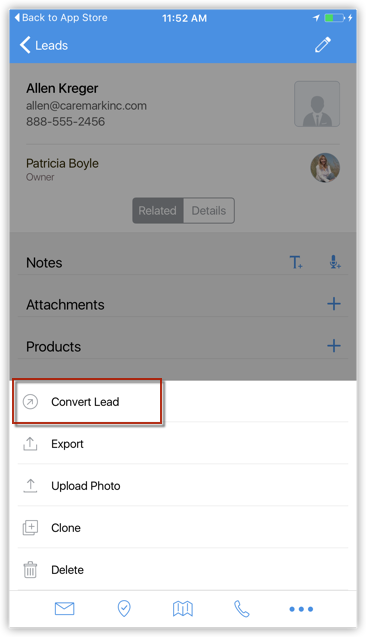
- In the Record Details page, tap the More icon.
- Tap Convert Lead.
- In the Convert Lead window, specify the necessary details and tap Convert.
The lead will be converted and will be available in the Converted Leads list view.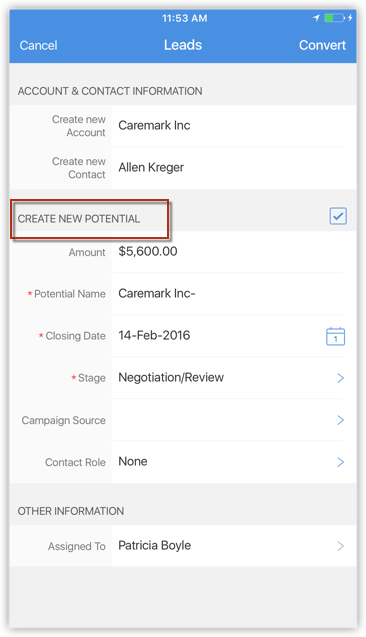
Edit Records
To edit a record
- Go to the desired module.
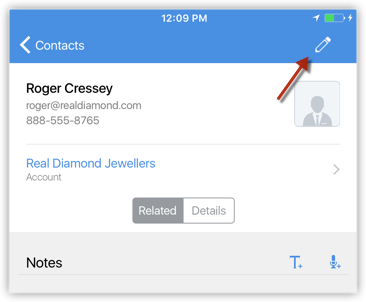
The records are displayed. - Tap the record that you want to edit.
- In the Record Details page, tap the Edit icon.
- Modify the details of the record and tap Save.
Delete Records
Occasionally, you may need to remove some of the unnecessary records from the CRM, for a better organisation of data. You can do so by deleting the records from the desired module from your iPhone.
To delete a record
- Go to the desired module.
The records are listed. - Tap the record that you want to delete.
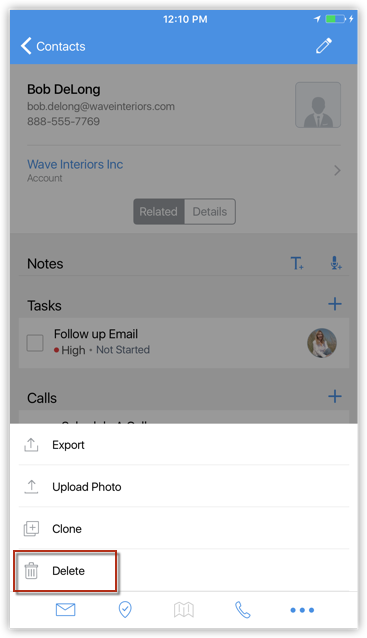
- In the Record Details page, tap the More icon.
- Select Delete.
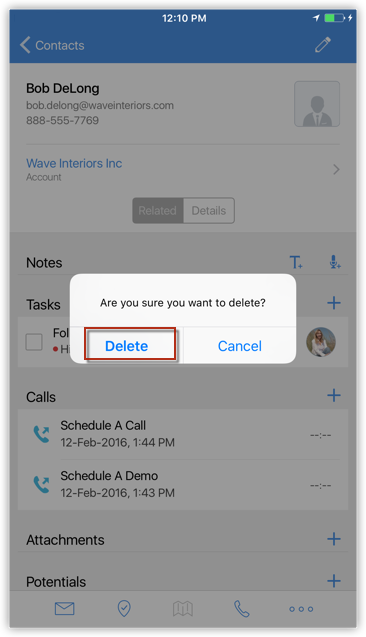
- Confirm Delete. The record will be deleted.
Change List View
You can change the list view that helps you filter the required data based on specified criteria. For each module All Views and My Views are supported. There are additional predefined and user-defined list views that are also available.
To change list view
- Go to any module.
The records will be listed based on the List View that is selected. - Tap the drop-down for the list views in the module.
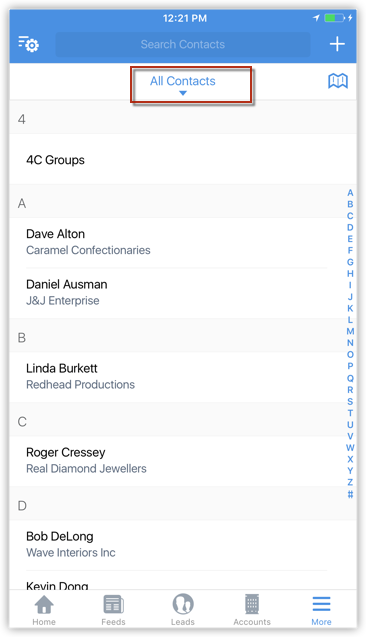
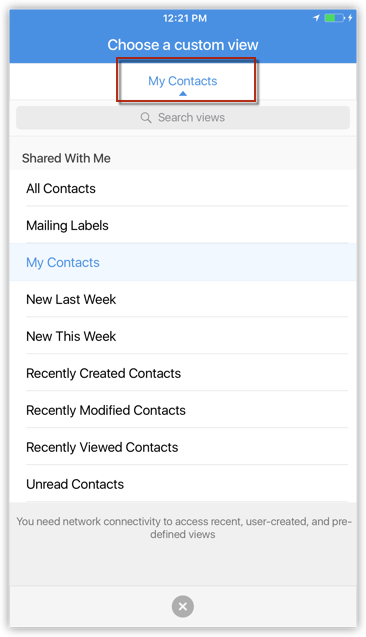
- From the List Views displayed, select the one matching your requirement.
Send Emails
To send an email
- Go to any Leads, Contacts or Cases module (or any other custom module).
You will have the option to send an email to the contact if the email address is available. - Tap a record to which you want to send email.
- In the Record Details page, tap the Email icon.
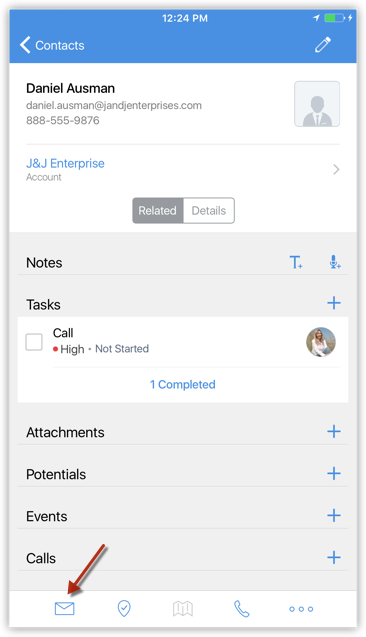
- The email compose window opens. Compose and Send your email.

Changing the owner of a record
- Go to the specific module and select the record whose owner you want to change.
- Tap Edit.
- Tap the record owner.
- Select the user from the Change Owner popup.
- Click Select.
- Select the checkbox if you want to notify the new record owner and if you want to transfer open tasks, events, calls to the new owner.
- Click Done

- In the Accounts module, you can change the owner along with the associated contacts, open deals and activities.
- In the Contact module, you can change the owner along with the associated open activities and deals. The deals can be transferred only if they aren't associated with an account.
Manage subforms
- Go to the subform and click +[Subform Name] or the Add button.
- Enter the relevant details and click Save.
- Click
/
to add or remove line items in a subform respectively.
- Go to the respective module.
- Select the record whose subform you want to add line items to.
- Tap the subform and click Edit.
- Enter the details and click Save.
- In the subform, click the Search button.
- Enter the value you want to search for.
The search results will be highlighted.
Use MailMagnet in iPhone
With the Mail Add-on configured in your CRM account, you will have an inbox full of important emails from customers that are associated to your leads and contacts. It is very important that emails from your customers get a timely response and in that case, email notifications play a vital role. MailMagnet does exactly that. For a field sales rep on the move, the MailMagnet option is very useful to receive instant notifications so that the most important emails from leads and contacts get your immediate attention. MailMagnet intelligently scans your inbox and notifies you of the emails from your prospects and customers in CRM.
MailMagnet will be available only if you enable the Mail Add-on feature and configure your email account within the CRM via POP3 configuration.
- When the leads or contacts send emails, it will be listed under MailMagnet. Outgoing emails will not be listed in MailMagnet.
- Only if you are the recipient (i.e. your emails address is in the To or CC fields of the email), will you receive the email in MailMagnet.
- Group mails, such as info@zylker.com, sales@zylker.com, etc. will not be listed in MailMagnet.
- The mail magnet will retrieve emails every 3 minutes.
Reply to Emails and Add Follow-up Task/Note
To reply to emails
- Tap Messages in the CRM app.
Email received from the leads and contacts will be listed.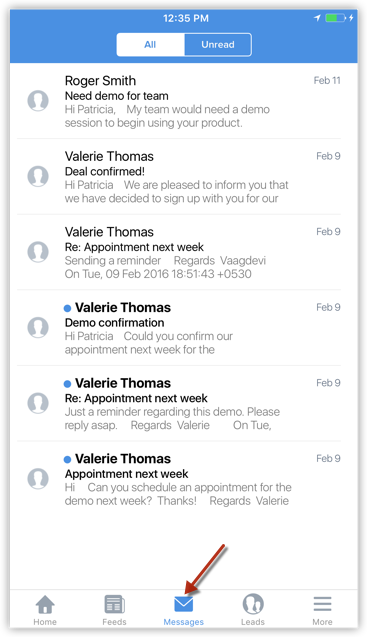
- Tap an email to open.
- Tap on the Reply icon and compose an email and Send.
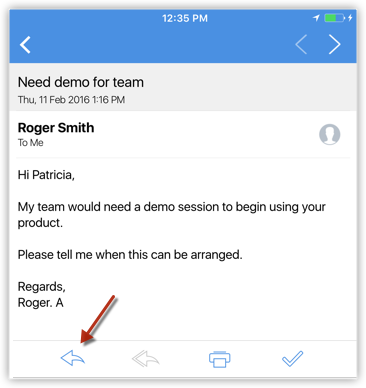
- On sending the email you will be able to associate a follow-up task or note.

Alternatively you can add a task by clicking on the Task icon from the email page.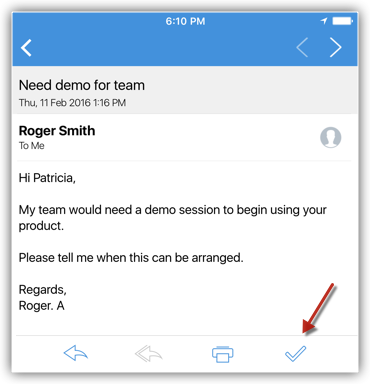
Import Leads and Contacts from Address Book
You can import multiple leads and contacts from your iOS Contacts to the CRM. A maximum of 100 contacts can be imported at a time.
To import a lead or contact
- Go to Leads/Contacts module.
- Tap the Add Record icon.
- Tap Import from Address Book.
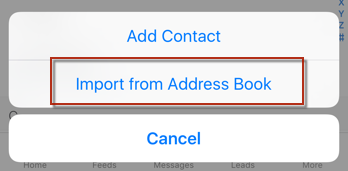
- In the All Contacts screen, select the contact(s) that you want to import.
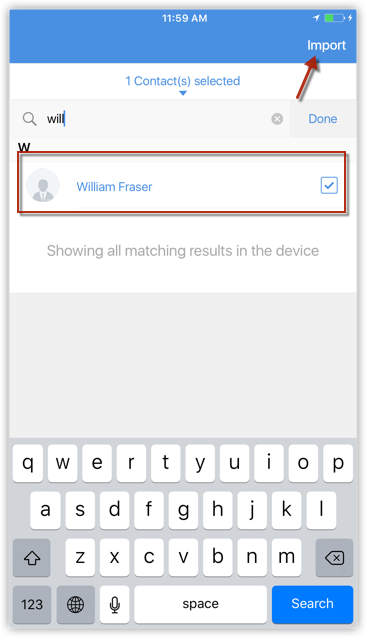
- Tap Import.
- The selected contact(s) will be imported and available in the respective module.
You can edit the records' details if required.
Save Leads and Contacts to Address Book
You can export and save the leads and contacts to your iPhone Contacts from the CRM, one record at a time.
To save a lead or contact in address book
- Go to Leads/Contacts module.
- Tap the desired contact.
Tap the More icon. - Tap Export.
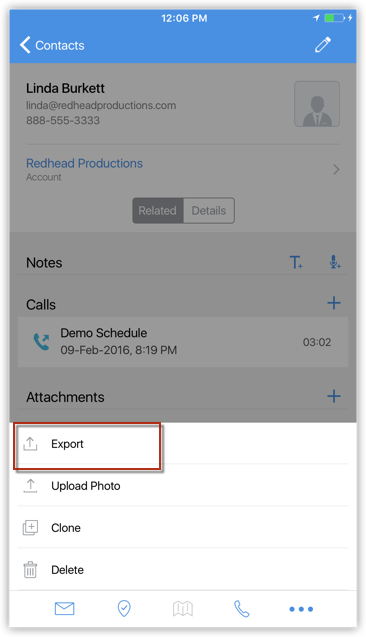
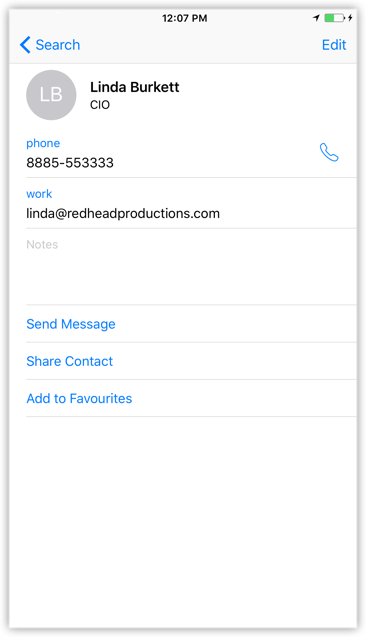
The contact is saved to your address book automatically. - Go to iPhone contacts to confirm that the record was exported.
Execute a Blueprint on the CRM app
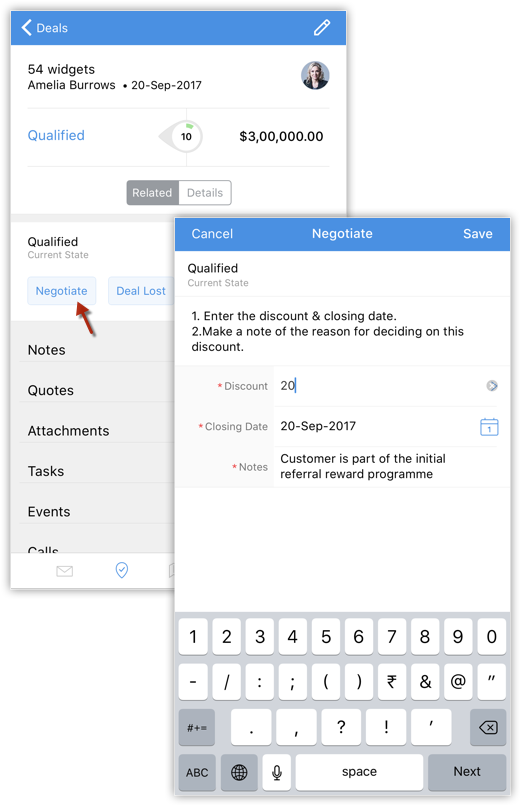
A Blueprint that you have configured in your CRM web account can be executed on the mobile app. Suppose you are out on a field visit to meet a customer regarding a deal and the deal has progressed from Qualification to Negotiation. You can update the stage right there on the app. If you have a process in place for the all the deals, you can execute the required Blueprint Transitions right on the app and progress to the subsequent stages in the process.
Example, you have configured Transition called "Negotiate", which must be completed in order to move to the next stage. The Negotiate Transition requires the sales rep to enter an acceptable discount and enter the details of the negotiation as a note. These requisites can be fulfilled right on the mobile app by executing the Negotiate Transition.
To execute a Blueprint using the CRM app
- Tap the module for which you wish to execute the Blueprint. Example, Deals.
- Tap the record in question.
You will see a Blueprint Strip that displays the Current State as well as the Transitions that must be executed in order to progress to the next State. - Click the required Transition and complete the requisites as directed. Example, Negotiate.
If the values you enter are unacceptable, you will see relevant error messages as configured in your Blueprint.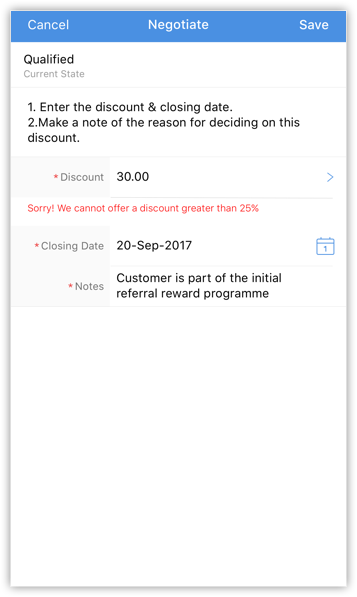
This way CRM guides and validates a sales process. - Once you have entered the acceptable values, click Save.
The record is now moved to the next State in the process.
In a similar manner execute each subsequent Transitions until the process is completed.
Quick Notes
State: Each stage in a process is referred to as a "State" in Blueprint. For example, a deal in your sales pipeline goes through different stages such as Qualification, Needs Analysis and Negotiation until it is won/lost. Each of these stages will be called a “State”.
Transition: Transition refers to the change of State in a process. It prescribes a set of requirements for the records to move from one state to another.
- Blueprint is available in the CRM for Android from (v3.2.16) onwards.
- Blueprint is available in the CRM for iOS from (v3.2.9) onwards.
Upload Photo
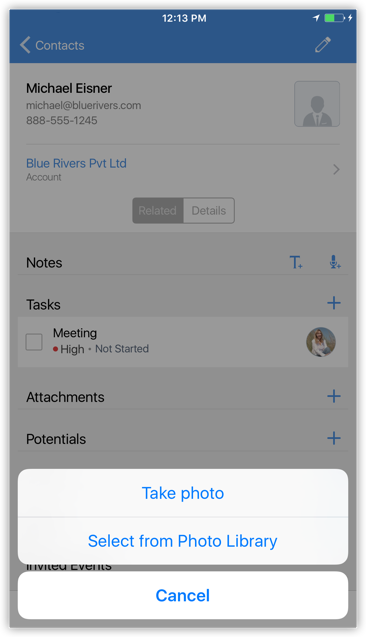
For Leads and Contacts, you can upload an image by taking a photo or using an existing photo from the iPhone's Photo Library.
To upload a photo
- Tap the Leads/Contacts module.
All the records in the selected module will be listed. - Tap the record to which you want to upload a photo.
- In the Record Details page, tap the More icon.
- Tap Upload Photo.
- Tap Take Photo or Pick from Photo Library to upload.
Related Articles
Using the CRM Mobile App for Android
Using the CRM Mobile App for Android Organise CRM Home Screen The CRM for Android welcomes you with an attractive Home screen that displays the Activities for the week. You can prioritise your work for the day based on the activities displayed. You ...iOS Specific Features
iOS Specific Features Supported CRM Modules From your iPhone, you can access a set of the CRM modules and the data in them which will be stored in a local database on your phone. This ensures that you can access the important data even in the offline ...CRM for iPhone - An Overview
CRM for iPhone - An Overview The CRM for iPhone is a native application that enables you to access and work with your Online CRM data from your iPhone. The 3.0 version of the native CRM app is available in iOS 8.0 and above. From you iPhone, you can ...Configure the CRM Settings in iPhone
Configure the CRM Settings in iPhone Change Theme To change the color theme for your CRM app on your iOS device In your CRM app, go to Settings. On the Settings page, under Themes, select the desired colour theme. The chosen theme is applied across ...Using Native App for iPad
Using Native App for iPad Supported CRM Modules From your iPad, you can access a set of the CRM modules and the data in them which will be stored in a local database on your iPad. This ensures that you can access the important data even in the ...