Using Native App for iPad
Using Native App for iPad
Supported CRM Modules
From your iPad, you can access a set of the CRM modules and the data in them which will be stored in a local database on your iPad. This ensures that you can access the important data even in the offline mode when no network connection is available. The following modules are supported in the CRM for iPad:
|
|
Create Records
You can create leads, accounts, contacts, deals, tasks, events, etc. from your iPad that will be synchronized with your CRM account.
To create a record
- Tap a module in which you want to add a record.
All the records in the module will be listed. - Tap the Add icon.
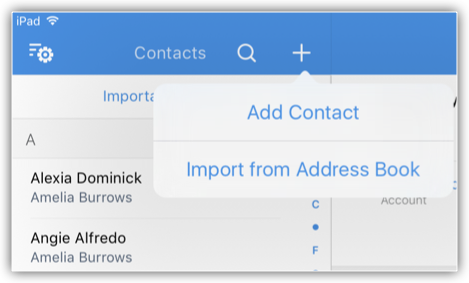
In case of leads and contacts, you will have the option to add the record manually or import from the address book.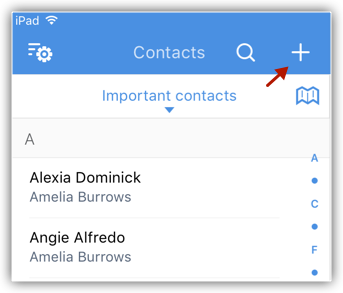
- In the Add [Record] screen, specify the details and tap Save.
You can tap the Show all fields to add more information.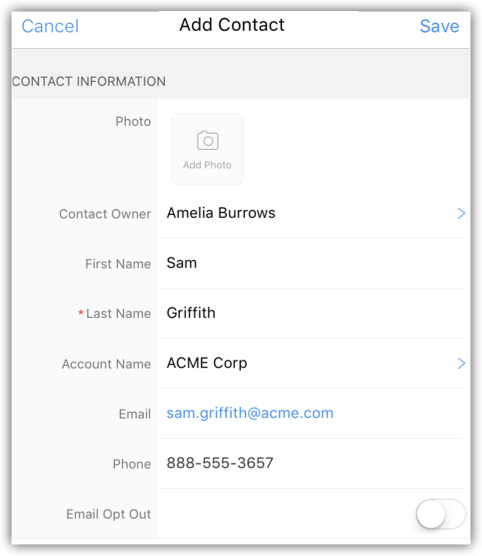
Convert Leads
Once the lead status has reached a certain stage, (i.e. when there is a chance of further negotiations), it can be qualified as a potential. You can then convert the lead into an account, contact, and potential.
To convert a lead
- Tap the Leads module.
All the leads in the selected list view will be available. - Select a record and in the record's details screen, tap the More Options icon > Convert Lead.
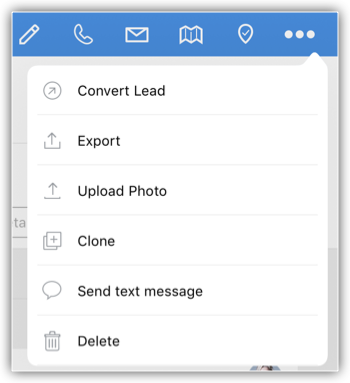
- In the pop-up, review the details, and tap Create New Deal, to add details for a new deal.
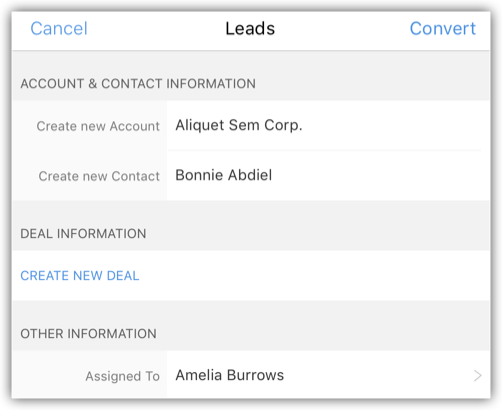
- Tap Convert.
The lead will be converted and will be available in the Converted Leads list view.
Import Leads and Contacts from Address Book
You can import the leads and contacts from your iPad Contacts to the CRM.
To import a lead or contact from the address book
- Go to Leads/Contacts module.
All the records in the selected module will be listed. - Tap the Add icon > ImportfromAddressBook.
- From your iPad contacts, select the checkbox(es) for the ones you want to import.
- Tap Import.
Export Leads and Contacts to the Address Book
You can save the CRM leads and contacts to your iPad's address book, one record at a time.
To export a lead or contact to the address book
- Go to Leads/Contacts module.
All the records in the selected module will be listed. - Tap the record that you want to add to the address book and tap the More Options icon > Export.

The record will be exported to the iPad's address book
Edit Records
You can edit the CRM records from your iPad.
To edit a record
- Tap a module and select a record.
- Tap the Edit icon.
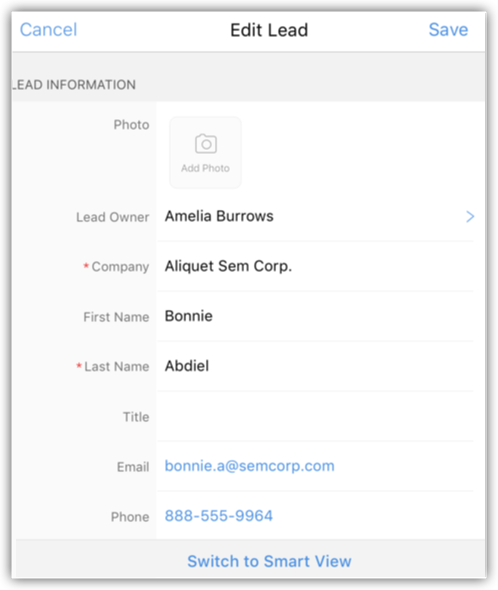
- In the Edit [Record] pop-up, make the necessary changes and tap Save.
Delete Records
Occasionally, you may need to remove some of the unnecessary records from the CRM, for a better organisation of data. You can do so by deleting the records from your iPad.
To delete a record
- Go to a module.
- Tap the record that you want to delete and tap the More Options icon > Delete.

Upload Photo
For Leads and Contacts, you can upload an image by taking a photo or using an existing photo from the iPad's Photo Library.
To upload a photo
- Tap the Leads/Contacts module.
All the records in the selected module will be listed. - Tap the record to which you want to add the photo and tap the More Options icon > Upload Photo.
- Tap Take Photo or Pick from Photo Library to upload.

Locate Leads/Contacts/Accounts Near You
Using Apple's Maps in your iPad, you can find the leads, contacts and accounts a few miles around your location. There is a list view named Leads/Contacts/Accounts Near Me which filters the leads/contacts/accounts around your location within the radius. The radius will depend on the miles specified in the CRM's Settings. Please note that the location service for the CRM should be switched on in your device.
To locate leads/contacts/accounts near you
- Go to the Leads/Contacts/Accounts module.
The records will be listed based on the List View that is selected. - Tap the Near Me icon.
All the leads/contacts/accounts near your location will be pinned on the map, irrespective of the ownership of the record or other criteria.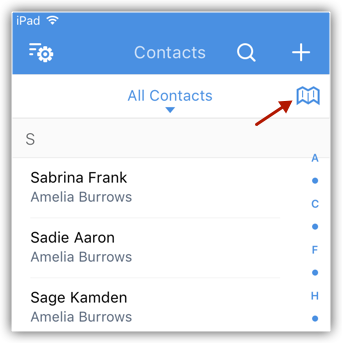

- The Location Service settings for the CRM should be switched on.
- Only the contacts within the specified radius will be located in the map.
- In your iPad, within the CRM, you can set the radius in miles or kilometers from the map.
- There are two color pins - Redpin is for single lead/contact/account and Violetpin is for multiple lead/contacts/accounts in the same location.
- You can tap on the pin for more details on the lead/contact/account.
- All the leads/contacts/accounts near your location will be pinned on the map, irrespective of the ownership of the record or other criteria.
- When you tap on the pin and then the information icon, you can view the records' details and other options such as Call Lead/Contact, Send Mail, View Map, Add Related Records etc. These options will be available based on the details in the record.
Send Emails
To send an email
- Go to any module.
You will have the option to send an email to the contact if the email address is available. - Tap a record to which you want to send email.
- In the Record Details page, tap on the Email icon.

- In the New Message window, compose the email and send.
Using MailMagnet in iPad
With the Mail Add-on configured in your CRM account, you will have an inbox full of important emails from customers that are associated to your leads and contacts. It is very important that emails from your customers get a timely response and in that case, email notifications play a vital role. MailMagnet does exactly that. For a field sales rep on the move, the MailMagnet option is very useful to receive instant notifications so that the most important emails from leads and contacts get your immediate attention. MailMagnet intelligently scans your inbox and notifies you of the emails from your prospects and customers in CRM.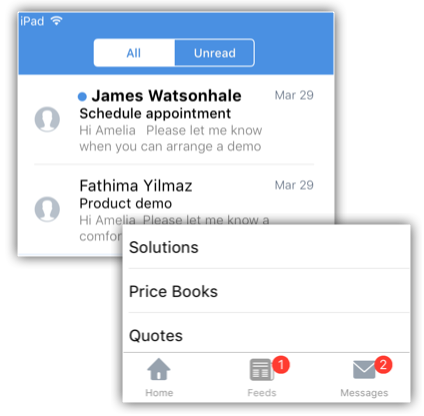
MailMagnet will be available only if you enable the Mail Add-on feature and configure your email account within the CRM.

- When the leads or contacts send emails, it will be listed under MailMagnet. Outgoing emails will not be listed in MailMagnet.
- Only if you are the recipient (i.e. your emails address is in the To or CC fields of the email), will you receive the email in MailMagnet.
- Group mails, such as info@zillum.com, sales@zillum.com, etc. will not be listed in MailMagnet.
- The mail magnet will retrieve emails every 3 minutes.
Reply to Emails
To reply to emails
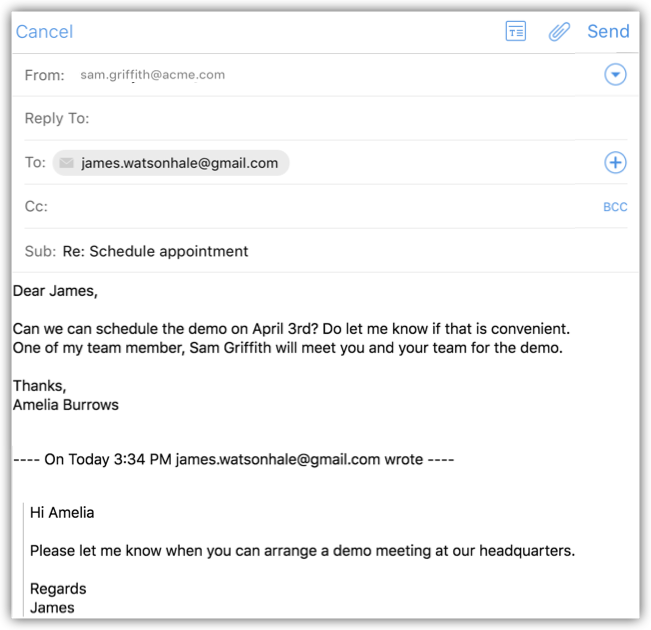
- Tap the Messages module.
Email received from the leads and contacts will be listed. - Tap an email to open.
- Tap the Reply or Reply All icon and compose an email to send.
Add a Follow-up Task
To add a follow-up task
- Tap the Messages module.
Email received from the leads and contacts will be listed. - Tap a email to open.
- Tap the Task icon.
- In the Add Task pop-up, specify the task details and tap Save.
Add a Note
You will get the option to add a note only after you reply to an email.
To add a note
- Tap the Messages icon in the CRM app.
Email received from the leads and contacts will be listed. - Open an email and tap on the Reply icon.
- Compose an email and tap Send.
The option to add a follow-up task and a note will be available.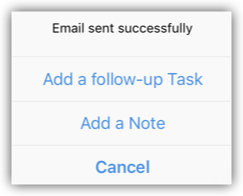
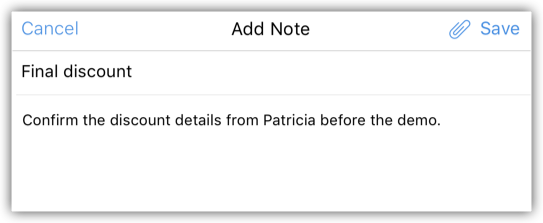
- Tap on Add a Note.
- Specify the note details and tap Save.
Make Calls
You can make calls to your customers using Mobile, FaceTime or Skype by selecting the record in the CRM and initiating the call. You can set the calling options from Native App's Settings. Once the call is complete, you can also log the call. Note that you can log only outbound calls.
To make a call
- Go to any module.
- Tap a contact to which you want to make a call.
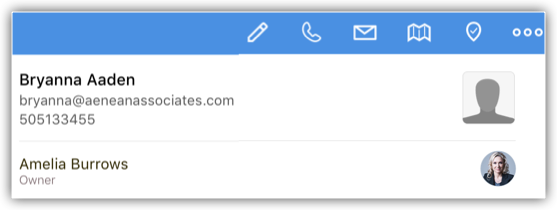
- In the Record Details page, tap on the Phone icon to make a call.
The call will be initialized using Mobile, FaceTime or Skype based on the option you select in the CRM Native App's Settings.
Log a Call
After making outbound calls to your customer, you can instantly log your calls with the log a call feature.
To log a call
- Go to a module and select a record.
- In the Record Details page, tap on the Phone icon to make a call.
The call will be initialized using Mobile, FaceTime or Skype.
When the call is completed, you will be asked if you want to log the call. - Tap Yes to log the call.
- In the Call Details page enter the call information and tap Save.
View Map
Using Google Map, you can locate the address of the Leads, Accounts, and Contacts.
To view map
- Go to the module and tap a record for which you want to view the address.
- In the Record Details page, tap on the Map icon.
Associate Related Records
You can cross link various records across CRM to get a holistic view of the data. It gives you the advantage of having all the related information in one place for a quick reference. Each module may have a different set of related records.
To view and associate related records
- Go to the module and select a record.
- In the Record Details page, under Related tab, the related records will be available.
- Click on individual records for more details.
- Tap the Add icon to create one and associate.
Record Voice Notes
You can record your conclusions on a recent demo for a prospect or capture your thoughts about a meeting with a client with Voice Notes. You can associate these audio files with your records and download them whenever you need. The voice notes will be counted as part of the storage limit in the CRM.
To record voice notes
- Go to a module and tap a record to which you want to add voice notes.
- Under the Related tab, tap the VoiceNotes icon in the Notes related list.
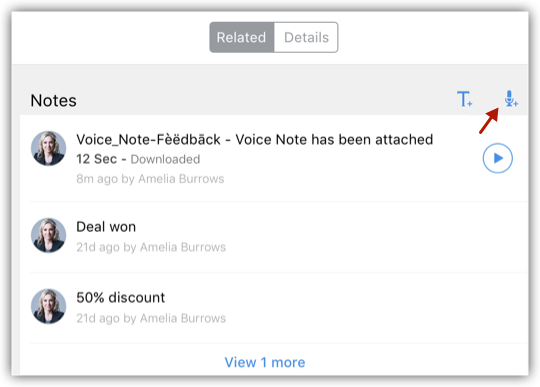
- Tap the record icon to start and stop recording your notes.
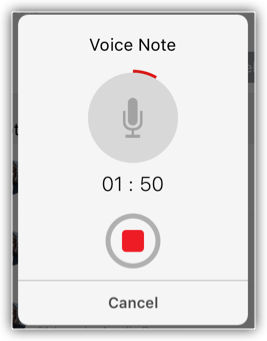
- After recording, specify id for the voice recording and tap Save.
Attach Files
Every record has the option to attach files. You can either take a photo, select a photo from the Library or attach a file from Docs.
To attach files
- Go to a module and tap a record.
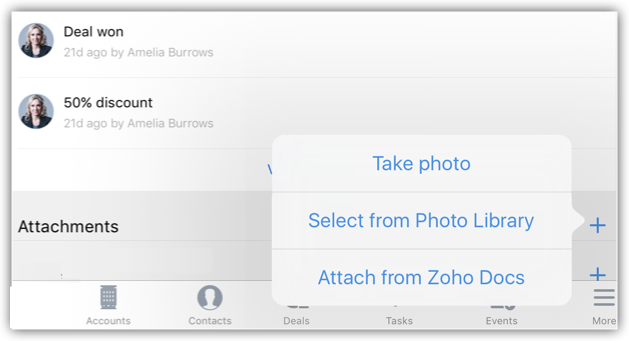
- Under Related tab, tap the Add icon corresponding to Attachments.
- Choose one of the options to upload: Takephoto, Selectfrom Photo Library, AttachfromDocs.
Search Records
Using the Search feature, you can locate specific information or specific records without having to go through the entire list of records. From the list of matching records, if any record is online (retrieved from the server) and not locally stored in your device, then it will be automatically downloaded to your device when you open it. You can search records that exist in the device by specifying the search criteria fields.
To search records
- Go to any module.
- Tap the Search icon and enter the text in the box to search records.
As you enter, the matching records will be listed.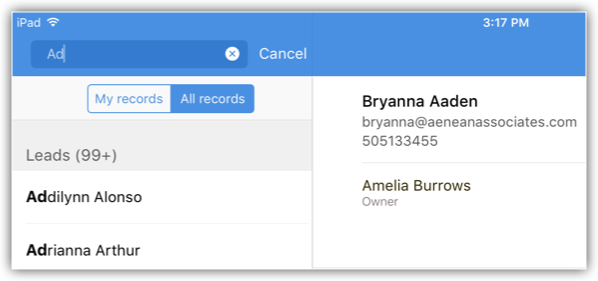
Define Search Criteria Fields
Using the Search feature, you can locate specific information or specific records without having to go through the entire list of records. You can search records based on a specific field value. These search criteria fields can be defined by you.
To define search criteria fields
- Go to a module for which you want to define the search criteria fields and tap the Settings icon.
- In the Info and Settings pop-up, tap Search.
- Choose the First, Second, Third and Fourth fields.
The search results will be based on the fields that you define here.
Change Name Format
You can change the name format for the leads and contacts in the CRM from your iPad device.
To change name format
- Tap MoreOptions > Settings.
- In the Settings screen, tap DisplayNameOrder to select the name format.
- Tap the Last,First or First,Last.
The name format will be changed based on the option selected.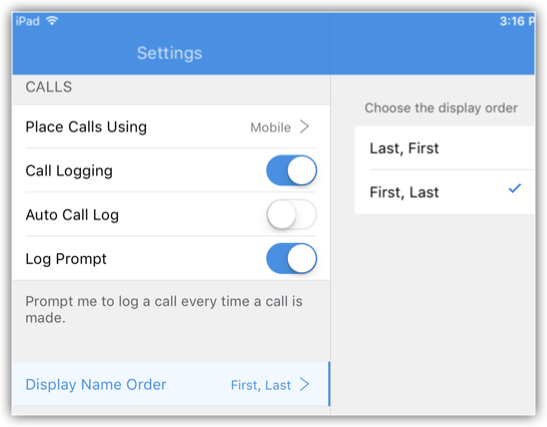
Send Feedback
Feedback can be sent to the Mobile development team, using the feedback form.
To send feedback
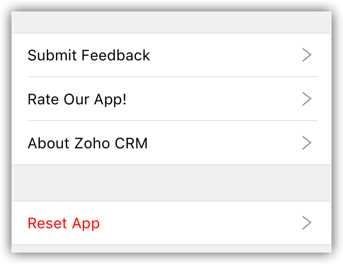
- Tap MoreOptions > Settings.
- In the Settings screen, tap Submit Feedback to compose the feedback message and send.
Related Articles
Using the CRM Mobile App for Android
Using the CRM Mobile App for Android Organise CRM Home Screen The CRM for Android welcomes you with an attractive Home screen that displays the Activities for the week. You can prioritise your work for the day based on the activities displayed. You ...Using the CRM Mobile App for iOS
Using the CRM Mobile App for iOS Organise CRM Home Screen The CRM for iOS welcomes you with an attractive Home screen that displays the Activities for the week. You can prioritise your work for the day based on the activities displayed. You can also ...Using Calendar Synchronization via CalDAV
Using Calendar Synchronization via CalDAV Create and View Synchronization of Events Once you have enabled CalDAV Access in the CRM and configured the CalDAV account in your iOS device, the events you create in the CRM Calendar will synchronize with ...CRM App Installation and Login
A guide to CRM App Installation and Login 1) The application name in the Playstore / ios store is CRM Platform 2) Once Downloaded and installed you should see the below page, click 'Sign In' 3) This will ask you for a domain first 4) The domain ...Using Territories
Using Territories Permissions to Access Records in a Territory Various Roles and Responsibilities Enable Territory Management Enable Deal Rule for Territories Create Territories Create Sub Territories Delete Territories Manage Forecasts Disable ...