Using Calendar in the CRM
Using Calendar in the CRM
Knowing your calendar and the various components in it is helpful in planning all your events and scheduled calls efficiently. Following are some of the components in the CRM calendar that will help you understand the calendar better and make the best use of it.
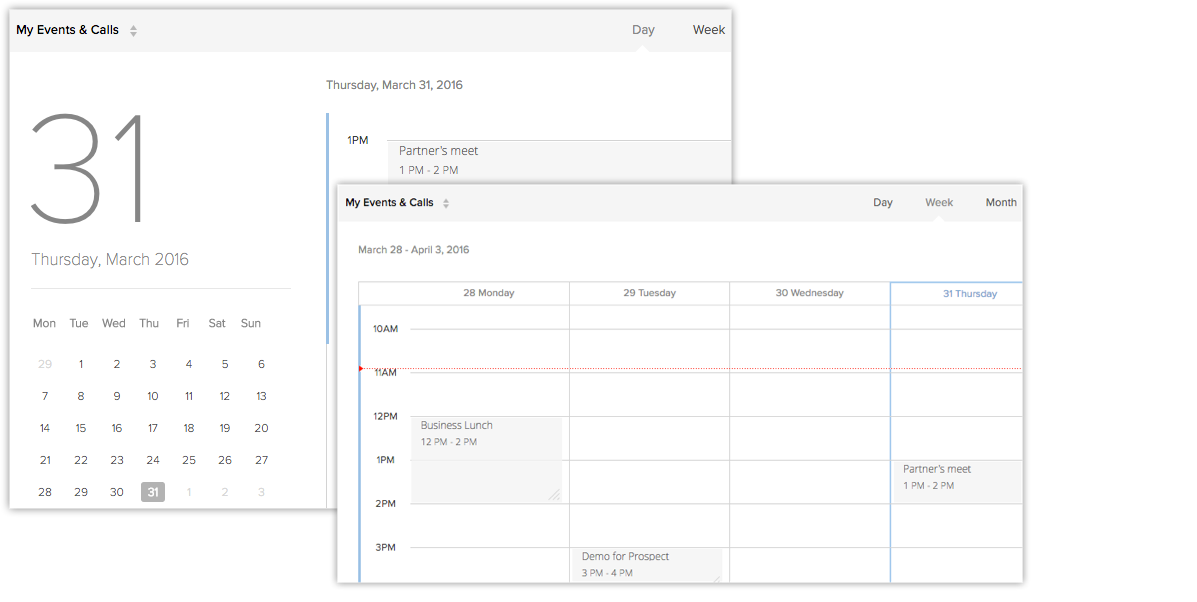
Day, Week and Month View
You have got the day, week and month view for your calendar and while viewing other user's calendar.
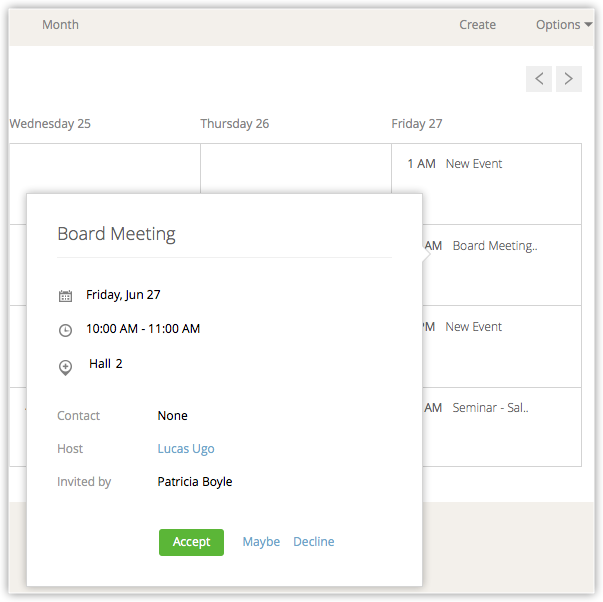
Pending Invitations
Check out the invitations that you are yet to respond to.
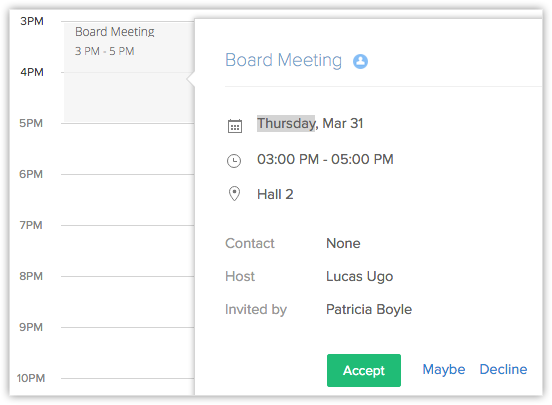
Accepting Invitations
Accept or decline event invitations in the calendar.
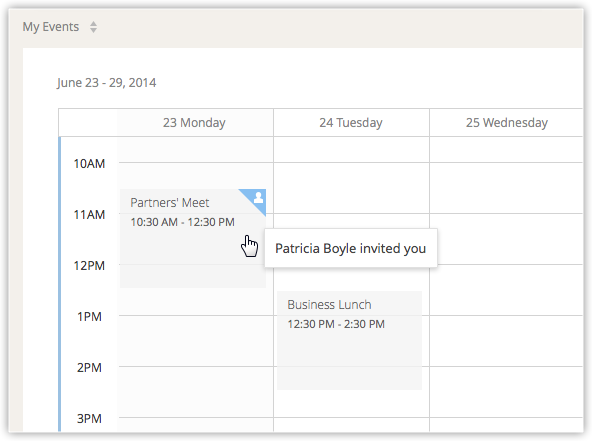
Invited Events
Invited events are separately marked in your calendar.
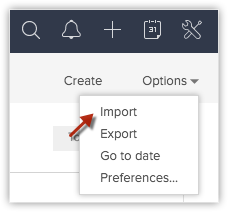
Importing and Exporting Events
Use .ics format files to import calendar events. Exported calendar events will also be available in .ics file.
Reminders
Get reminders before the event starts and before the call.
Other Users' Calendar
- Users with Administrator profile, can see all the user's events in the calendar.
- Users other than administrator profile can see the events of other users, if they have Public Read/Write/Delete or Public Read Only permission for the Activities module under Data Sharing Settings feature. This applies irrespective of the profile permission and role hierarchy.
- Others who do not have the above mentioned permission will be able to see other users' events as per the role hierarchy in the CRM.
- Click on the My Events & Calls drop-down list and choose All User's Events & Calls to view other users' events.

Create Events
Creating events from within the calendar is quick and easy. You can either click the Create link or click on a date or time slot in the calendar to create events. Once created, these events will be available under the Activities tab also. By default, the CRM provides the following fields while creating an event from the calendar.
- Title - Name of the event
- Location - Where the event is held
- All day - Is it an all day event
- From & To - Date and time of the event.
- Repeat - When the event is schedules on a regular basis
- Participants - People invited for the event
- Reminder - A reminder for the event
The form that you fill in to add an event can be customised. You can add or remove fields in the form, except for the above mentioned default fields that are important for the record Additionally, you can also mark fields as mandatory.
To create events from calendar
- Click the Create link in the calendar and select Event.
You can also click on the date or time slot in the calendar and create events.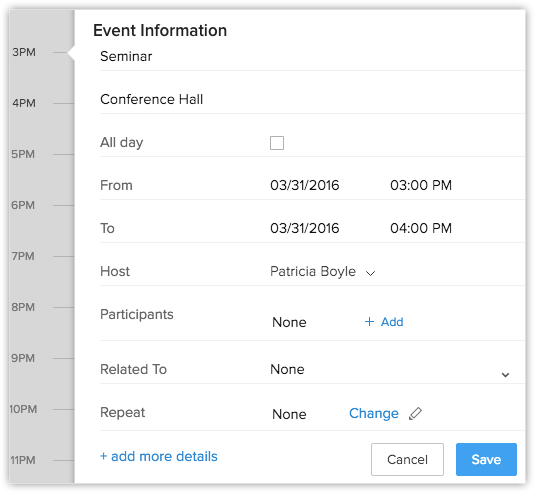
- Specify the Title of the event and Location.
- Select the AllDay check box if you want to mark it as an all day event.
- Select the From and To date and time.
For an all day event, the option to set time is not available. - From the Host drop-down list, choose the name of a user who will host the event.
The users listed in the Host drop-down will be based on your role hierarchy. The event will be created in the calendar of the user who is hosting the event. - Select Leads, Contacts, or Other modules to specify what the event is related to.
- Click the Change link, if you want to schedule the event to repeat on a daily, weekly, monthly or yearly basis.
By default the Repeat option is None. - Click the Add link, if you want to invite participants to the event. You can select contacts, leads, user, and users from roles, groups, territories, etc.
By default the Participants option is None. You can also specify the email address of contacts that are not in your CRM account and invite them to the event. - Set a Reminder for the event.
By default, when you create an event, the reminder settings will be set based on the calendar preferences of the user who is hosting the event. However, you can change that, if required. - Click Add more fields if you need other fields to be populated to add more details about the event.
- Click Save.
Schedule Calls
From within the calendar, you can schedule calls. You can either click the Create link or click on a future date or time slot in the calendar to schedule calls. Once created, these calls will be available under the Activities tab also. By default, the CRM provides the following fields while adding a scheduled call from the calendar.
- Subject - Subject for the call.
- Call Type - By default it is Outgoing, as they are scheduled calls.
- Call Purpose- The purpose of the call such as negotiation, prospecting, demo, etc.
- Contact Name and Related To - Contact or other related record to the call.
- Call Details - This included the call date and start time.
- Owner - User who is the owner of the record or to whom the call is assigned.
- Reminder - A reminder for the call
To add scheduled calls from calendar
- Click the Create link in the calendar and select Call.
You can also click on the date or time slot in the calendar and add scheduled calls.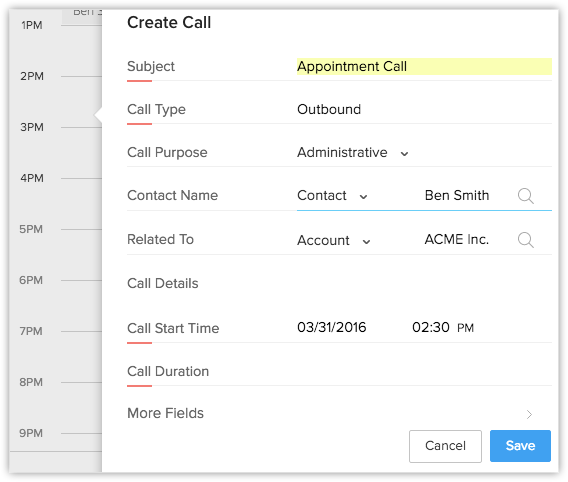
- Specify the Subject of the call.
- By default the CallType will be Outbound.
- Select the Call Purpose from the drop-down list.
- Select Leads, Contacts, or Other modules to specify what the call is related to.
- Enter the call's date and start time details.
- Select the Owner from the drop-down list.
- Set a Reminder for the call.
The reminder settings in the Calendar Preferences will not be taken into consideration as it is set for events only. - Click Add more fields if you need other fields to be populated to add more details about the call.
- Click Save.

- As per the role hierarchy, you will be able to access calendars of other users in the organisation. You can add events/calls in their calendar too. When you create an event/call in your calendar, but choose another user as the host/owner of the record, the event will be added to host's/record owner's calendar.
- When you click on an event in the calendar, you can see some event details. These details can be customised in the Page Layout Settings so that in a quick glance, users can view only the details that are most important.
- You can view the events and calls in the Day, Week or Month view.
- When participants are invited for an event, you will have the option to first cancel the event, inform the invited people via email and only then will you be able to delete the event.
Related Articles
Using Calendar Synchronization via CalDAV
Using Calendar Synchronization via CalDAV Create and View Synchronization of Events Once you have enabled CalDAV Access in the CRM and configured the CalDAV account in your iOS device, the events you create in the CRM Calendar will synchronize with ...Managing Calendar in the CRM
Managing Calendar in the CRM Planning and scheduling is important when it comes to business events. A well conceived plan goes a long way in bringing positive results whereas, properly scheduled events can complement your planning.Businesses attend ...Calendar Booking
Calendar Booking Calendar booking comes in handy for the customer to book a meeting almost instantly. It allows customers to see when the support agents are available and enables them to schedule an event or call independently. For example, Travis ...CRM for Google Account Users
CRM for Google Account Users This feature is for the Google Account users. Google Apps Account users can refer to the CRM for Google Apps Users The CRM for Google makes it easier for your business to collaborate, communicate and share information, ...Setting Up Calendar Synchronization via CalDAV
Setting Up Calendar Synchronization via CalDAV Gone are the days when you had to log in to the CRM every time you wanted to check your work schedule for the day. You can now receive alerts about the next staff meeting on your iPhone or even your ...