Understanding Inventory Template Builder
Understanding Inventory Template Builder
Understanding the components of Template Builder
The template builder is made up of various components that can be dragged and dropped on to the template.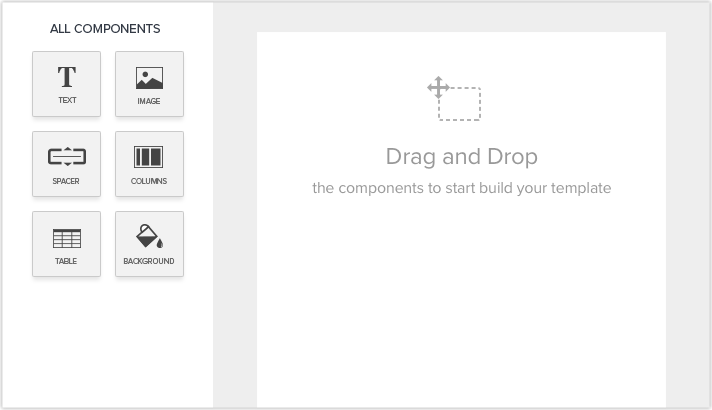
Header and Footer
Header and footer are available at the beginning and the end of the template. You can add them by clicking on the header or footer area and typing the required information.
By clicking on the Settings icon that appears when after you add the header or footer, you can choose if you want it to appear at the start and end of the document or whole of the document.
Using the footer option the page number of the template can be inserted. This helps in cases where the template contains many pages and helps customers keep track of the pages.
Text
When text has to be added to the template, the text components has to be dragged and dropped to the area where it is required.
The different types of text components that are available are two different heading component and one text component. The properties of these components can be changed based on your needs using the property bar that appears above the template when the component is clicked.
Image
This component is used for inserting images in the template. You can either upload an image from your computer or enter the image URL.
The three different options available for inserting images are:
- Single image
- Two images in a row
- Three images in a row
After you drag and drop the image component, when you hover the mouse on the component a Change button will appear.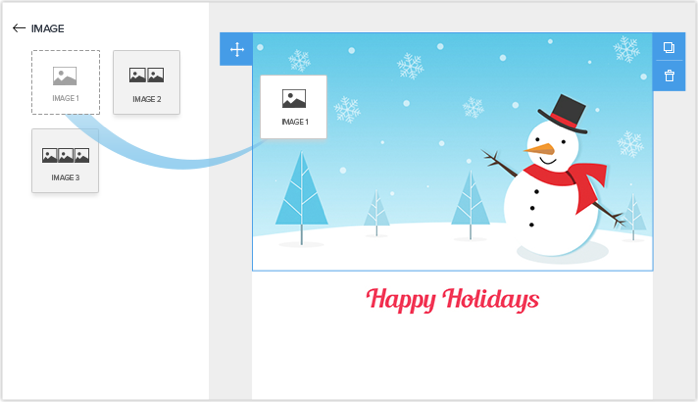
Click on it to insert the needed image.
Spacer
A spacer is used for improving the readability if the template. When you want to insert a blank space in the template you can make use of the spacer component.
The three default spacer components are ten, twenty and thirty point spacers. The spacer height can be adjusted by dragging the lower margin of the spacer component.
Columns
To make your template more visually appealing and to improve readability you may want to have columns in your template.
Five different column options are provided in the column component. You have columns that consist of two and three text component, one with three image components and two other components with combinations of image and text components.
Table
Product Table
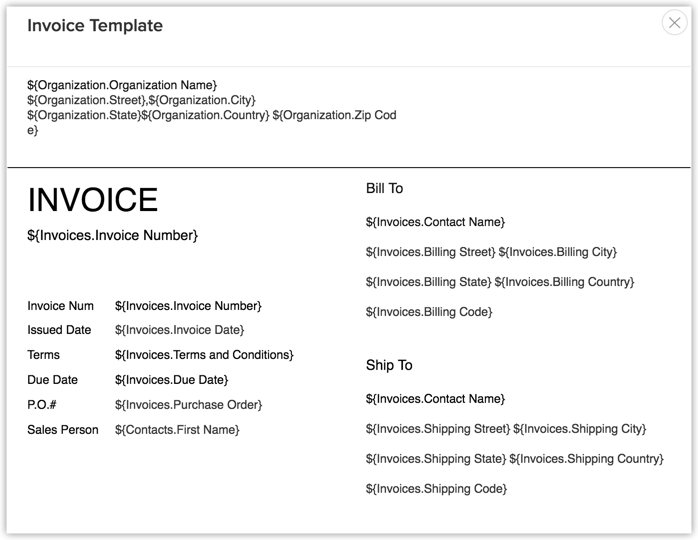
A predefined product table is already available in the table component, to which customisations that are needed can be made.
The product table is made up of the merge fields that retrieve the related data.The iteration will take place automatically within the product table. If the merge fields are used in a normal table, the iteration will not take place.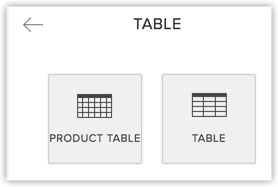
Inserting a table
To insert a table in your template, drag and drop the table component. This is a predefined component for creating a table from scratch. When you are creating a table from scratch, you have to provide the table property details beforehand. To create a table:
- Drag and drop the table component.
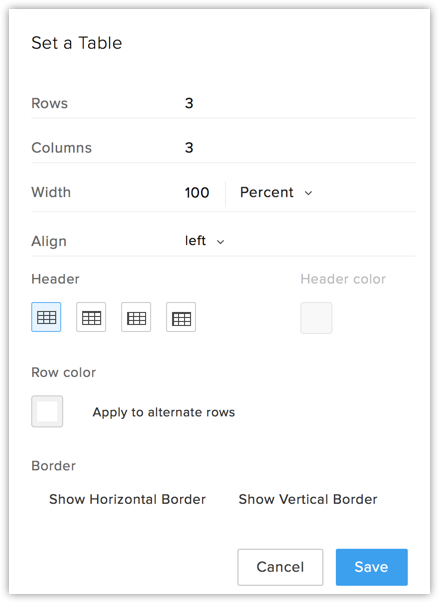
- In the Set a Table section:
- Enter the appropriate details for the rows, columns, width and alignment.
- Specify the header and the color of the header if needed.
- Choose what color the rows should be in and which borders of the table are required.

- Resize columns width for table is provided to either increase or decrease the column width by dragging the column border.
- Edit table rows and columns is enabled to add rows at top/bottom of any row and columns next/before of any column in an existing table.
Background
For making your template more visually appealing, you may want to add background colours to your template.
You can specify the inner colour of the template using the background component. By clicking on the inner colour component, you can choose the shade that you need from the colour palette. Alternately, you can select the colour by entering the colour hexcode in the colour palette.
Merge Fields
Merge fields are used in places where the value for that particular text keeps changing. For example, you want to add the organisation name in the inventory template. In such cases, the merge field retrieves data based on the value of the merge field.
For the list of merge fields to appear, type # in the text area and choose the merge field needed from the drop-down list.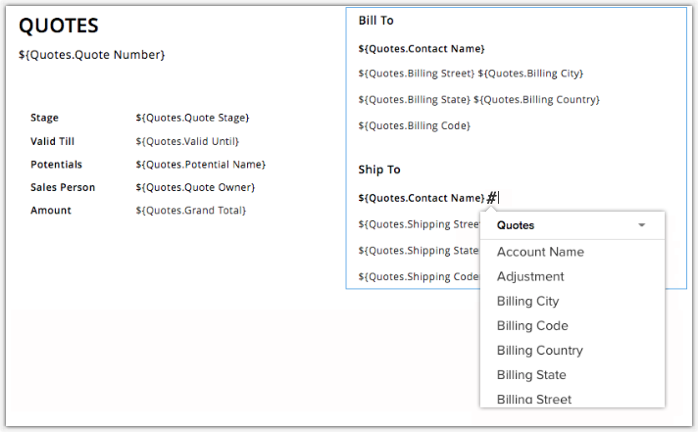
In case you want a specific merge field, for example the Account name to appear, type #Account and you will get the relevant merge field in the drop-down.
- Company logo is provided as a merge tag so that it can be easily inserted where ever needed.
Recognise Unsupported Merge Fields
Unsupported fields are those fields that no longer exist in the CRM for various reasons. If you try to create an inventory template with the merge field values of such unsupported fields, a popup prompts you to Remove Unsupported Merge Fields before you can save the template.
The list of unsupported merge fields are displayed in the popup window. If the CRM is unable to identify the exact merge field that is no longer supported, that field will simply be displayed as ${Unsupported_Field}.
Following are specific instances when merge fields get unsupported in the CRM.
Custom field deleted
If your inventory template continues to have the merge field value of a deleted field, it will be listed as an unsupported merge field.
Custom fields of a look-up module deleted
If your inventory template has a merge field inserted from a [Module] lookup and then the field gets deleted, it will be listed as an unsupported merge field.
That is, assume you have a Lead-lookup in the Potentials module. An inventory template you have created for the Potentials module includes a merge field value from the Leads module, populated via the look-up. Now if you delete that field from Leads, then it will be listed as an unsupported merge field.
Field not related to the selected module
If you have used a merge field that is not related to the module for which you are creating the template, then it will be listed as an unsupported merge field.
For example, if you insert the merge field value ${Leads.Lead Id} in an inventory template for the Potentials module, it will be listed as an unsupported merge field.
Integrations/Features disabled
When a feature or integration has been disabled for your account, the fields that were created as part of the integration will also not be available for the account post the deactivation. If a merge field value of such a field has been inserted in your inventory template, it will be listed as an unsupported merge field. This is applicable to the following features/integrations.
- Google Ads Integration - Google Ads fields that are no longer available due to deactivation will not be supported in the template.
- Visitor Tracking (SalesIQ Integration): Visitor Tracking fields that are no longer available due to deactivation will not be supported in the template.
Preview inventory templates
At times you may want to see how your template has turned out and for this purpose you can make use of the preview option.
- After creating or editing a template, click on Preview.

- In the preview page you can see the name of the template, the subject and how the template will appear when sent.
- Close the preview.
Related Articles
Understanding Email Template Builder
Understanding Email Template Builder Components of Template Builder Merge Fields Preview and test mail templates Components of Template Builder The template builder is made up of various components that can be dragged and dropped on to the template. ...Creating Inventory Templates
Creating Inventory Templates From the Scratch From the Template Gallery Inserting HTML Organize Inventory Template Using inventory templates With the the CRM - Inventory Templates functionality, you can customize the Quote, Purchase Order, Sales ...Inventory Management
Inventory Management The CRM extends beyond the traditional CRM functions and supports complete sales cycle management by integrating Inventory Management features. These include Products, Price Books, Vendors, Sales ...Understanding Email Bounces
Understanding Email Bounces What are bounces? Why has my email bounced? What is a hard bounce? What is a soft bounce? Will soft bounced email addresses be blocked permanently? My email to a valid email address has been marked as hard bounced. Why? ...Creating Canvas View
Creating Canvas View Design & Build Canvas View Manage, Edit and Create Additional Canvas View Replicate Canvas View In the CRM, you can create and swap the record views between List View and Kanban View as and when required. But, these views may not ...