Including Opt-in Checkbox in Web Forms for Consent
Including Opt-in Checkbox in Web Forms for Consent
You may already have some CRM web forms in use that are published in your website. You need to follow the steps given below to add a consent checkbox to those web form. The same steps can also be followed to include consent checkbox in a new form.
Step 1 - Create a Consent/Opt-in field in your CRM account.
First, create a checkbox type field that will store the consent information.
- Go to Setup > Customisation > Modules and Fields.
- Click the desired module and choose a layout.
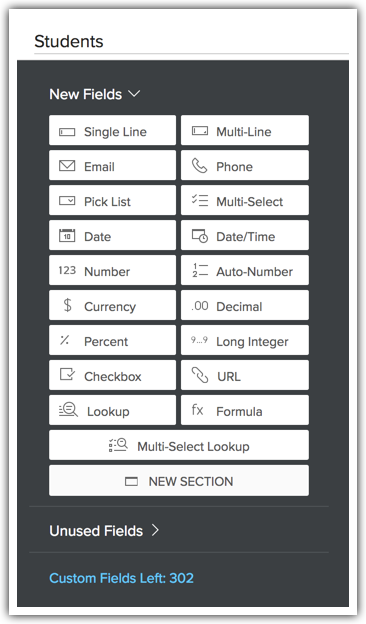
- From the New Fields Tray on the left, drag and drop the checkbox field type into the desired module section on the right.

- Name the field and define the Field Properties as required for the field.
- Click Save.
Step 2 - Include that field in your web form and generate the form's code.
Drag and drop fields to build a form and generate the code for the web form.
- Go to Setup > Developer Space> Webforms.
- In the Web Forms page, choose the Module from the drop-down list.
The existing web forms for the selected module will be listed. - Click Create Web Form or choose one of the existing forms to edit.
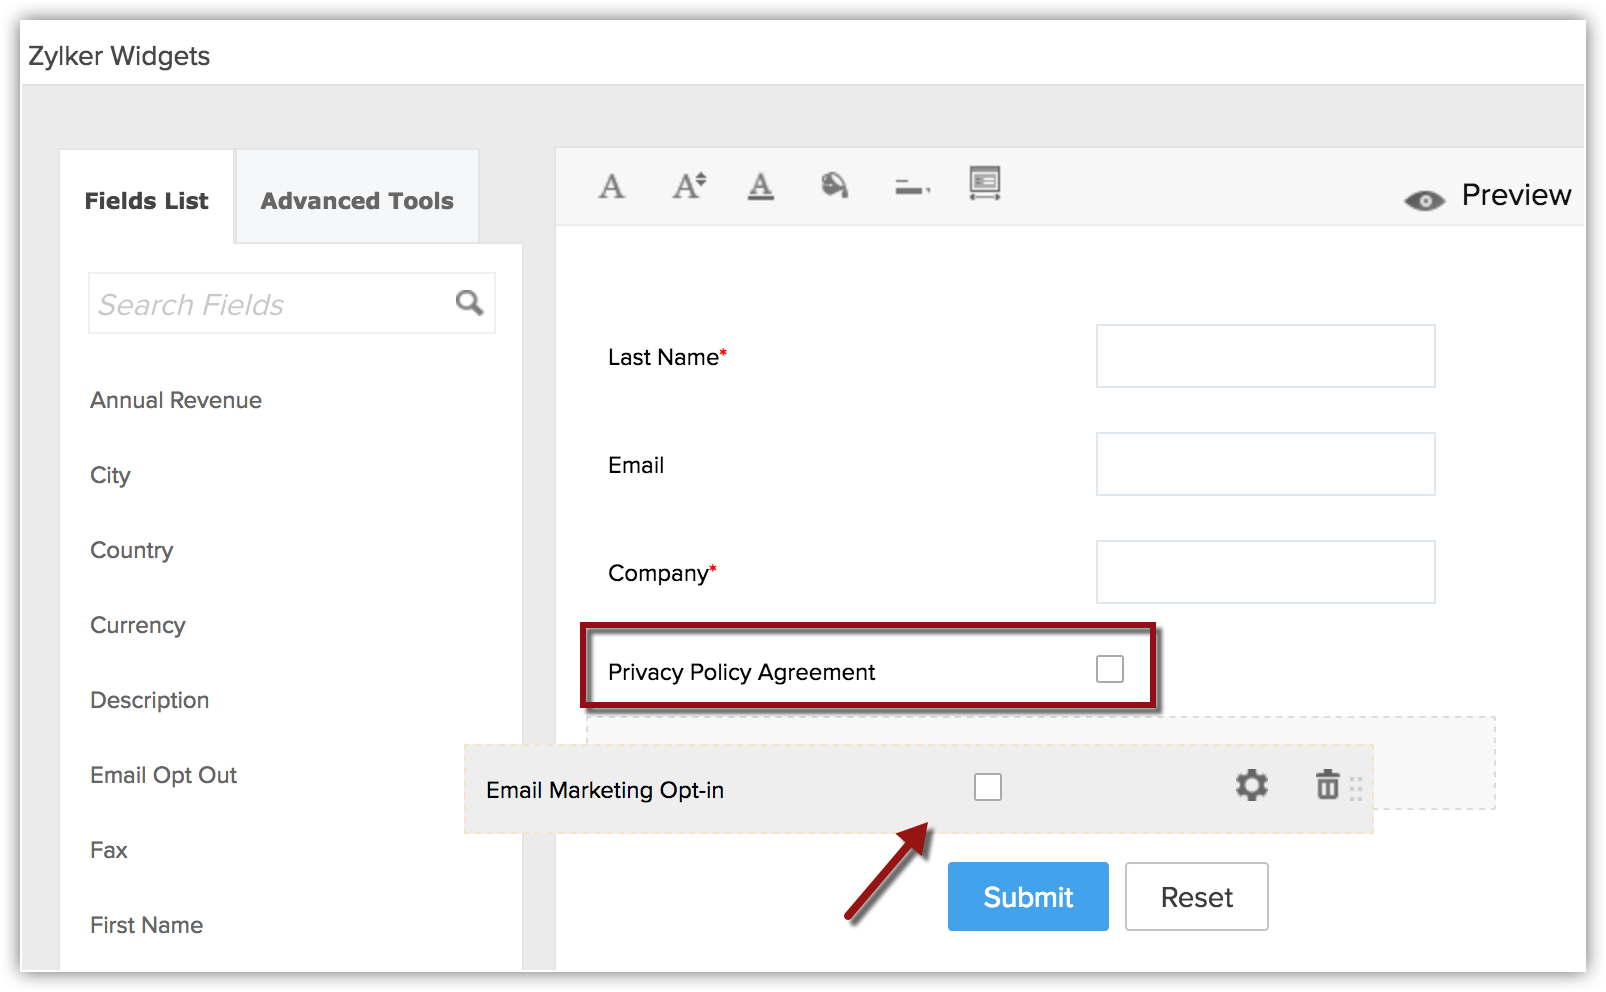
- Under the Fields List tab, click on the checkbox field that you created and drag & drop it in the form builder.

- Save the changes and generate the code.
- Copy the code to publish it in your website.
Step 3 - Publish the form in your web page.
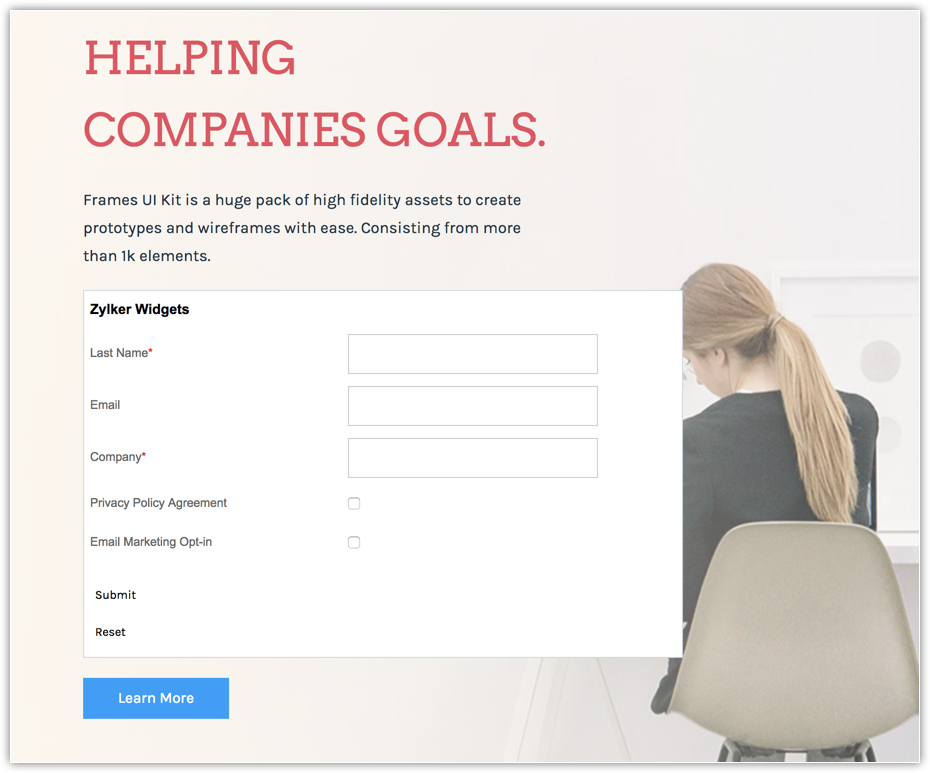
The final step is to use the new code for the web form and publish in the website. You can edit the text for the field in the form's HTML code but make sure the name value is not changed as this value is used to capture data from the web form and pass it on to the CRM.
Related Articles
Setting up Web Forms
Setting up Web Forms Creating a web form involves three steps Building the form - Drag and drop fields to build a form and format it easily with the WYSIWYG editor. Specifying the form details - Add details such as form name, landing page URL ...CRM Web Forms for Google Sites
CRM Web Forms for Google Sites Web forms simplify the process of capturing visitors' or users' information from the website into your CRM system. They are designed to automate importing of data from website into the CRM and to enable non-technical ...Consent Management
Consent Management Understanding Consent Management in the CRM Define Consent Settings Set Up Consent Form Add Consent Link in an Email Template View status of consent request Implement Consent Management for your Customers The CRM's consent ...Web Forms - An Introduction
Web Forms - An Introduction Web forms simplify the process of capturing visitors or users information from your website into your CRM system. They are designed to automate the importing of data from websites into the CRM. Non-technical users find it ...Managing Web Tabs
Managing Web Tabs Activate Web Tabs Create web tabs Access Creator applications in the CRM Delete Web Tabs Web tabs help you to open web pages like company-wide announcements, web applications, etc. inside the CRM. All the the CRM users across the ...