Importing Data to the CRM
Importing Data to the CRM
Data can be gathered through various sources such as, purchasing a record database, collecting from trade shows and campaigns, and so on. Importing records from such external sources to the CRM is one of the most important lead creation activities in any business. For that reason, importing should be easy and should help you maintain clean data without duplicates.
You can import your data using either of the two options mentioned below:
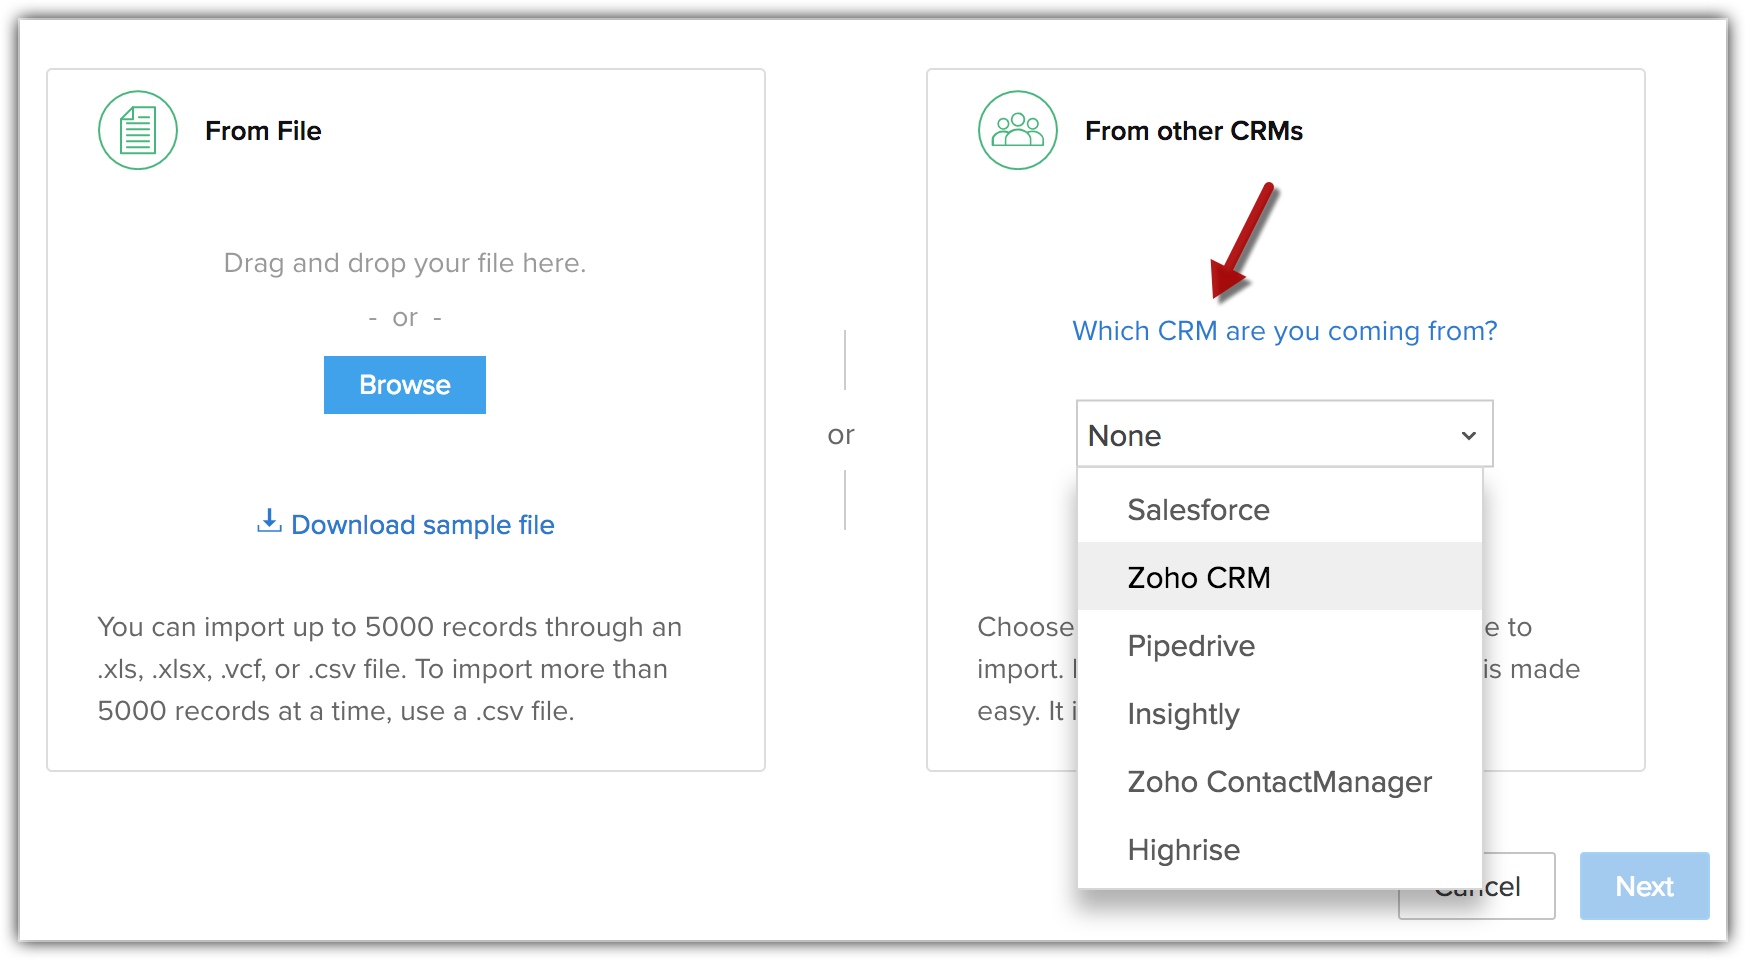
Importing data to individual modules in the CRM : Individual files can be imported, one at a time, to a specific module.
Importing or Migrating data from other CRM accounts to the CRM : The Data Migration wizard helps you to migrate data from other CRM systems to the CRM. The wizard enables you to attach the CSV file of the module to be migrated and set the supported Date and Time format in the import file to avoid values being ignored during the migration. You can also ask the CRM to notify you when the import is complete by selecting the Send Email Notification option. After the necessary details are specified, you will need to map all the mandatory fields in the CSV file with those in the CRM.
Import Checklist
Before importing the data, please go through the following checklist:
- PermissionMake sure you have the access and privilege to Import data. If you do not have this permission, the Import link will be hidden in your user interface.
- File FormatThe supported formats are Excel (XLS, XLSX), Comma Separated Value (CSV), and Business Card or vCard Format (VCF) . All file attachments should be separated from the data.Unexpected errors may occur if the XLS/XLSX files contain any special controls such as combo filters or images embedded in them.
- Characters not allowedAny data for the file to be imported should not contain the following characters:
- Double quotation marks(") use only as a field delimiter
- Vertical bar (|)
- Angle brackets (<>)
- Double quotation marks(") use only as a field delimiter
- Mandatory FieldsEach required (mandatory) field must contain a value. Make sure you do not leave any mandatory fields blank, in the import file. For instance, when you are importing account information, each account record must include an Account Name . Please note that you cannot proceed to the next step without mapping the mandatory fields.
- Check ox DataMake sure that the data you plan to import from Boolean or check box fields contain values that will properly convert during the import process.Imported data from Boolean and check box fields are converted as follows:
- If check box is selected: True or 1
- If check box is not selected: False or 0
- If check box is selected: True or 1
- Drop-down ListAll data values displayed in the drop-down lists must exist in the corresponding the CRM fields.For instance, if you plan to import account information that contains a value for the industry type drop-down list, before you import the account information, make sure all the industry values in the source file already appear in the drop-down list. If the values do not exist, you must either change the values in the source file to match the existing values in the CRM, or have your administrator add the new values.If values are not added in the drop-down list, data can still be imported. After importing, if you change the value for the field, you cannot change it back to the old one as it will not be available in the list.
- Field NamesMake sure the first row of data (records) in the source file contains the column headings or field names rather than the actual data values. These heading field name values help identify the data when you map the new data to the existing fields in the CRM.
- Blank rows in the import fileMore than 10 blank rows in the file might indicate the end of the file. Data after the blank rows will be ignored during import. Make sure not to leave blank rows in between rows of data.
- File SizeMake sure the file size does not exceed the following limits according to your edition of the CRM:CSV files - Enterprise - 25 MB , Professional and Standard - 10 MB , Free - 5 MB .VCF files - 5 MB for all editions.
The modules along with their defined mandatory fields are described in the table below. Please make sure to map these fields when you import. There maybe other mandatory fields in each module too, but you can always customise and mark the fields as non-mandatory, if required.
| Modules | Mandatory Fields | Modules | Mandatory Fields |
| Leads | Last | Cases | Case Origin Subject Status |
| Accounts | Account Name | Solutions | Solution Title |
| Contacts | Last Name | Price Books | Price Book Name |
| Deals | Deal Name Date Closing Date | Products | Product Name |
| Campaigns | Campaign Name | Vendors | Vendor Name |

- Using the Import feature, you cannot import activities, reports, invoices, quotes, purchase orders, forecasts, sales orders, and templates into the CRM.
- However, you can import events in ICS format from Calendar.
Import Limits
If the import file is in XLS, XLSX or VCF format, you can import a maximum of 5000 records/batch. Records more than 5000 can be imported in CSV format.
- The supported formats are Excel (XLS, XLSX), Comma Separated Value (CSV) and Business Card or vCard Format (VCF) .
- If your records exceed the specified limits mentioned above then you can split the records in two or more files and import them.
Import Data to a Module
Import all the records that are owned by (assigned to) the users in your organisation, including the records owned by you.
To import data
- Click the appropriate [Module] tab (e.g., Leads, Contacts, Accounts, etc).
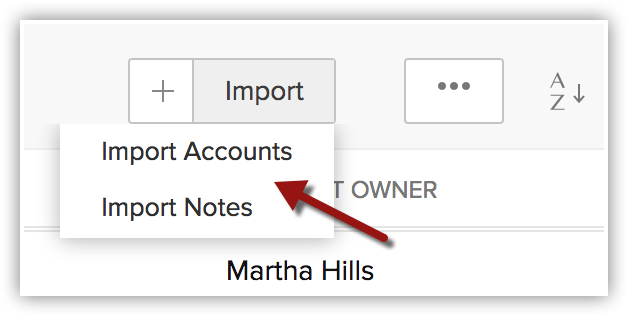
- In the [Module] Home page, click Import [Records] .
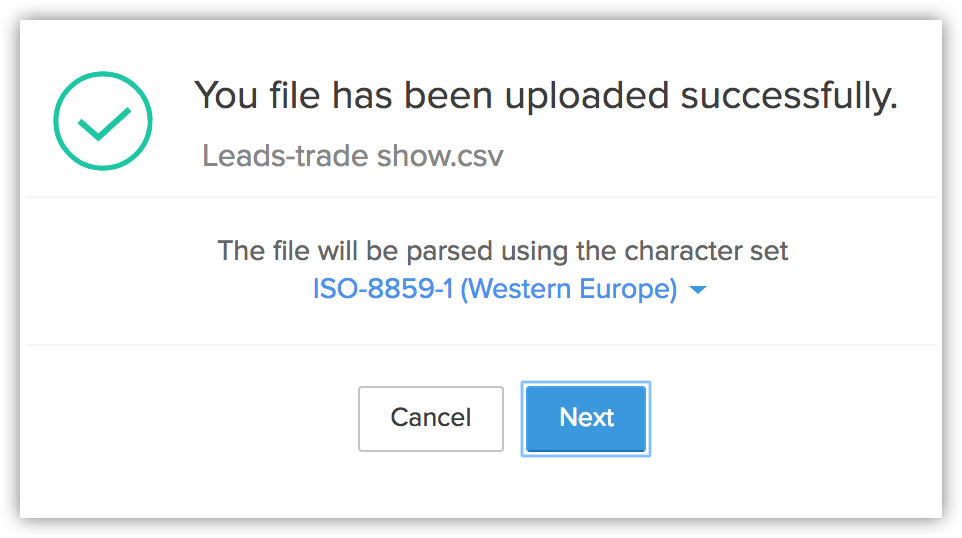
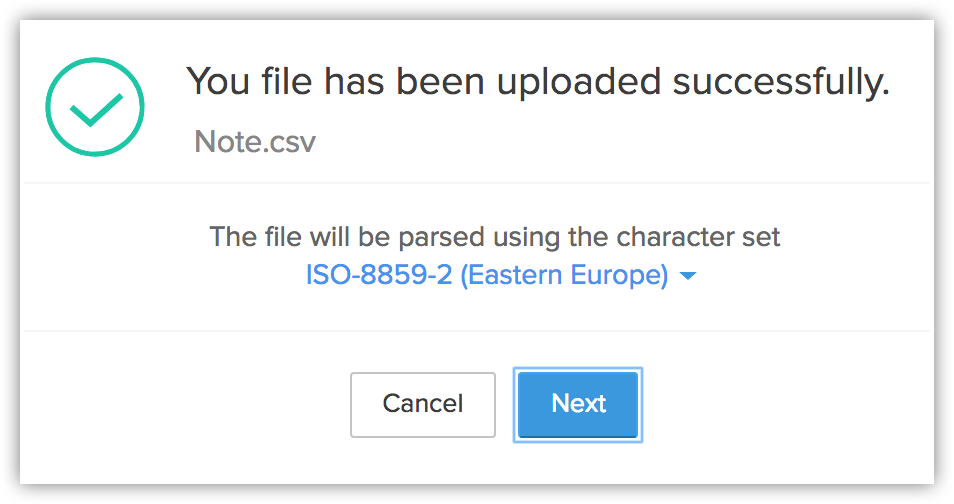
- Click Browse or Drag and drop, to upload a file.The character encoding will be automatically detected.
- If needed, change the character encoding from the drop-down list and click Next .
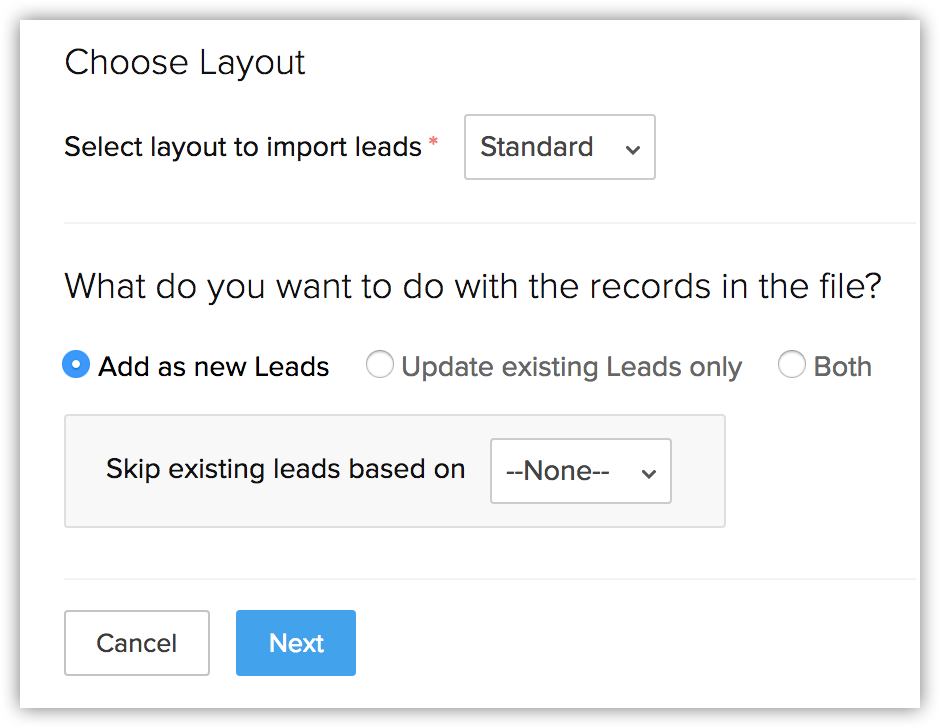
- Select the Layout into which you want to import the records.If you do not have a layout created, the records will be imported to the standard layout and the option to choose a layout will not be available.
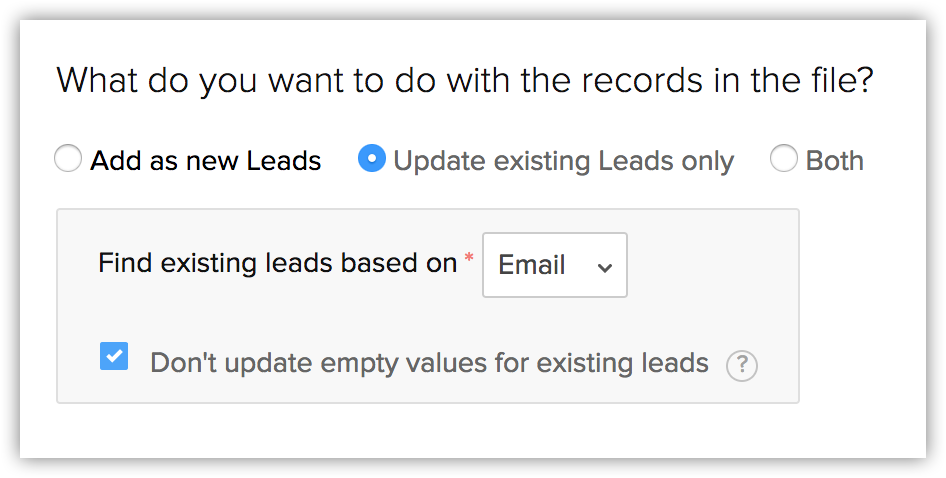
- Select one of the following options.
- Add as new [Records] : Choose this option to import all the records in the import file to the CRM.Select Record ID or Email / Record Name from the drop-down list. In order to avoid data duplication, you have this additional option to skip records from the file that match existing records in the CRM. These can be filtered based on record ID, name or email address, as per the module.
- Update existing [Records] only : Choose this option to make changes only to the existing records.Select Record ID or Email / Record Name from the drop-down list to find existing records that match those in the import file. This option helps you filter existing records that need to be updated. Additionally, you can choose to skip updating empty values in the records. For example: Say your CRM record has a value, Hospitality, for the field Industry and the import file does not have any value for the same field. When you import the data from the file and choose Skip updating empty values, then the empty value will not be overwritten and the Industry field value will be left unchanged. This will avoid the chance of any data loss.
- Both : Choose this option to add new records as well as update the changes in the existing records.Select Record ID or Email / Record Name from the drop-down list to find existing records that match those in the import file. You have this option to filter existing records that needs to be updated. You can also choose to skip updating empty values from your import file to the records in the CRM.
- Click Next .
- Map fields from the import file to those in the CRM.
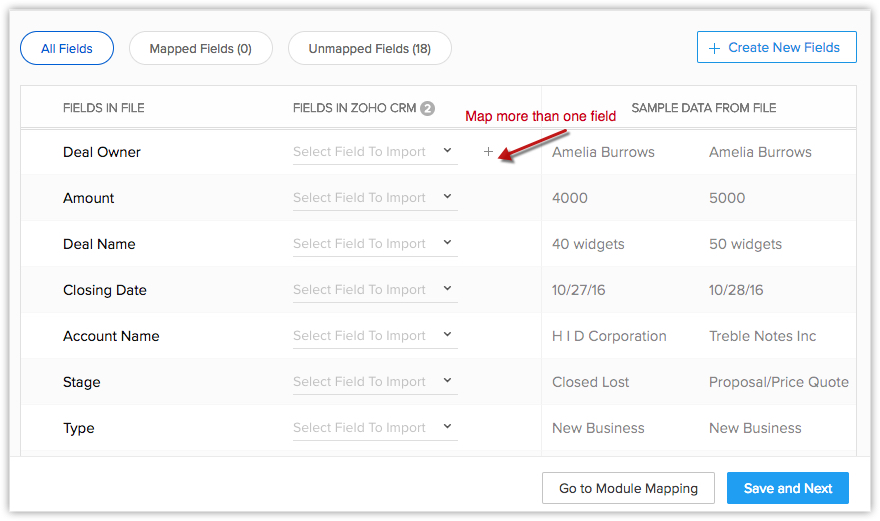 The data from the first three columns in the import file will be available. Based on these data, formats for a certain field will be added. This format can be edited, if required.
- Click Create New Fields , if you are in need of custom fields that are not already available in your CRM account.
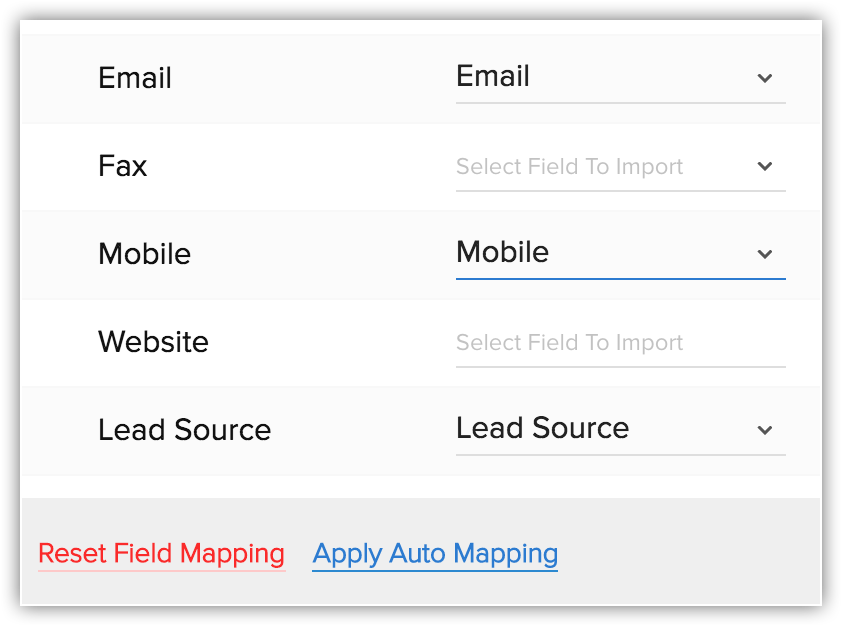
- Click Mapped and Unmapped to view the columns that are mapped and not mapped respectively with the fields in the CRM.
- Click the Reset Field Mapping link to start mapping from scratch.Any mapping you have done so far will be removed and you can start over.
- Click the Apply Auto Mapping link to let CRM map the import columns with matching fields.The system will identify columns that match the CRM fields and map them automatically.
- Click Create New Fields , if you are in need of custom fields that are not already available in your CRM account.
- Click Next .
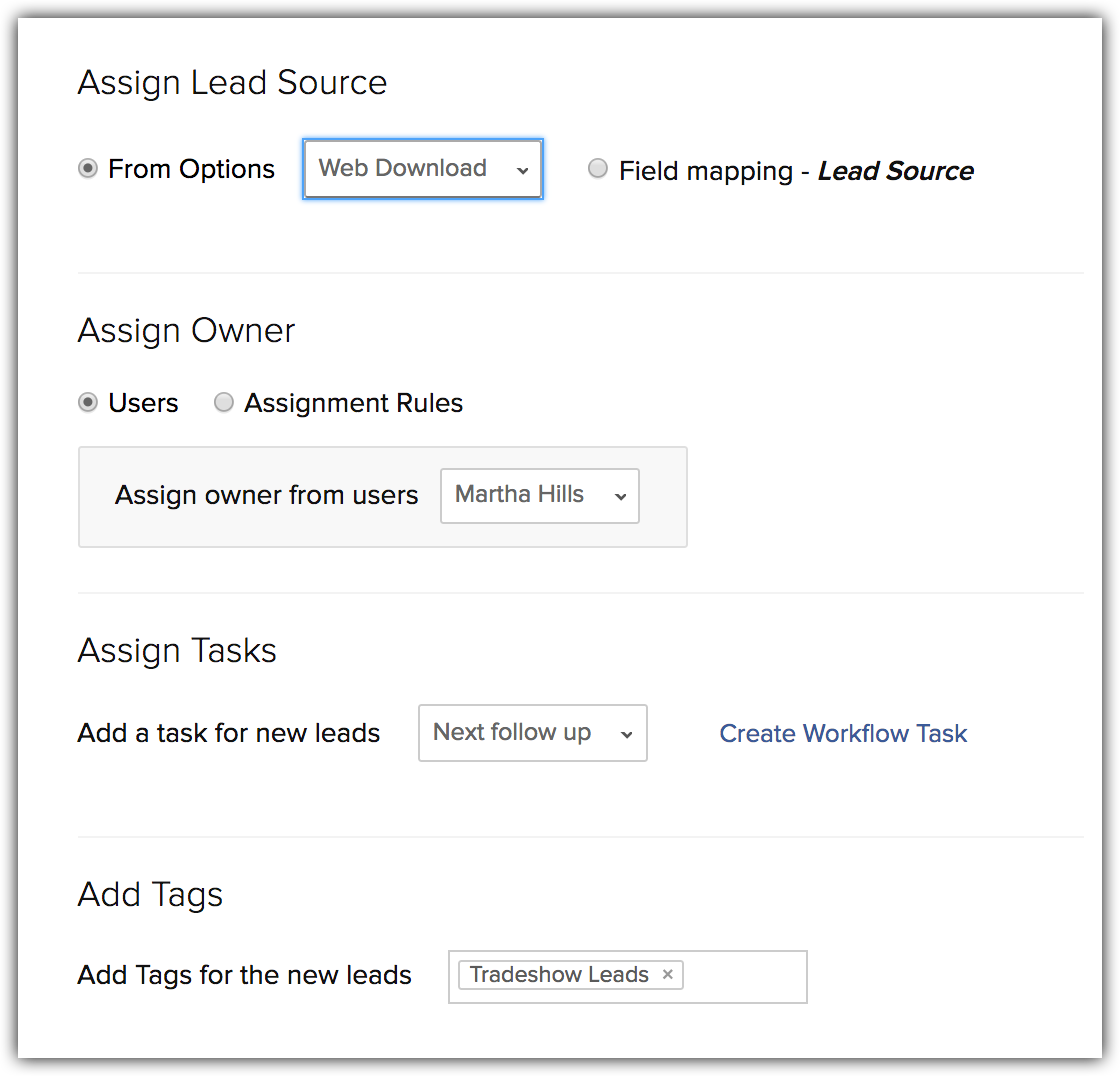
- Choose one of the following toassign the lead source :This option is available only for the Leads module and only if you have mapped the Lead Source field. If the field is not mapped, you will get to choose one the CRM lead source value from the drop-down list.
- From options : Values from the Lead Source picklist field are listed. You can select one value and it will be applied to all the records that are imported.
- Field mapping : Your import file may have a column that mentions the lead source. You can map that column with the CRM field and choose this option to use the values from the import file as the source.
- From options : Values from the Lead Source picklist field are listed. You can select one value and it will be applied to all the records that are imported.
- Choose one of the following toAssign Owner :
- User : Choose a user from the drop-down list to assign a single owner for all the records that you import.
- Assignment Rules : Choose an assignment rule from the drop-down list to assign users based on the rule or create a new assignment rule.
- File mapping : This option will be available only when the [Record] Owner field is mapped to a column from the file. You can map either using Record ID or Email. The import file should have a column that contains the exact email address(es) of the user(s) to whom you want to assign each record. Only then will the records automatically be assigned to the respective users while importing.
- User : Choose a user from the drop-down list to assign a single owner for all the records that you import.
- Choose a task from the drop-down list or create a workflow task to assign tasks .The existing workflow tasks will be available in the list.
- Add relevant Tags , if applicable, from the list of existing tags for the module.The chosen tag will be added to all of the records that are imported.
- Select the checkbox to Enable Manual Lead Approval .The records will be manually approved by the admin before being assigned to specific users. This option is available only for Leads, Contacts, Cases and custom modules.
- Click Finish .The import action will be initiated.
- Select the [Module ID] from the Find existing using field, if and only if you are re-importing the records that were exported from the CRM. The [Module ID] field is generated by the CRM and is therefore unique to the CRM. Hence, it is ideal to choose this as a unique field in cases when you want to export a set of records from the CRM to a spreadsheet, make some changes to it and import the records again. In this case, when you choose the [Module ID] as the unique field and choose to update the existing records, the matching records are seamlessly updated. Choosing the [Module ID] as a unique field in any other case may cause duplication of records.
- The unique fields are not case sensitive. That is, if the unique field's value in the import file is "ABC" and in the existing record, it is "abc", the CRM will still identify this as a match.
- Once the Import process begins, you cannot cancel it.
- The manual approval option is available only while importing leads.
- If you select a workflow task while importing, the Notify Assignee option in the selected workflow task, will not be applicable.
- During field mapping, you can choose to map more than one CRM field to the import field. Say for example, if the created and modified by are same you can map both these CRM fields to the Created by ID.

Import Notes
Many a time, you may face the need to write down notes for a lot of records at the same time. Sometimes the same note may need to be associated with multiple records. Instead of adding notes one at a time to each record, you can import them and get them associated with relevant contacts.
You can overcome this hassle by using the Import Notes feature offered by the CRM. Simply export your existing records to a spreadsheet, add your notes in new columns and import the notes.
To import notes
- Prepare your spreadsheet (either exported from CRM or a new sheet) with your notes for each record. Make sure you have the Note Title and Note Content columns in your sheet. Apart from these two columns, the spreadsheet must have a column for one of the unique fields for the chosen module - Email, Record ID or any other unique field.
- In your CRM account, click the required module.
- Click the [Module] tab .Module refers to the tabs like Leads, Contacts, Accounts, etc.
- In the [Module] Home page, click Import Notes .
- Browse the import file and upload it.
- When the file is uploaded, click Next .
- Map fields from the import file to those in the CRM.The data from the first three columns in the import file will be available. Based on this data, formats for certain field will be added. This format can be edited, if required.
- Click Mapped and Unmapped to view the columns that are mapped and not mapped respectively with the fields in the CRM.
- Select the Reset mapped fields checkbox to start mapping from scratch.
- Click the Apply Auto Mapping link to let CRM map the import columns with matching fields.
- Click Mapped and Unmapped to view the columns that are mapped and not mapped respectively with the fields in the CRM.
- Click Import .The import action will be initiated. Notes can be seen in the respective record's details page.

- The following permissions should be enabled in a user's profile to import notes:Create permission for Notes under Module Level Permissions .
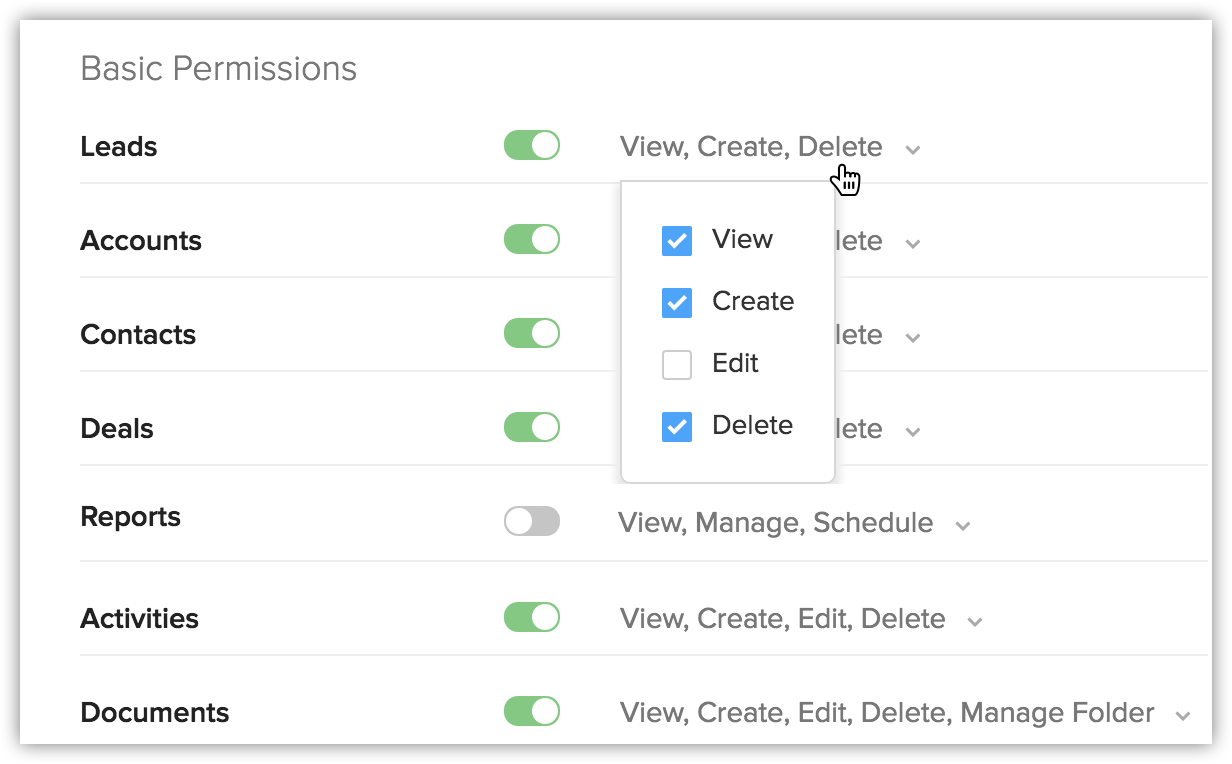
- ImportPermissions enabled for the respective parent module in Profiles .For example, even if a user has Notes creation permission but does not have Import permissions for Leads, he/she will not be able to import notes for leads.
Related Articles
Importing Contacts from G Suite
Importing Contacts from G Suite The Import Contacts feature helps you import contacts from G Suite to the CRM. It gives you the advantage of accessing your Google contacts from the CRM, without having to sign in to your Google account, every time you ...Data Privacy
Data Privacy View Data Source View Personal Fields Manage Data Processing Bases A record's details are available in two sections - Info and Timeline. When you switch on GDPR Compliance in your CRM account, you will be able to view another section, ...Migrating Data from Salesforce
Migrating Data from Salesforce Data files from Salesforce Modules Mapping Migrate data Follow the steps in this document to migrate your Salesforce data into the CRM. Data files from Salesforce The zip file you upload should contain all the files in ...CRM Terminologies
Know CRM Terminologies In any business environment, there are terms such as Leads, Deals, Campaigns, Invoices, etc. Following are the list of such terms and their definitions as used in the CRM. You can refer to more such terms in the CRM's Glossary. ...Data Migration - An Introduction
Data Migration - An Introduction Migrate Options Before you migrate Migration checklist The Data Migration wizard in the CRM ensures that your data is migrated accurately and helps you reduce much of the manual work. It automatically maps import ...