Creating Kanban Views
Creating Kanban Views
Kanban view is a card-based view that displays the data in an organised manner for better comprehension. For example, you can segregate the leads based on their status or categorise the sales depending on different stages. This sort of information gives better insights about the potential bottlenecks and lets you fix them effectively.
Below is an instance, where the leads are listed down based on their current state along with their probable revenues. The information is displayed in two ways: List View and Kanban View.
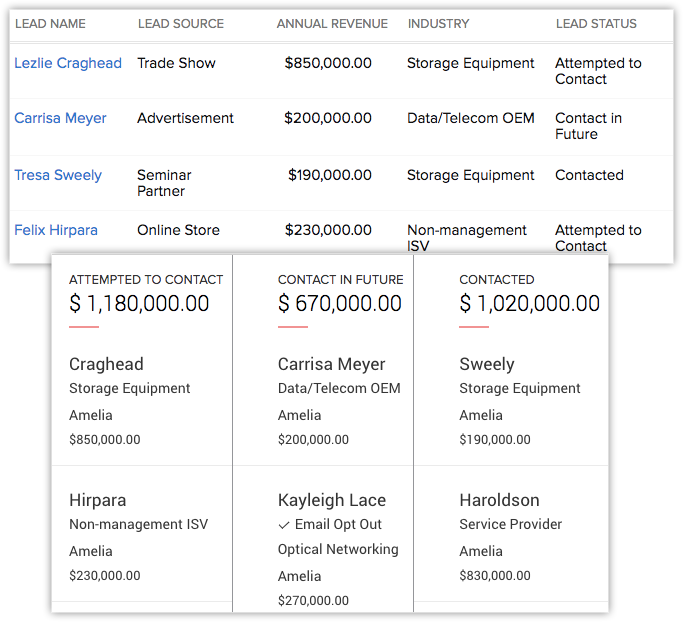
As you see, in comparison to List View where all the records are listed one after the other; Kanban view straight away segregates your data based upon the lead status. Also the revenue stack for each status is aggregated accordingly. Thus, Kanban view presents your CRM data in a more productive manner. In the CRM, you can create such Kanban views for all modules except Activities, Visits, Finances. There are two types of Kanban views in the CRM: Pre-defined and Customisable.
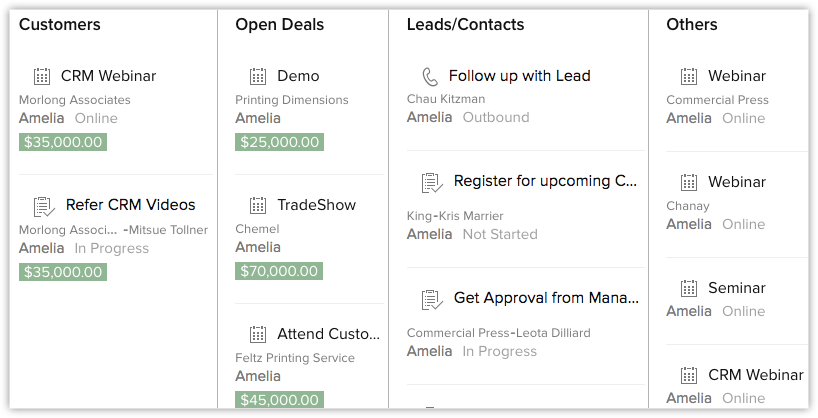
A) Pre-defined – Pre-defined Kanban views are available for Activities, Social, Visits, Deals and SalesInbox. Below is the CRM view for Activities module that is categorised based on Customers, Open Deals, Leads/Contacts and Others.
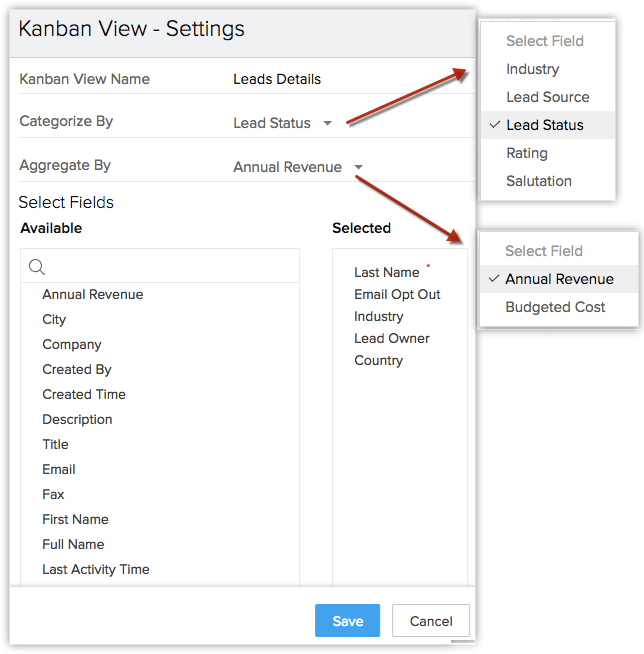
B) Customisable – You can create a customised Kanban view for any module. To create a Kanban view you have to enter the following details:
- Kanban View name - You can enter any name for the Kanban view created, for example, "Lead Details".
- Categorise by - Select the category in which you want to segregate the data, for example "Lead Status".
- Aggregate by - Select a currency or number field for which you want the aggregated value. For example "Expected revenue/Number of user licenses". A summed up value for each category will be displayed.
- Select Fields - Select the fields that you want to view within each record.
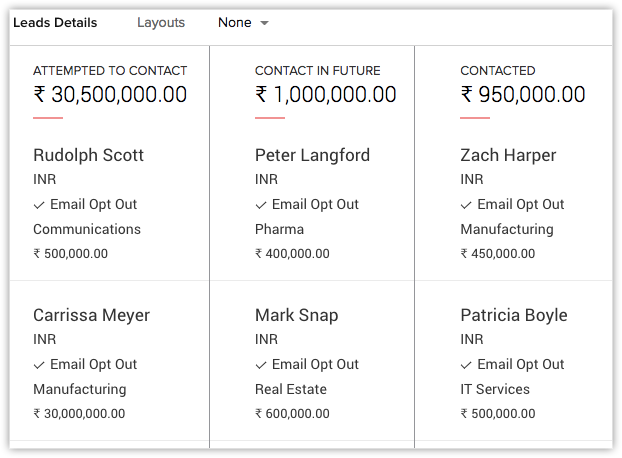
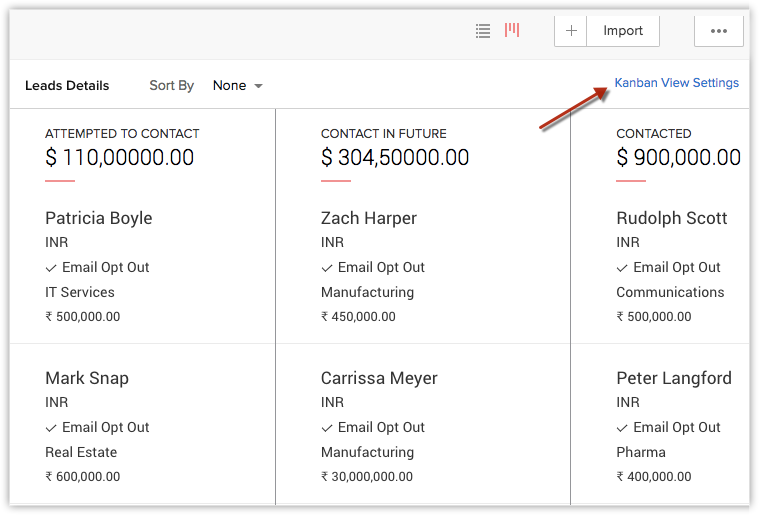
Below is a Kanban view for the Leads module, here the records are arranged into columns and each lead displays a few related information. The leads are categorised based on three different statuses: attempted to contact, contact in future and contacted. Further, you can view the fields like, industry and annual revenue of each of the leads. The aggregated revenue from the leads is displayed at the top of the respective columns.
Users with the Module Customisation permission can access this feature.
Create a Kanban View
Creating a Kanban view will give you precise information about all the records at one click. You can create a Kanban view for all the modules except activities, visits and finances.
To create Kanban view
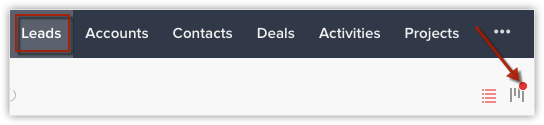
- In the CRM, go to a Module.
- In the Module page, click the Kanban View icon.
- In the Kanban View Settings pop-up, fill the following details:
a) Kanban View Name
b) Categorised By
c) Aggregate By
d) Select Fields - Click Save.
Edit Kanban Settings
After you create Kanban view for a module, you can either add or delete the information based on your requirement.
To edit the Kanban settings
- In the Modules page, click Kanban View Settings.
- In the pop-up, edit the details.
- Click Save.

- The Kanban view settings option is enabled only if the picklist fields are available in the selected module.
- Edit Kanban view option is available only for users who have Manage Custom View enabled in their profiles.
Working with Kanban View
In addition to viewing the record details in an organised manner you can perform several other operations from the Kanban view. Let us take a look at each of them:
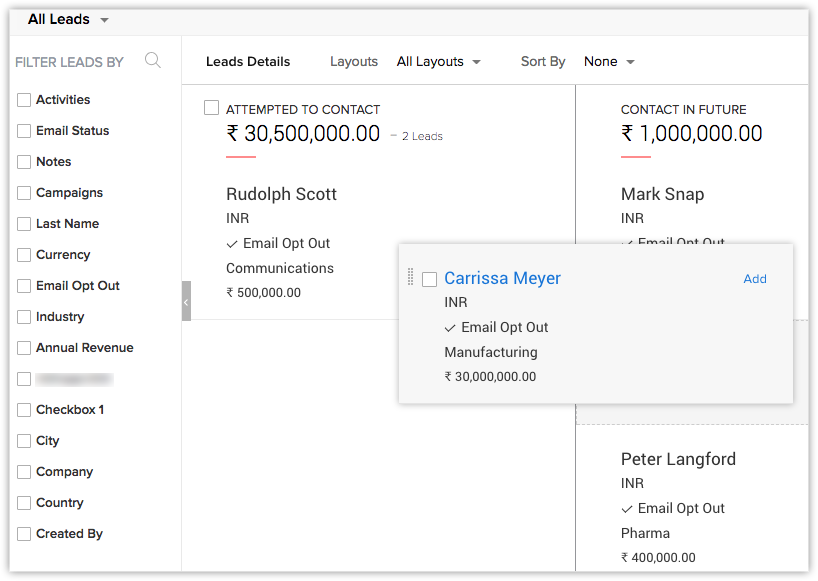
- Drag and Drop - You can drag and drop a record from one column to another based on the requirement. For instance, a lead listed under "attempted to contact" has declined the present offer and you want to keep them in pipeline for future reference. So, instead of editing the record and changing the status you can simply drag and drop the record to the desired column to automatically change the status. Also, the aggregated value of the respective column will get updated.
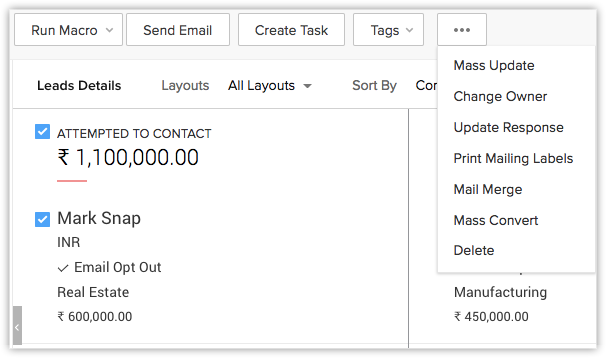
- Mass Operations - You can send mass emails, create tasks, create macros and so on. From the More Actions icon, you can change owner, mass update a field, mass convert the leads or delete leads.
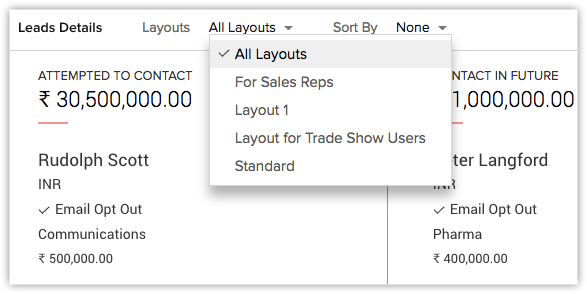
- Select a Layout - A user can select a layout in which they want to view the module.
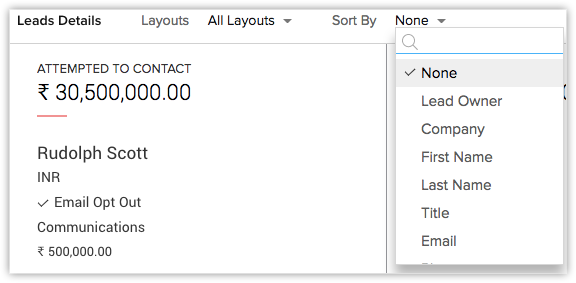
- Sort Records - A user can sort the records based on the fields they want to view like company, first name, last name, lead owner and so on.
Related Articles
Creating Canvas View
Creating Canvas View Design & Build Canvas View Manage, Edit and Create Additional Canvas View Replicate Canvas View In the CRM, you can create and swap the record views between List View and Kanban View as and when required. But, these views may not ...Module Views - An Overview
Module Views - An Overview Module views give you ways to sort, categorise, and view your records. they help you prioritise your tasks by viewing only those records that you need the most. In the CRM, you can choose to view the records in three ...Creating Conditional Layouts
Creating Conditional Layouts How to Create a Conditional Layout Points to Remember Conditional layouts in the CRM offer an interface for you to seamlessly manage dependency between fields in a layout. Your sales data are often interdependent. ...Managing List Views
Managing List Views Standard List Views Create Custom List Views Select All Records in a Custom List View Edit Criteria Patterns Use Last Activity Time in Criteria Clone Custom List View Edit Standard List View Sort Records in List View Delete Custom ...Creating Profiles
Creating Profiles Profiles in CRM help you define permissions for a set of users. For instance, the permissions required for a person from Sales team might differ from the permissions required by a person in the Marketing team. You can define the ...