- Mention the Name and the Subject of the template.
- Save the template to the appropriate folder.
- You can then proceed to customise the template using the template builder.
Choose a Pre-designed Template
To make the creation of templates easier, pre-designed templates are provided in the template gallery. You can choose any template from the list that fits your needs and customise it using the drag and drop editor. You can preview the template before selecting it.
Inserting HTML
- In the CRM, go to Setup > Customisation > Template.
- In the Template Gallery click on the Insert HTML code / Plain text link.
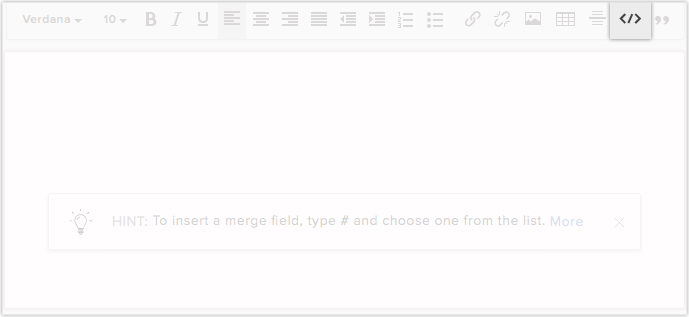
- Click on the HTML icon, paste your HTML code and click Insert.
- Click Save.
Sample Email Template
Below is a sample email template that shows how the merge fields retrieve relevant data.
Dear ${Leads.Salutation} ${Leads.First Name} ${Leads.Last Name},
Thank you for your interest in the CRM.
We welcome your suggestions and comments in improving the product further.
Sincerely,
${User.First Name}
Email Output
Dear Mr. Larry King,
Thank you for your interest in the CRM.
We welcome your suggestions and comments in improving the product further.
Sincerely,
ConstructionBos

Note
- You can create a template with a maximum of 200,000 characters.
- You can give a link to your video in your email template. You cannot embed the video in the template itself.
- Email Templates are Record specific. It is created for a specific record type. For example, you can create a template for leads or contacts. When you send emails to leads, only the templates created for lead records will be available. Likewise, if you are creating an email template for sending emails to leads, do not merge the contact-related fields and vice versa.
- You can add attachments in the template by clicking on the attachment button and inserting them. You can attach a maximum of 10 files and the total size limit is 3MB.
- The maximum length of the template name is 75 characters.
- The maximum length of the subject is 150 characters.
Organise Email Templates
Organise your email templates by sorting them into template folders. Preview your email templates before you save them and also view template analytics to see which ones have had better reach.
Preview Email Templates
You can view the preview and the analytics of the template on the list page itself, making it easier for you to view one template after another. With this, you can get an idea of how the template looks and how well it is performing, helping you in deciding if any improvements have to be made.
Delete and move templates
At times you may want to delete templates that are not used much, templates that underperform and junk templates. You can delete a template by selecting it and clicking on the Delete button.
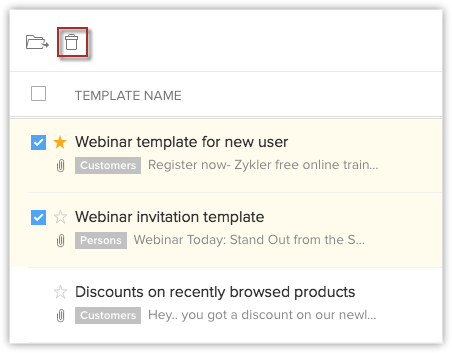
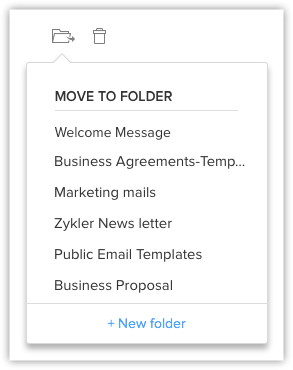
You can move a template from one folder to another. This will be helpful in instances where you have to share a few templates with someone. You can move the needed templates to a folder and share. This can be done by selecting it, clicking on the Move to Folder button and choosing the appropriate folder form the drop-down list. You can also create a new folder and move the template to it if you want.
View Template Analytics
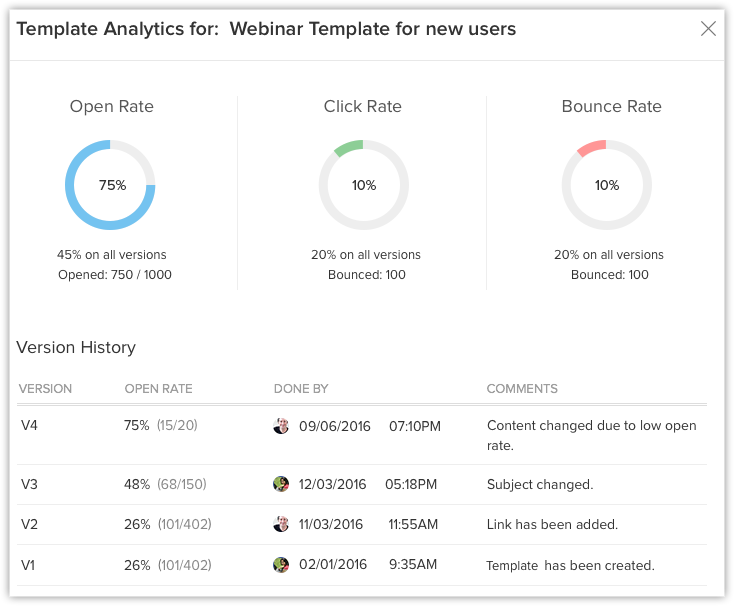
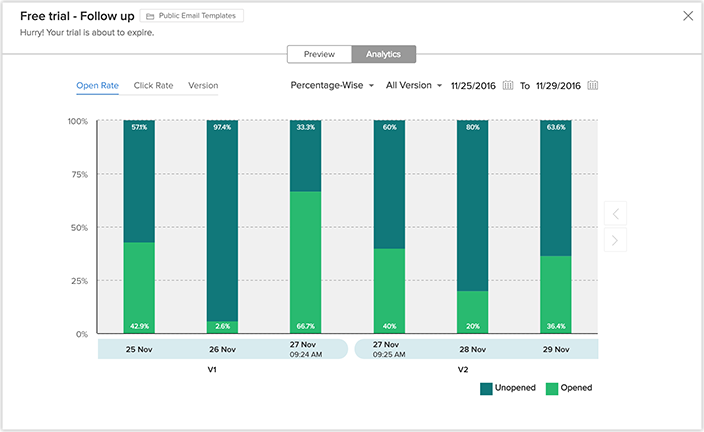
With template analysis you can get to know about the performance of each template. Whenever changes are made to the template, it is considered as a new version of the template. This lets you analyse how each version of the template has performed and gives you an idea of how well the implemented changes have been accepted.
- Go to Setup > Customisation >Templates > Email.
Click on the required email template and select the Analytics tab or you can click on the open rate under the stats column. A graph with the template statistics will be shown.
You can toggle between:
- Open Rate: Opened rate is the percentage that tells you many times the email containing the template has been opened by the customers.
- Click Rate: Clicked rate is the percentage that tells you how many clicks were registered by the customers for that particular email containing the template.
- Version: The Version tab gives you a list of when a template was modified and by whom. Click on it to view a summary of the template with details such as different versions, open rate, click rate, when it was done and by whom.
- You can choose to view the graph based on the Percentage, Count or Version from the drop-down list.
- You can choose if you want a specific version or all versions to appear on the graph.
- You can define the range of dates for which the data should appear on the graph.
Sort and Search Email Templates
Sorting makes it easier for you to access the templates that you need, by bringing them to the top of the list. For example, you can sort the templates in such a way that the most used templates appear at the top of the list. In the CRM you cannot only sort templates, you can also search for templates.
- You have two options for sorting templates based on time.
To sort it based on the last use time, click on the Last Used column. With the help of the Last Used column you can get to know which templates are used the most.
To sort the template based on the modified time click on the Modified Time column.
You can also search and filter templates based on your needs.
- You can search for a template by its name with the help of the search bar provided.
- Choose the module from the drop-down list to display the templates related to that particular module.
Clone Email Templates
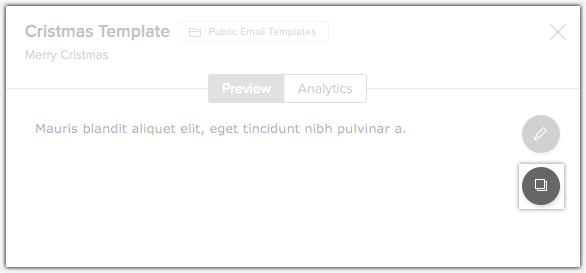
At times, there might be slight changes that have to be made to the content of an existing template, before sending them to a customer. Rather than having to go through the trouble of creating a whole new template, you can clone the old template, make the necessary changes and send it. To clone a template, select the template and click the clone button that appears on the preview section of the template.
Marking Favourites
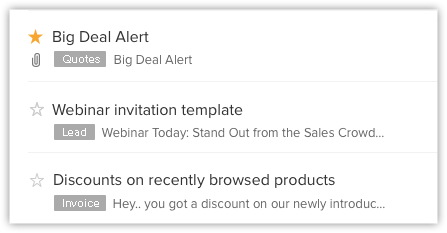
You may have templates you frequently use and might want those to appear at the top of the list at places where you select templates. For this purpose you have the option of setting templates as favourite by clicking on the star that appears before the template name.
Associated Templates
At times some templates will be associated with other CRM functions like Workflow, Case Escalation, Macro etc. In these instances, you can view the functions with which the template is associated by clicking on the button that appears at the end of the template details.

You cannot delete a template that is associated with other functions directly. In case you want to delete it, you have to remove the template from all the places it is associated and then delete it.
Working With Template Folders
With template folders you can group similar templates together. When you have a large number of templates, searching for them can become exhausting. By grouping similar templates together, you can easily access them in a single place.
Create a New Folder
By creating a new folder, you can categorise the templates by adding similar templates to the folder. You can create a folder only when you want to save a template or move templates from one folder to another.
- Create a new template.
- Click on Save.
- While saving the template, you will be asked to save it to a folder. To create a folder, click on + New Folder.
- Enter the name of the new folder and choose with whom the folder should be shared.
You can choose to share it with all users, specific users or just yourself.
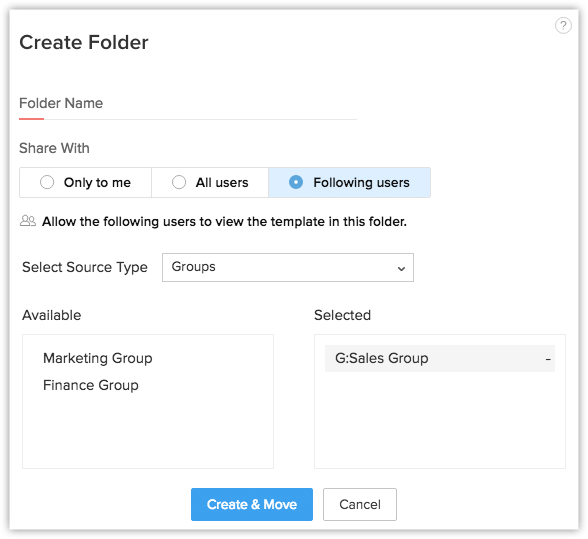
- A new folder will be created and the template will get added to it automatically.
 Note
Note- If you want to create a folder when moving templates, click on the + New Folder after creating the template and enter the folder details and click Create.
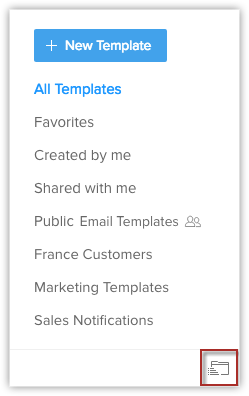
- You have default folders in Email Templates like All Templates, Favorites, Associated Templates, Created by me and Shared with me.
These folders cannot be deleted or customised.
Share Template Folders
You can share template folders with other users when needed. When you want to share only specific templates, you can add them to a folder and share them. This might be helpful in cases where the user does not have permission to create templates, but has to send them to customers.
- Click on the more options that appear when you hover the mouse over the template folder.
- Click on Share.
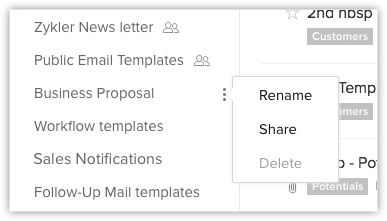
- In the Share Folders section, choose if you want to share the folder with All Users, Only to me or specify the users you want to share with.
In case you chose to select specific users, you can select the source type from the drop-down list and select the users. - Click Done.
Reorder Folders
You would prefer to have the important folders at the top of the list. In order to do that, you need to reorder the folders by clicking on Folders Reorder button. After reordering click Done.
Using Email Templates
There are ten instances in which you can make use of the email template. They are:
- Send Mail
- Mass Email
- Schedule Mass Email
- Auto Responders
- Macros
- Workflow Automation
- Approval Process
- Case Escalation
- Webforms
- Auto Response Rules
You can view a list of all the available email templates before sending them, in all the ten features. If you want, you can also mark a template as favorite from the list that appears.
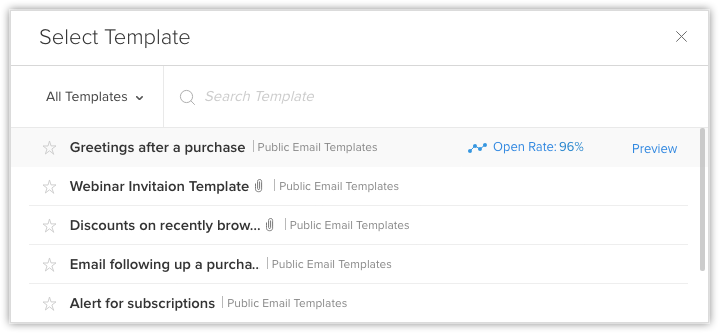
You can also choose to view a preview of the template that you need before sending it. You get a consolidated view of the template analytics here. The percentage of Open rate, Click Rate and Bounce Rate for the different versions of the template are represented in the form of a chart.
