Creating a Portal
Creating a Portal
Create a portal
To create a portal
- Go to Setup > Channels > Portals.
- In the Portals page, click Get Started Now.
Your company's name will appear as the default portal name. - Edit the Portal name, if required.
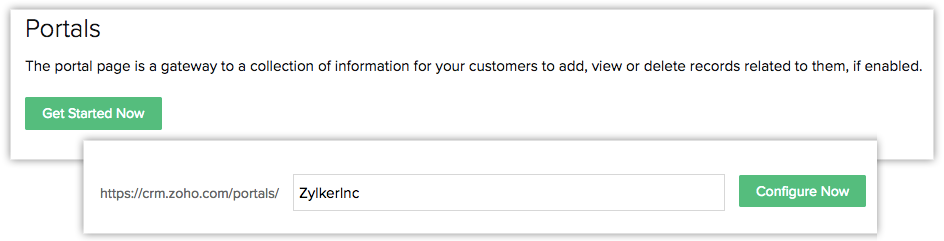
- Click Configure Now.
The customer portal URL will be generated and the portal name will be available. - Click Next to continue.
Next, define the portal user type, portal tab configuration, and field permissions.

Note
- You will not be able to edit the portal name once it is created.
- Once a portal is configured you will not be able to delete it.
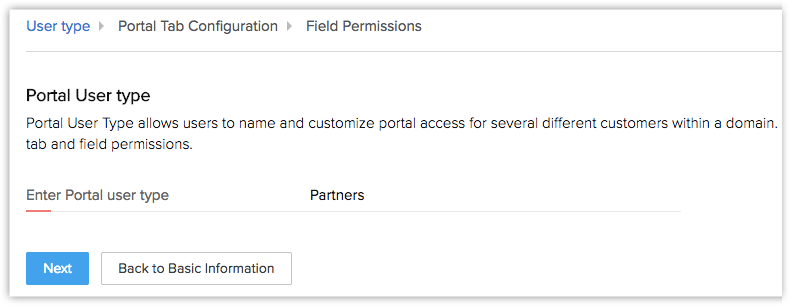
Define portal user type
To define a portal user type
- Under Portal User Type enter a name e.g., parents, partners or vehicle service.
- Click Next.
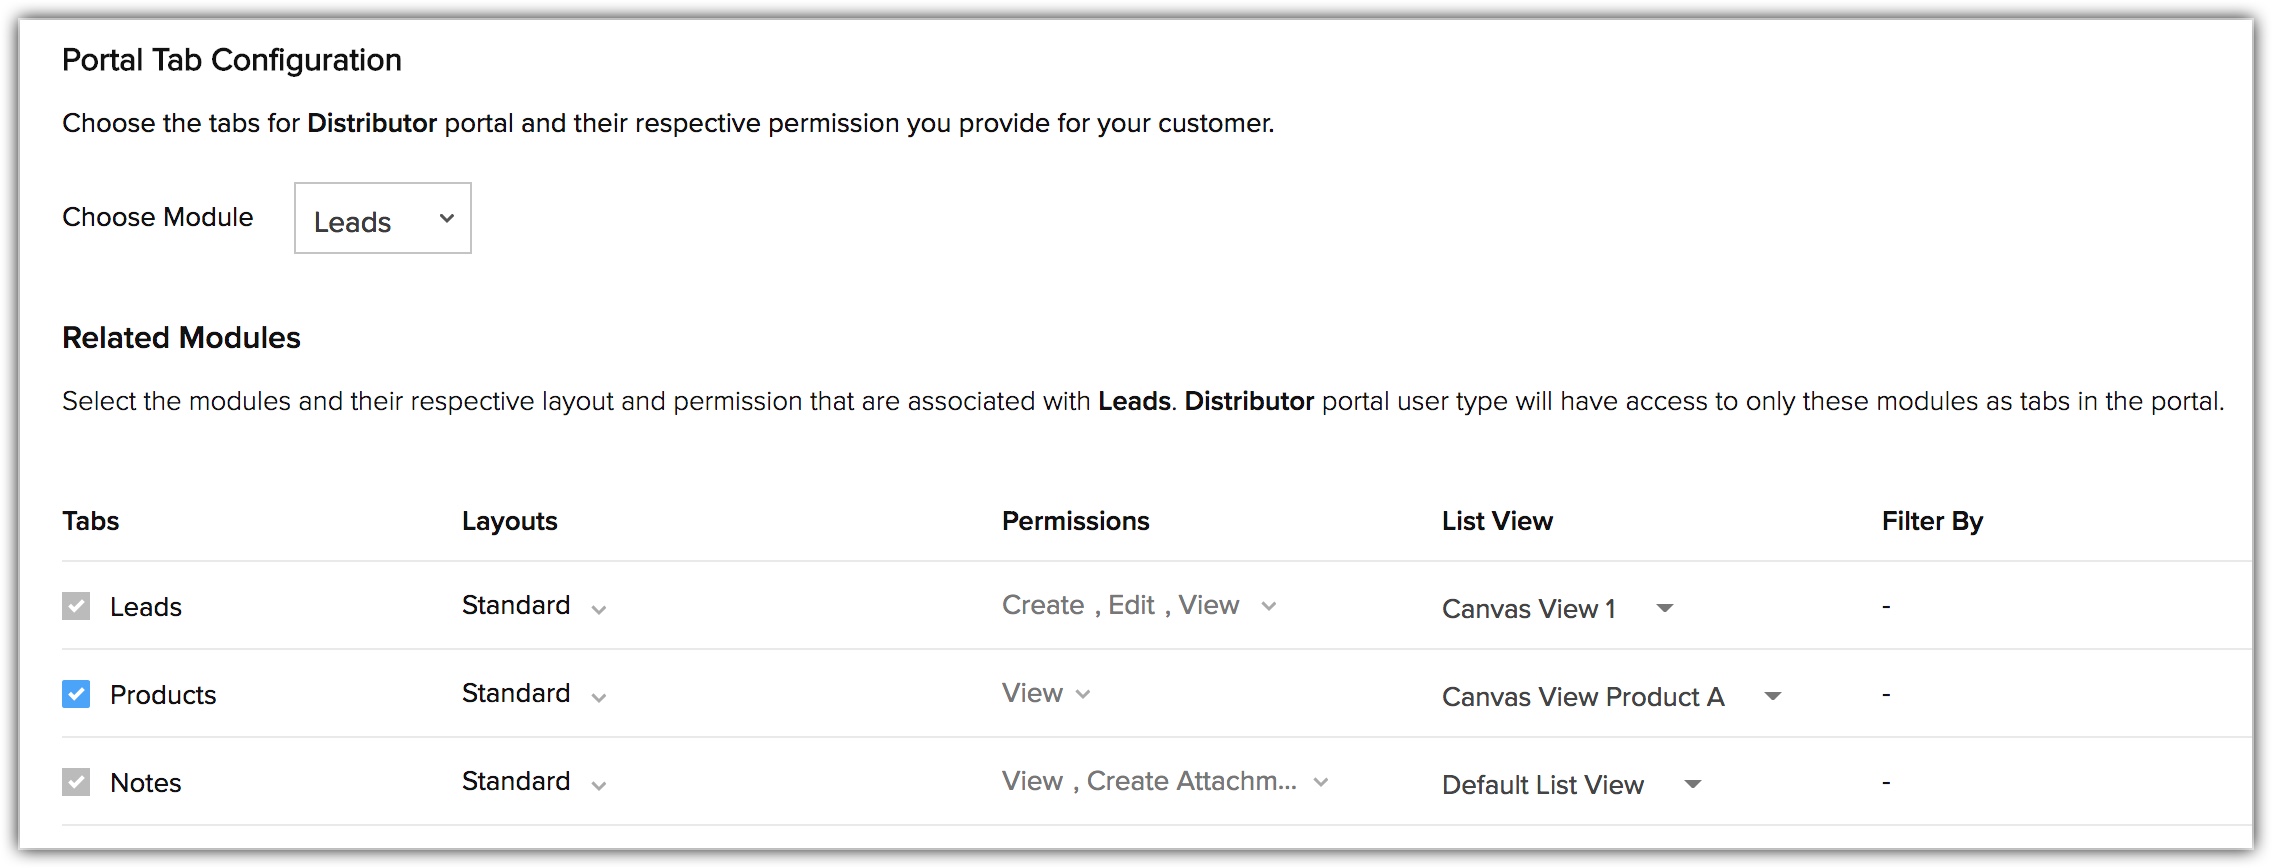
Configure the portal tab
To configure the portal tab
- In the Portal Tab Configuration page, select a module from the Choose Module from the drop-down list.
- In the Related Modules section, do the following:
- Tabs - Select the checkboxes for the related modules that the portal users will be able to access.
- Layouts - Select one or more layouts that the users will have access to.
- Permissions - Choose create, edit, view, or delete permissions for the records in the module. Portal users will only be able to perform the defined actions for the records in the module that they own.
- List View - Select either List view or Canvas view for the records.
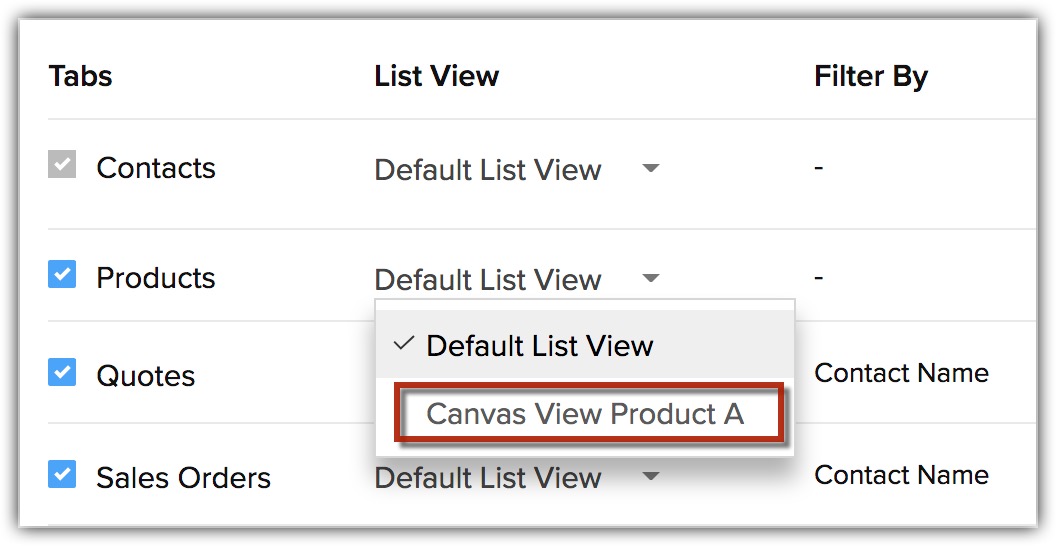
- Filter By - Select the filters from the drop-down list.
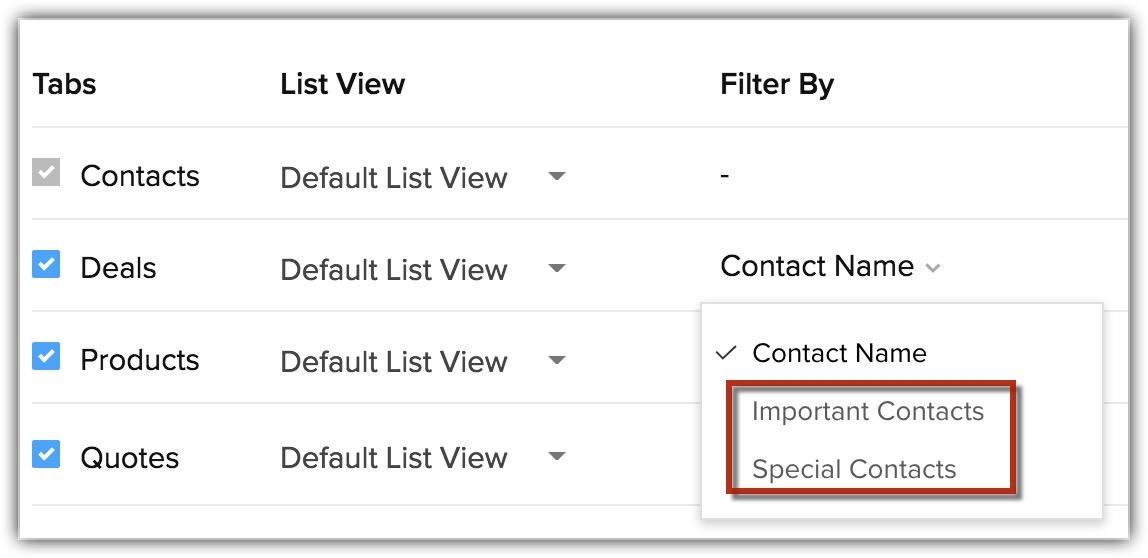
- Tabs - Select the checkboxes for the related modules that the portal users will be able to access.
- Click Next.
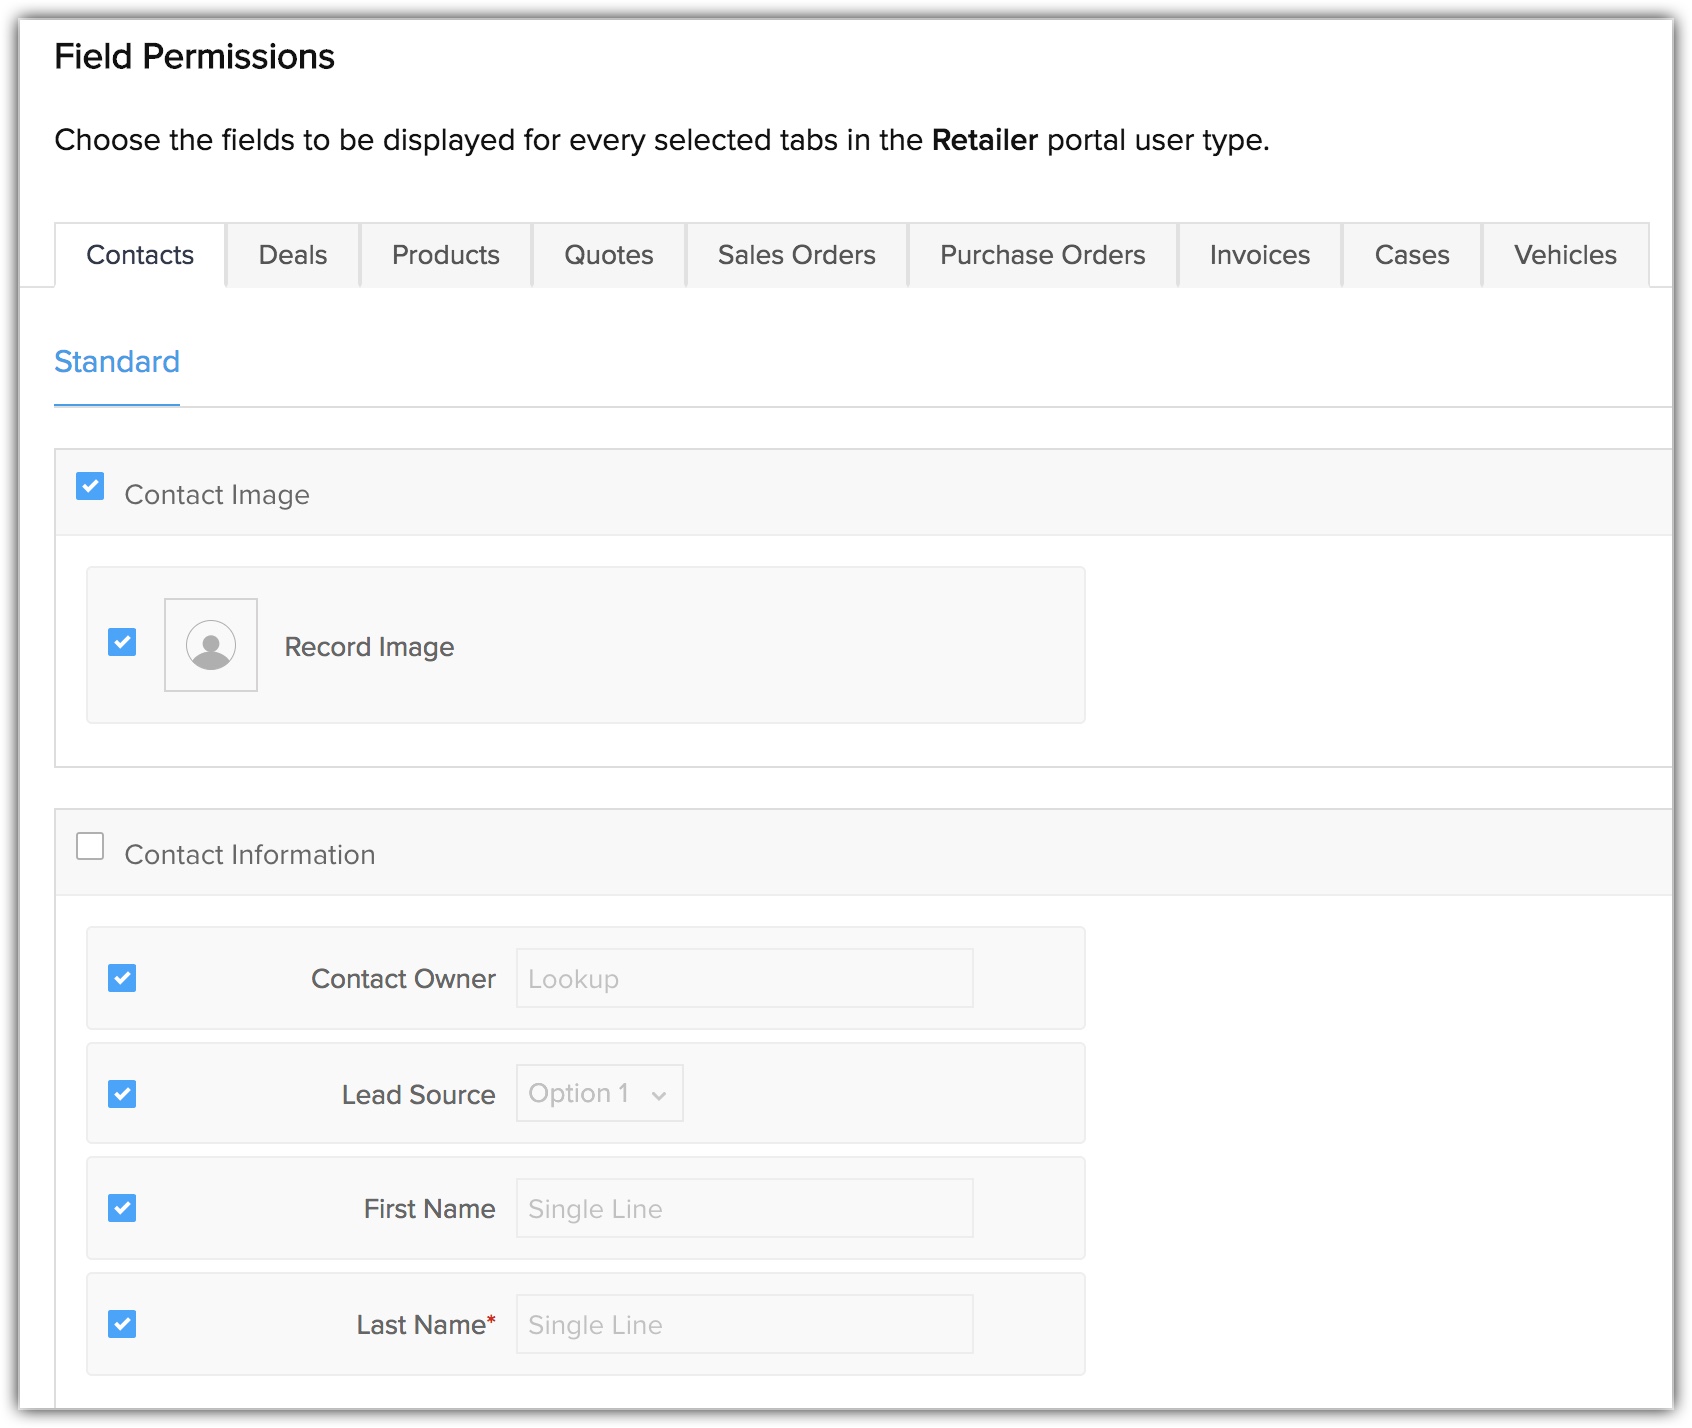
Specify field permissions
To specify field permissions
- In the Field Permissions page, select the check boxes for the fields that need to be available for the portal users.
- Click the Read Only checkbox, if required.
- Click Save and Next to move to the next layout or module to define field permissions.
- Repeat the above steps for all the modules and layouts.
- Click Finish to save all the details.
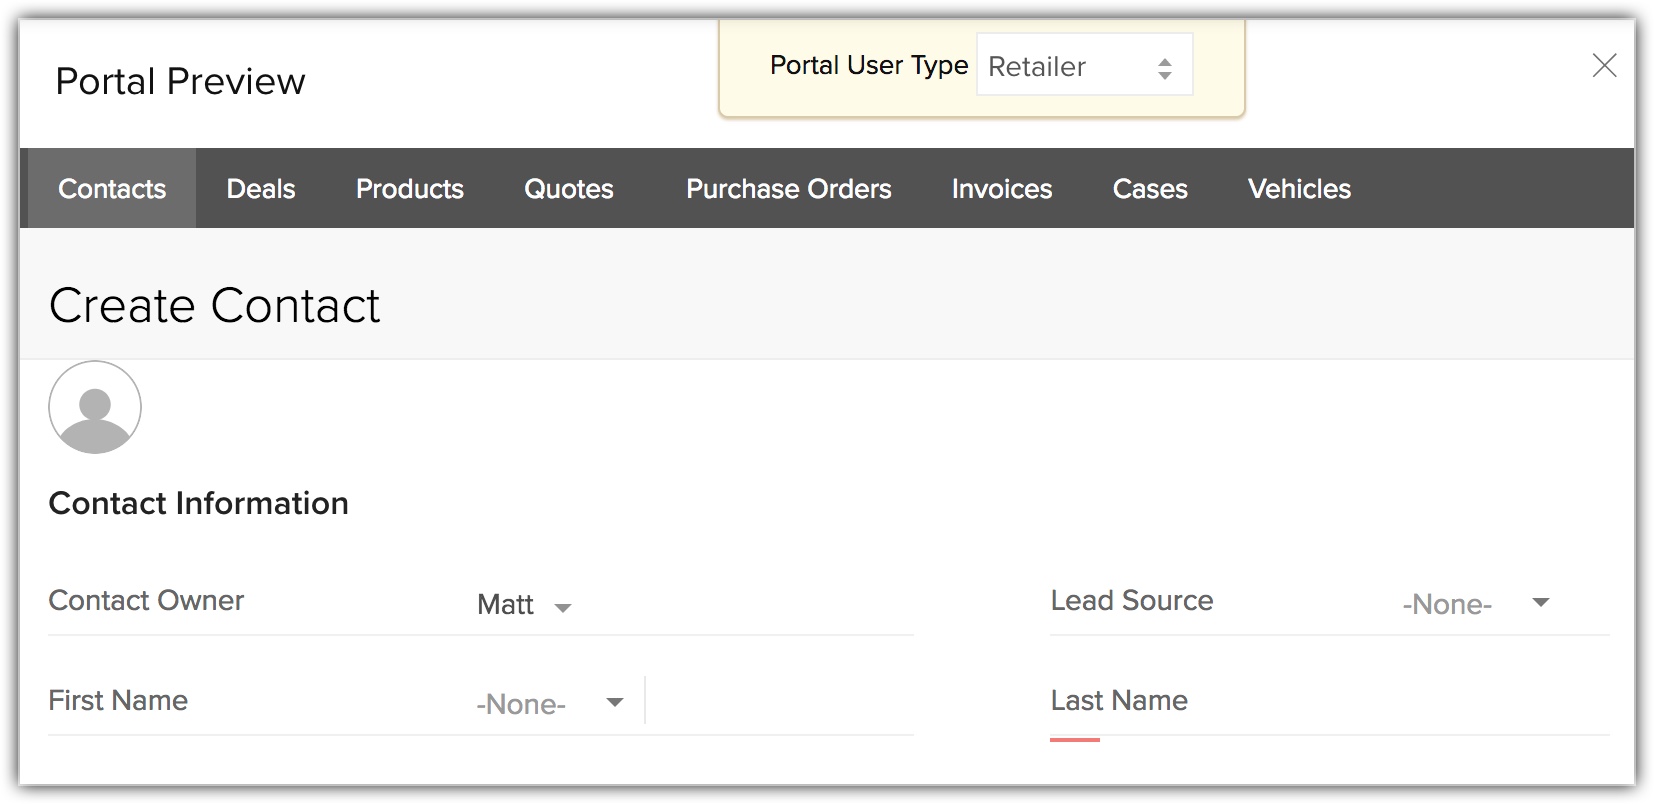
View portal preview
Once the portal configuration is complete, you can preview the portal to see how the customers will see the records.
To view the portal preview
- Go to Setup > Channels > Portals.
- In the Customer Portal Configuration page, click Preview.
- Select the Portal User Type from the drop-down list to view the preview.
Note
You can view the portal summary after the portal configuration is completed. You can edit the Field Permission and Portal Tab Configuration in the portal configuration details. You can also add a new portal user type, if required.
You can view the portal summary after the portal configuration is completed. You can edit the Field Permission and Portal Tab Configuration in the portal configuration details. You can also add a new portal user type, if required.
Related Articles
Creating and Setting up Portal
Creating and Setting up Portal Setting up portals involves the following four steps: Creating portal Defining portal user type Configuring portal type Specifying field permissions Creating portal By default, the company's name will be the portal name ...Working with Portal
Working with Portal Sending Invite to Users Changing Portal User Type Converting a Lead to Contact Deleting a Portal User Type Deactivating a Portal User Sending Invite to Users Once you have created the portal, you can start inviting the ...Data Privacy for Portal Users
Data Privacy for Portal Users Data Processing Basis As a Data Controller, to be GDPR compliant you need to process data based on one of the lawful bases. Based on your business requirement and discretion you can choose a processing basis from the ...Portals - An Introduction
Portals - An Introduction What are Portals? Portals, are designed to give customers access to part of the CRM. By creating portals, you can extend access to your CRM account to your customers. Through a portal, your customers can access the modules ...Creating Profiles
Creating Profiles Profiles in CRM help you define permissions for a set of users. For instance, the permissions required for a person from Sales team might differ from the permissions required by a person in the Marketing team. You can define the ...